Chapter 24: Modeling and texturing of a bowl with a pasta
Beginners guide to Blender
This time you will learn how to model and texture a bowl with a pasta with a seasonings.
Let’s begin. (You can check out video tutorial on my YouTube channel:https://youtu.be/XGlf3eB3b-k?si=NL9s_h1Uq4P9CsN1)
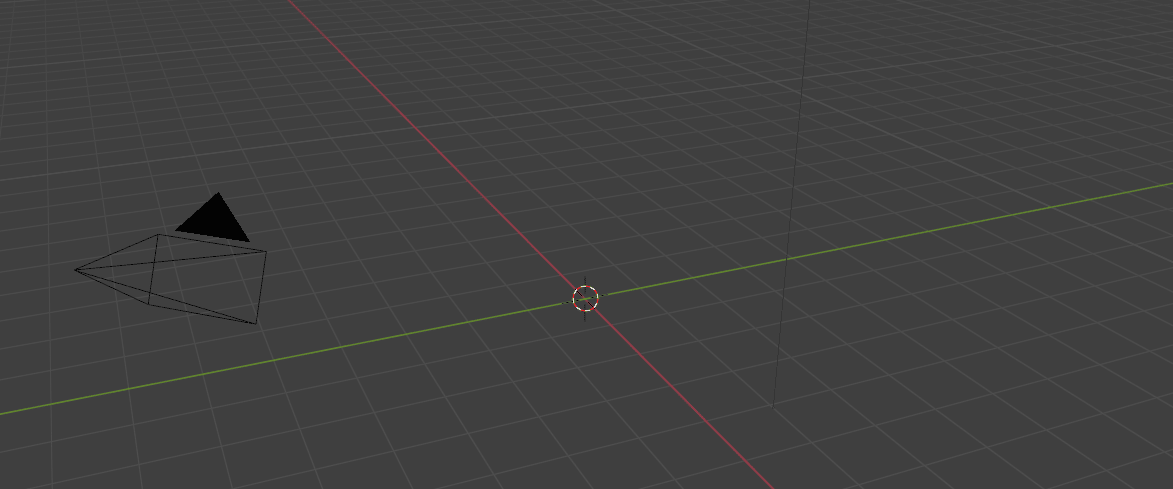
Select the cube and delete it with “X”.
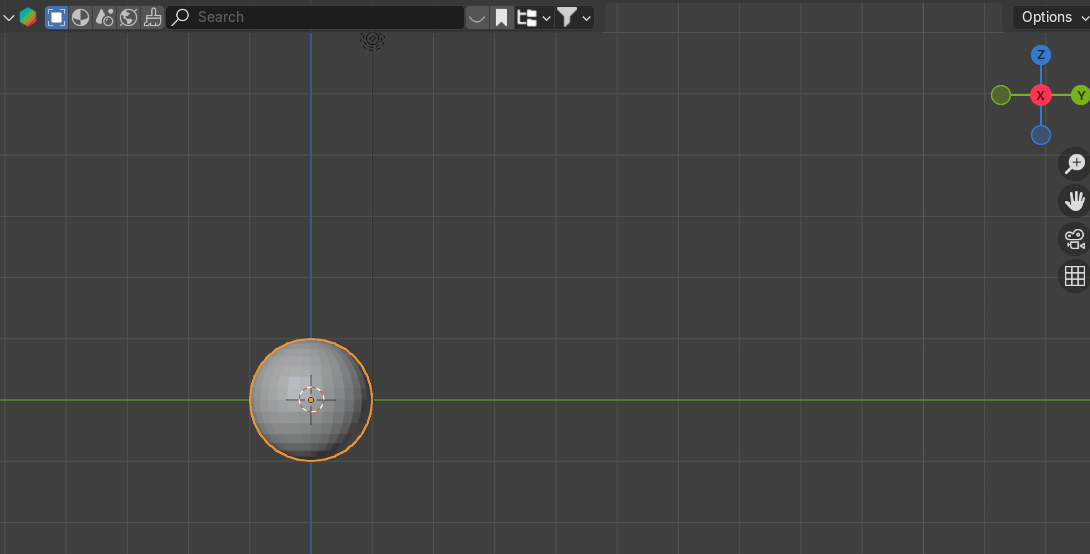
Add mesh-UV Sphere.

Beginners guide to Blender
Change view to right orthographic view with numpad 3 or click red X on the screen.
Switch to edit mode with “TAB”.
Turn on X-ray mode with “ALT+Z”.
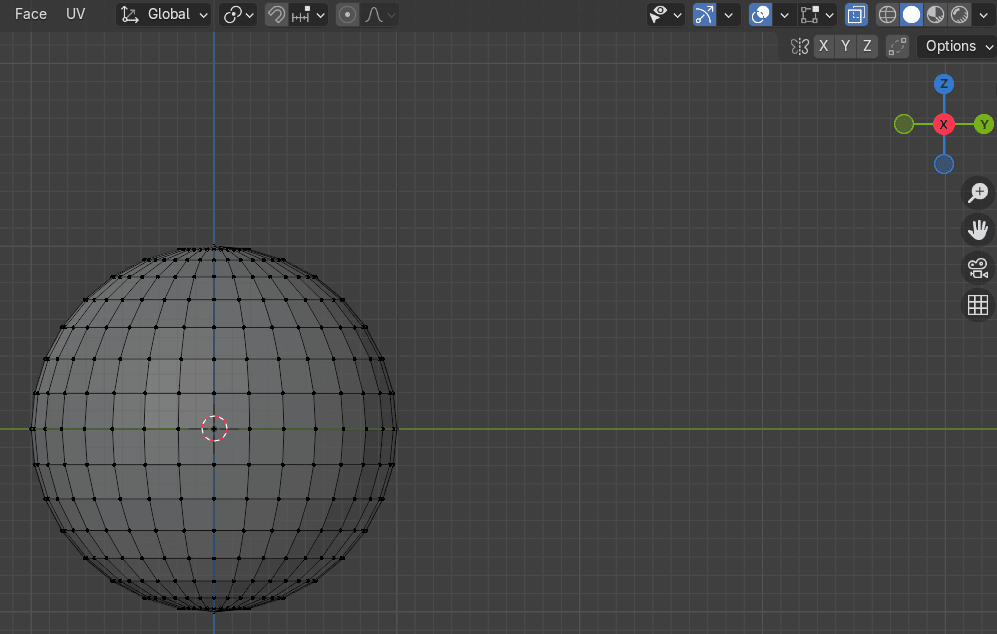
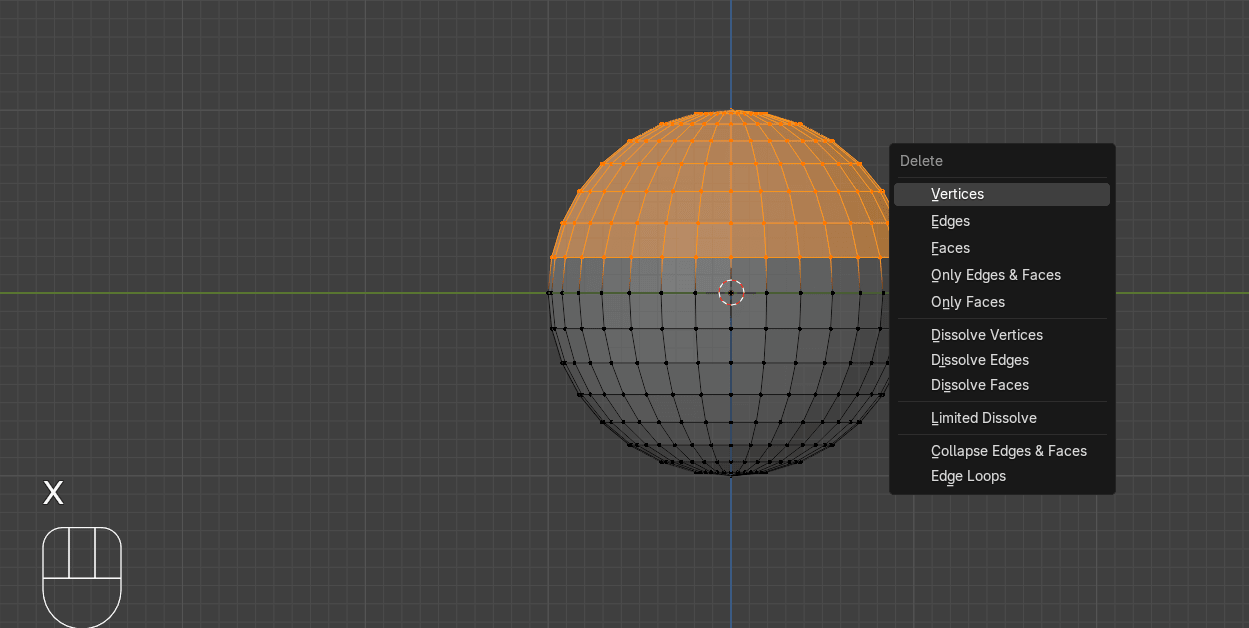
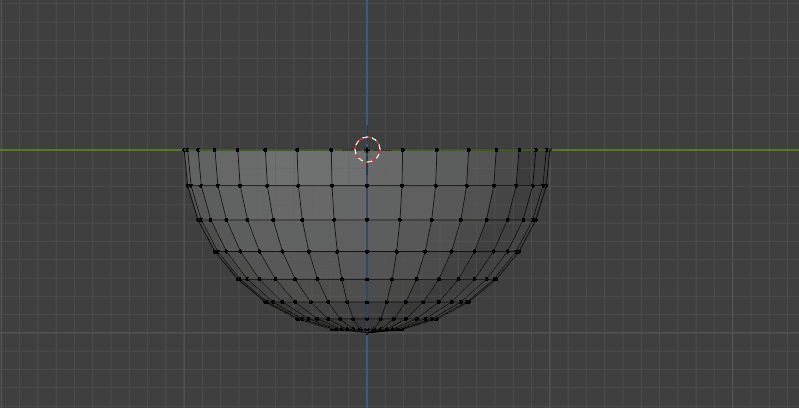
Select the half of the sphere as shown and delete the vertices with “X”.
Beginners guide to Blender
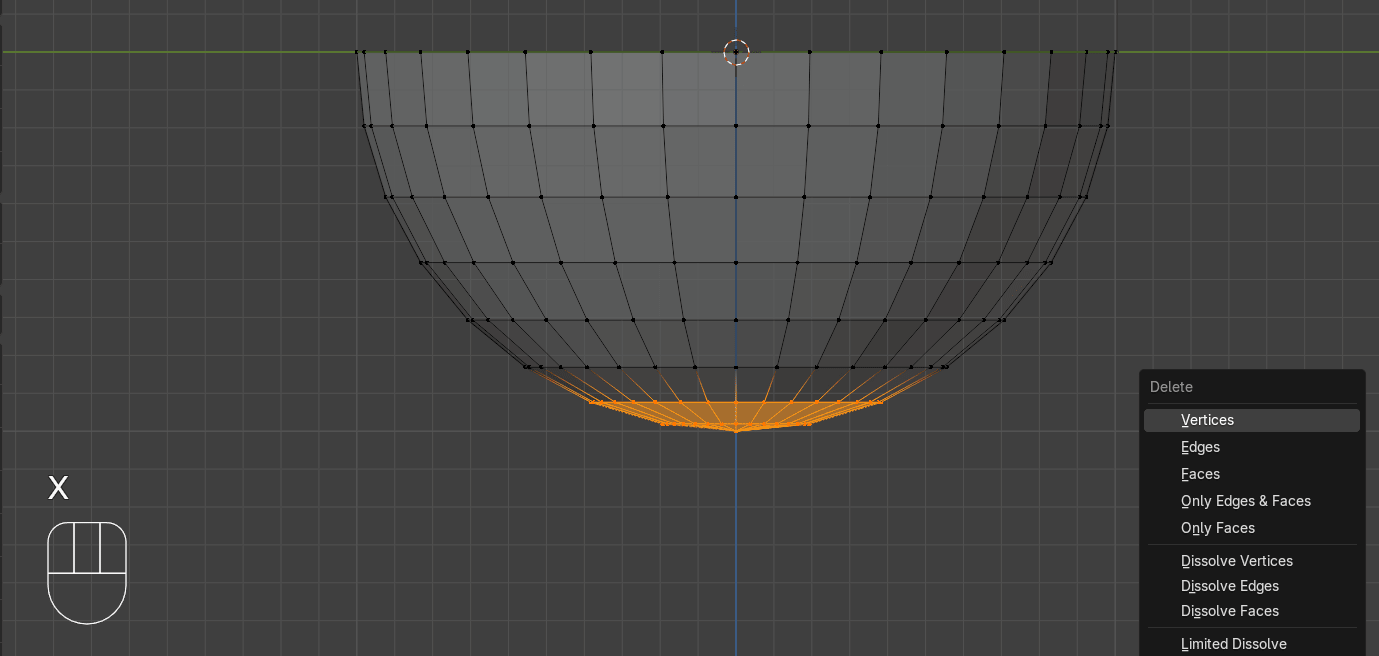
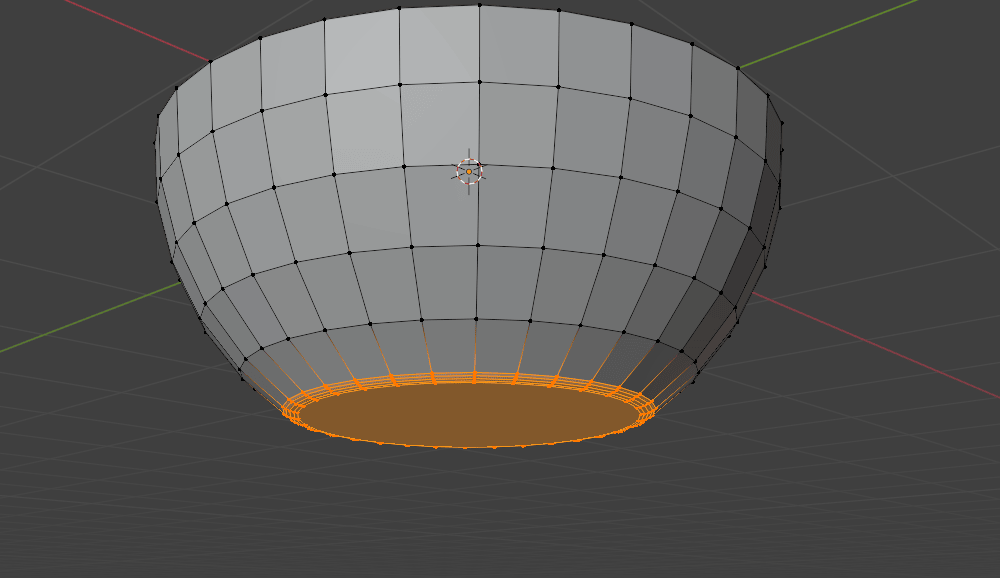
Choose the bottom vertices as shown and delete them with “X” as well.
Beginners guide to Blender
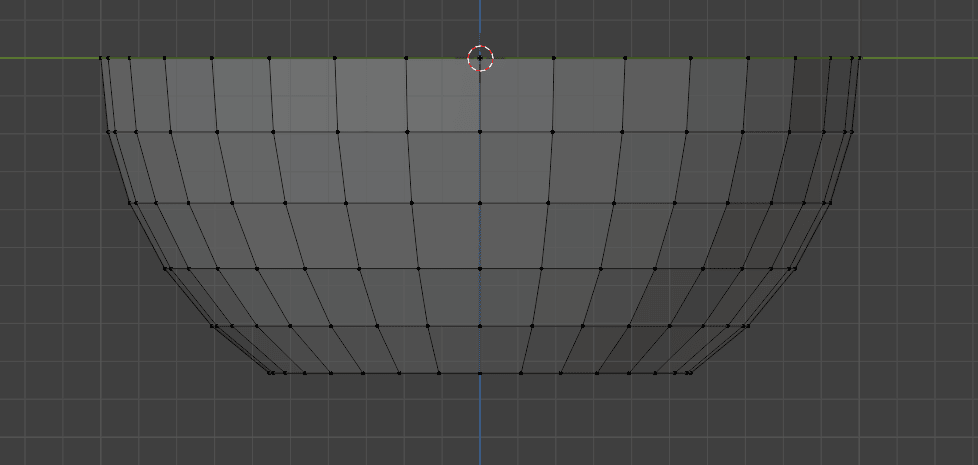
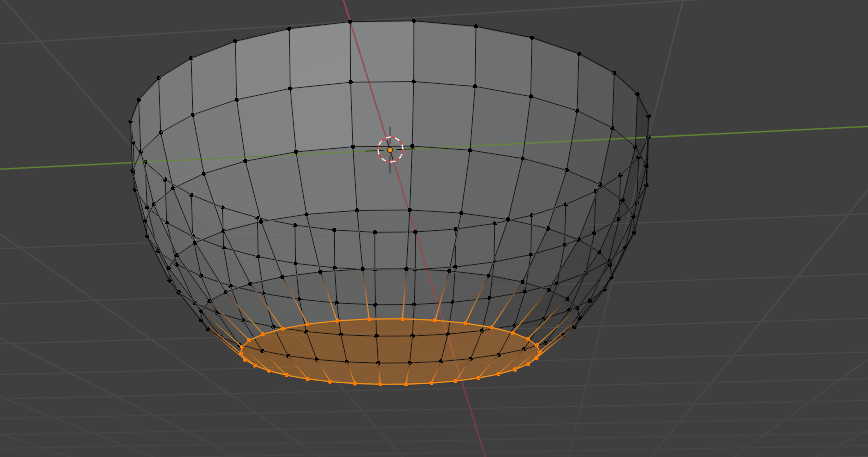
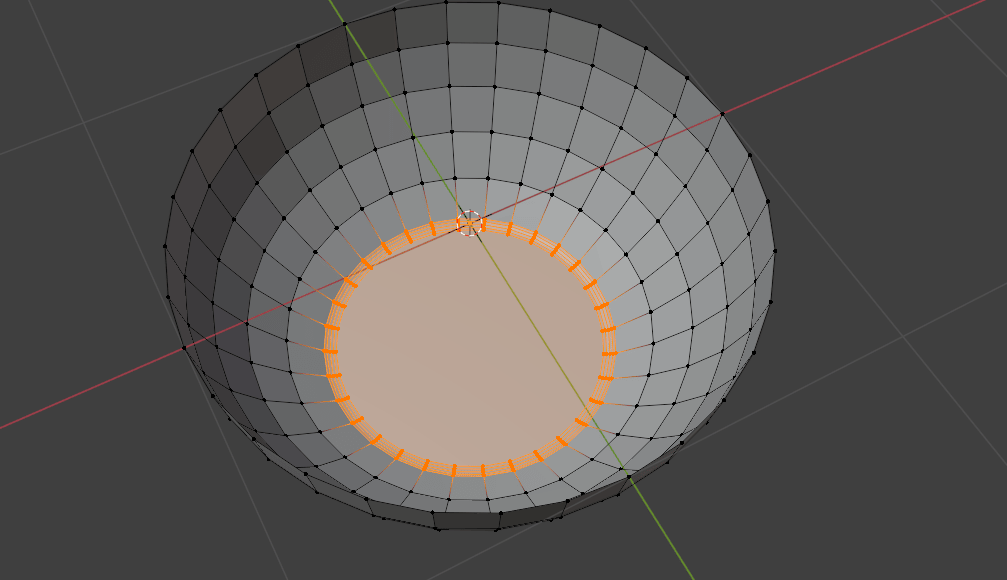
Choose all those bottom vertices and click “F” to fill the face.
Turn off X-ray mode with “ALT+Z”.
Bevel it with “CTRL+B.”
For more segments scroll the mouse wheel up. I added 4 segments.
Select all with “A”.
Beginners guide to Blender
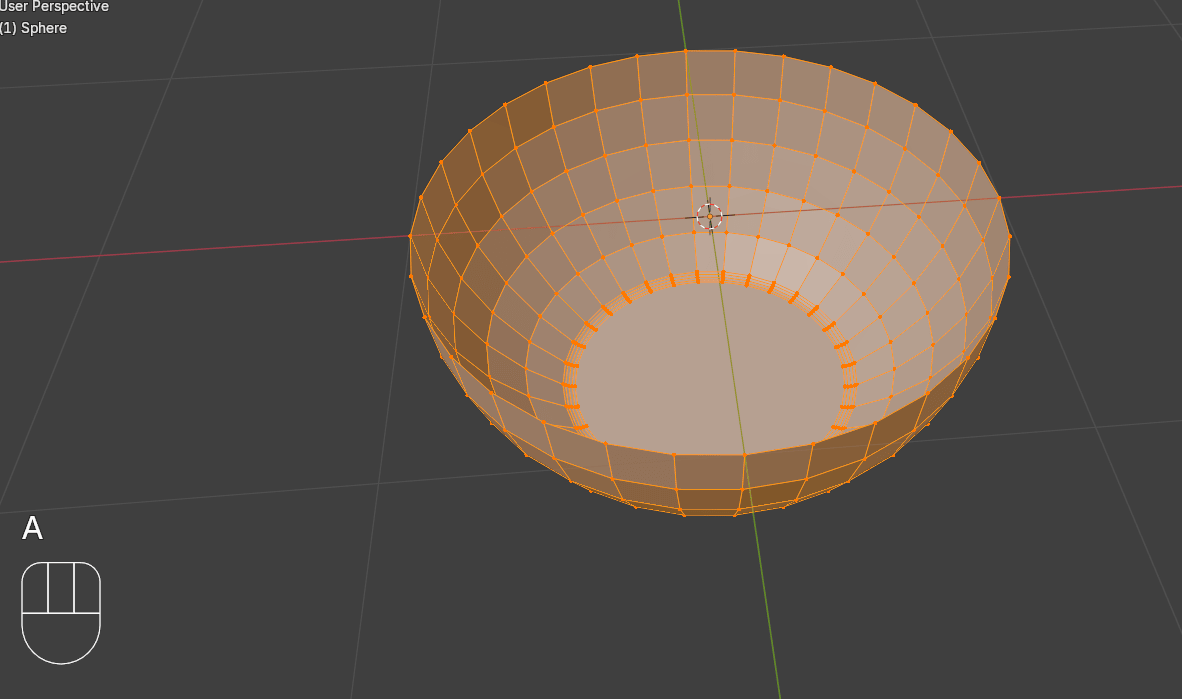
Click “ALT+E” and select extrude faces along normals.
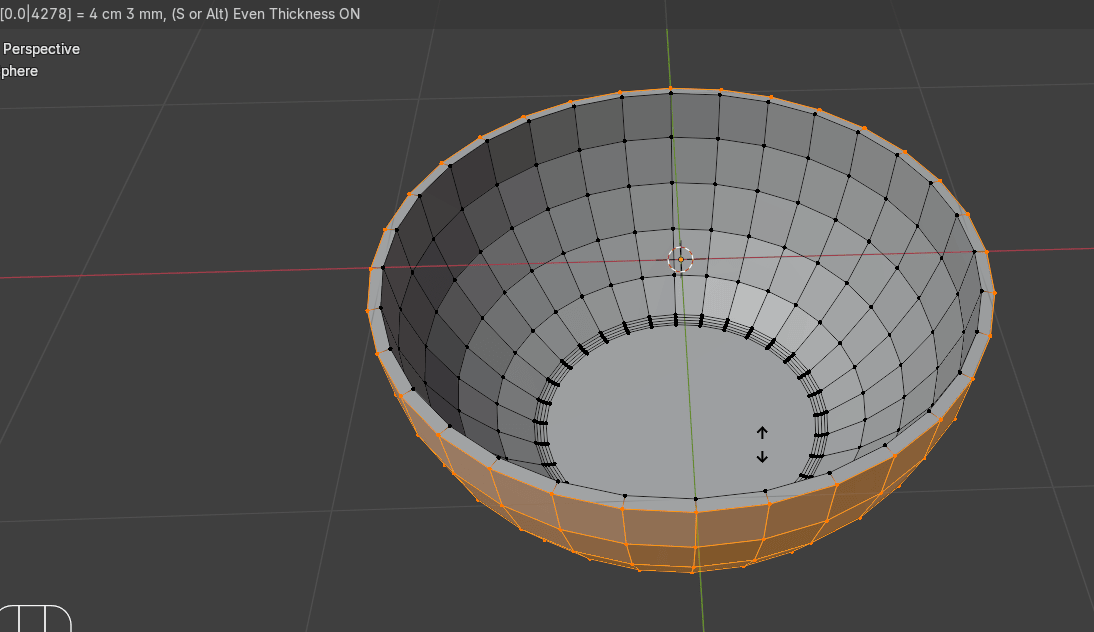
Switch to selecting edges with 2.
Select edges as shown
Beginners guide to Blender
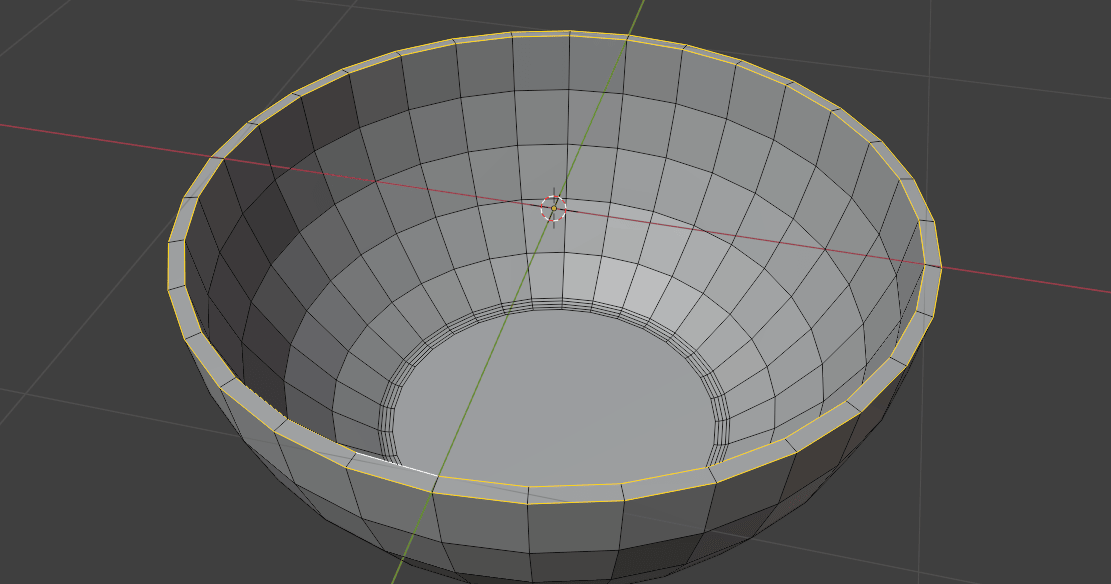
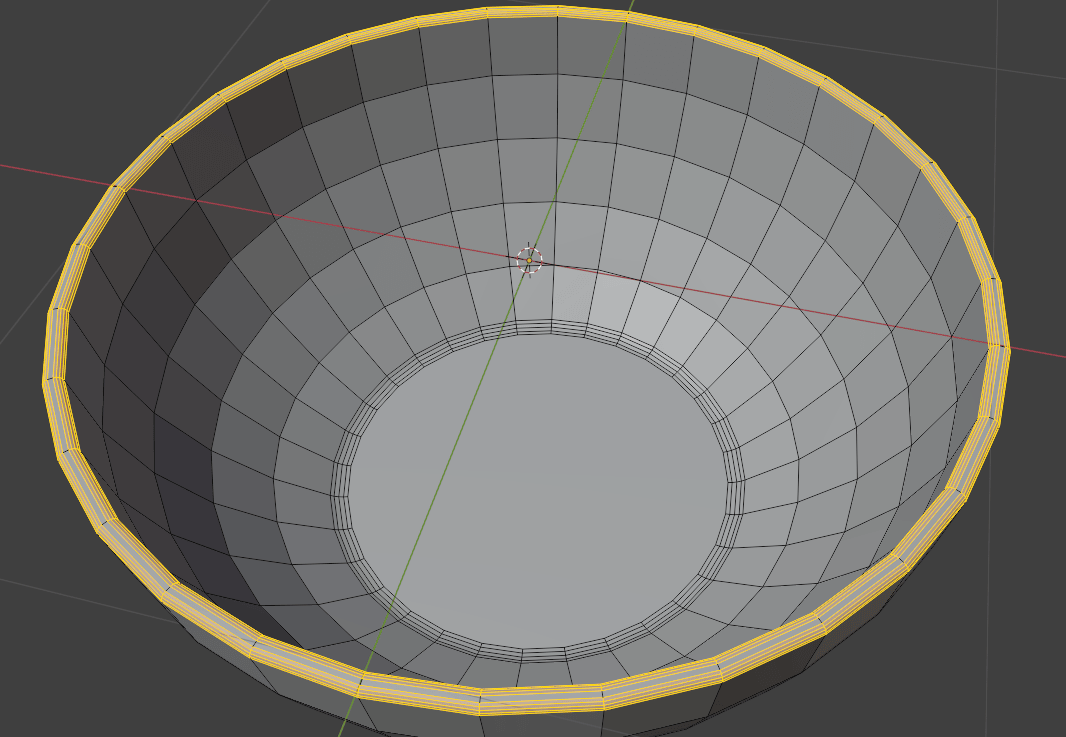
and bevel them with “CTRL+B.”
I added the 4 segments.
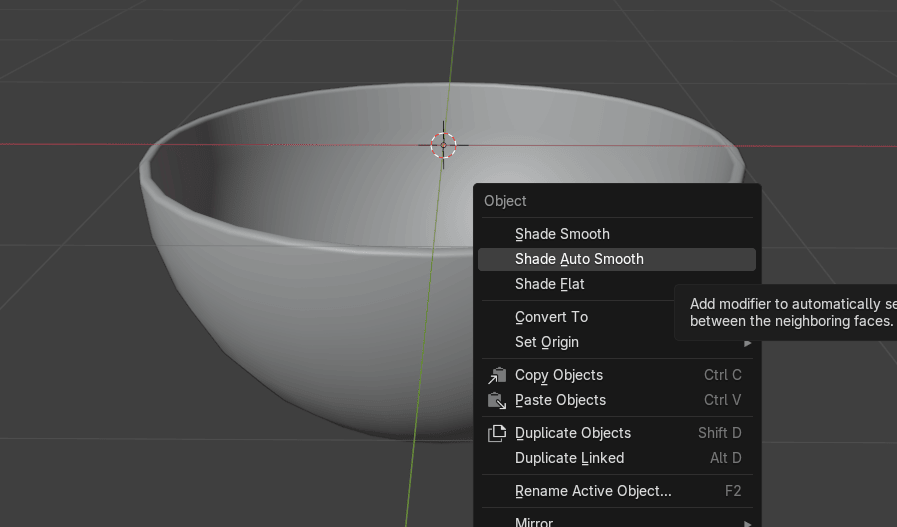
Switch to the object mode with “TAB”.
Beginners guide to Blender
Click the right mouse button (RMB) and choose Shade auto smooth.
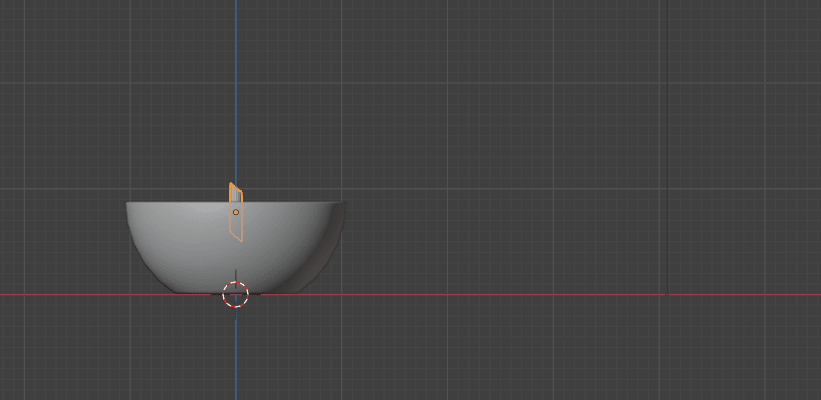
Change view to right orthographic with 3 on the numpad.
Move the bowl up with “G+Z”.
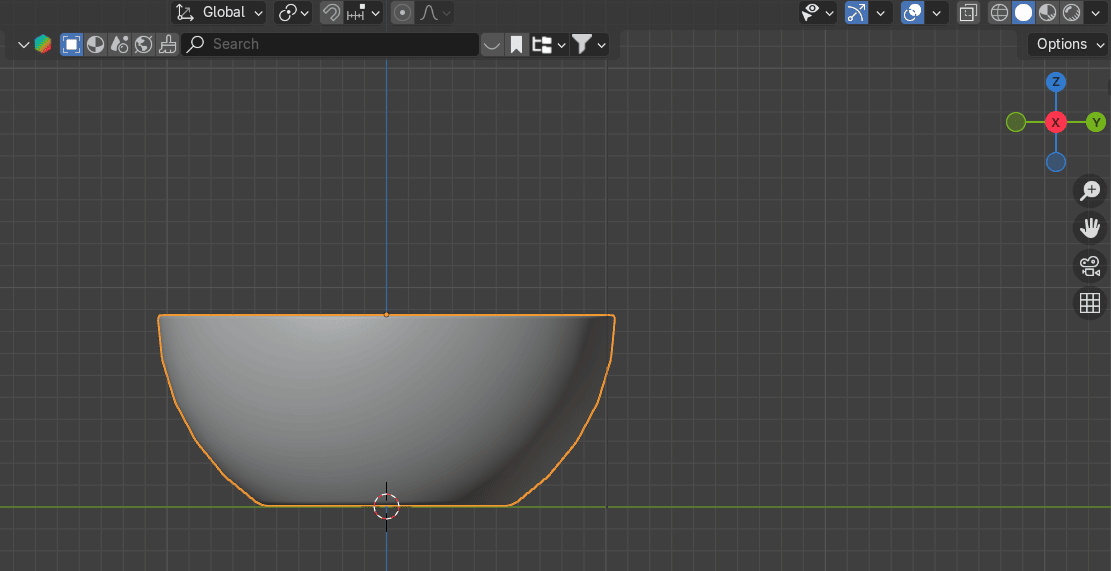
Go to overlays and turn on face orientation.
Beginners guide to Blender
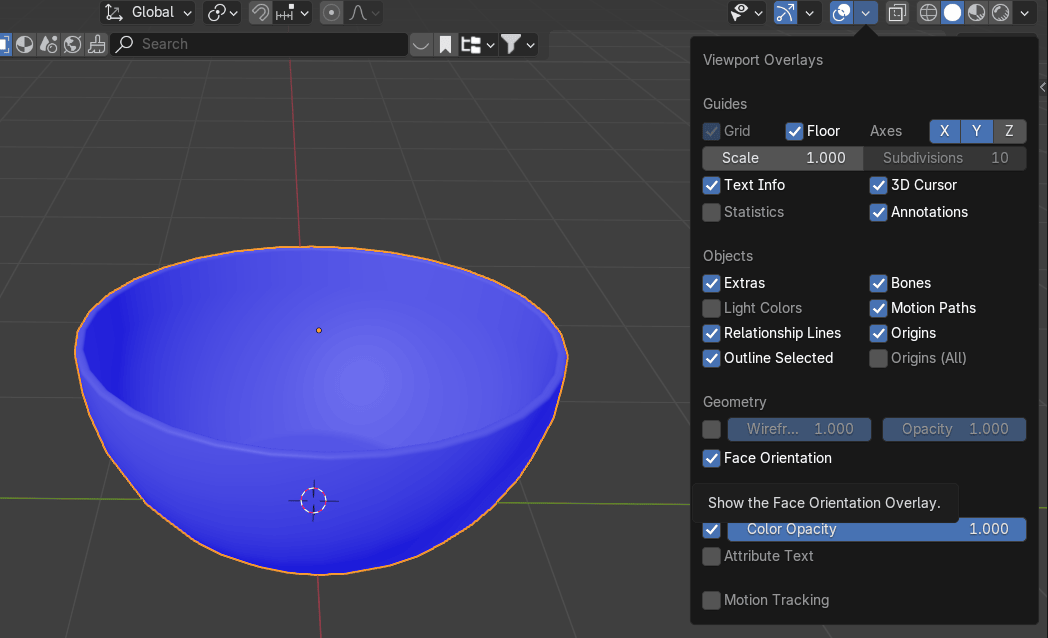
It should be blue.
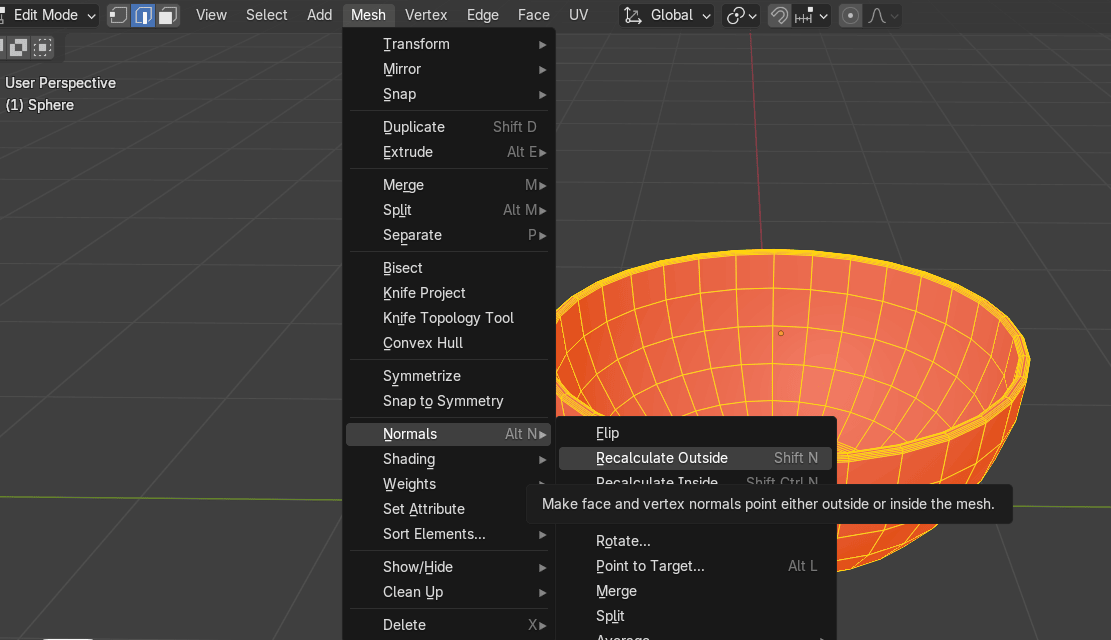
In case it is red switch to edit mode with TAB.
Select all with A.
Go to mesh - normals - recalculate outside. Now it is blue as it should be.
Switch to object mode and turn off the face orientation.
Change view to right orthographic with 3.
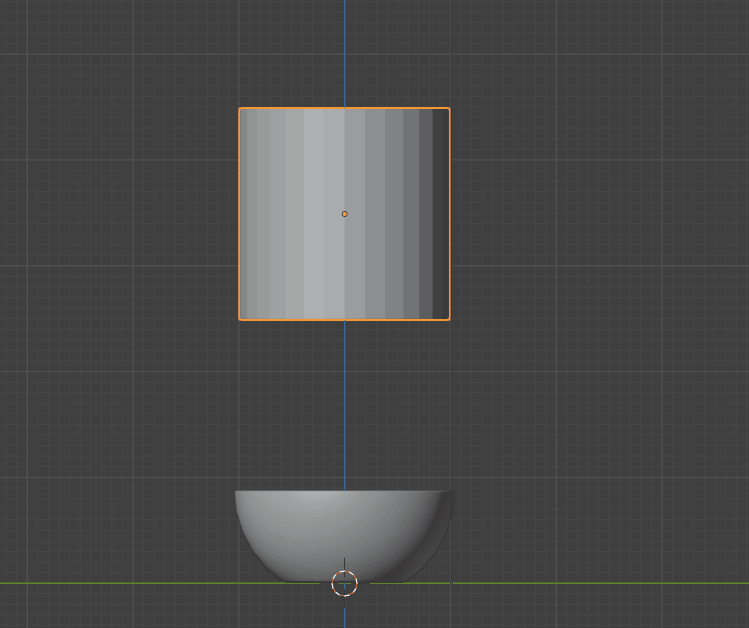
Add - mesh - cyllinder. Scale it with S.
Beginners guide to Blender
Move it up with “G+Z”. Apply the scale.
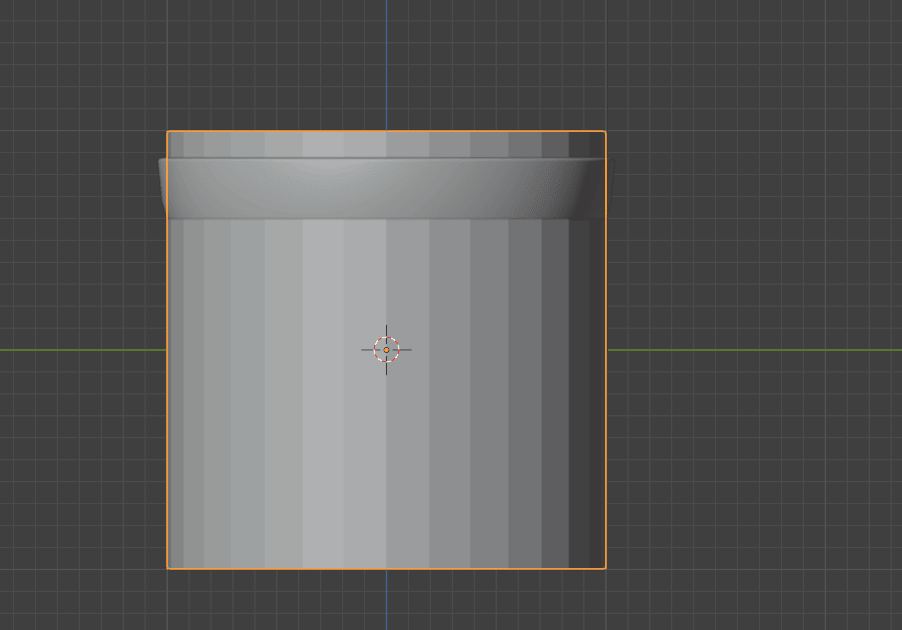
Switch to edit mode with “TAB”. Scale it with “S”.
Beginners guide to Blender
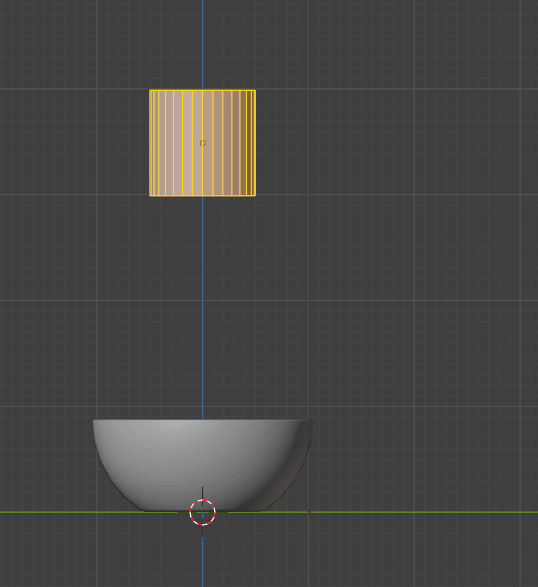
Scale it with “S+Z”.
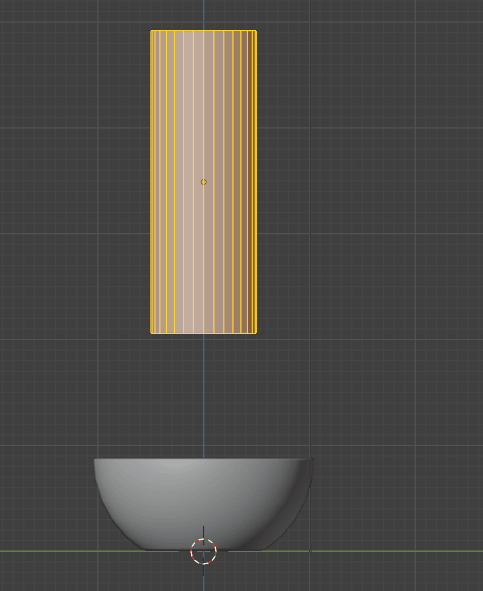
Beginners guide to Blender
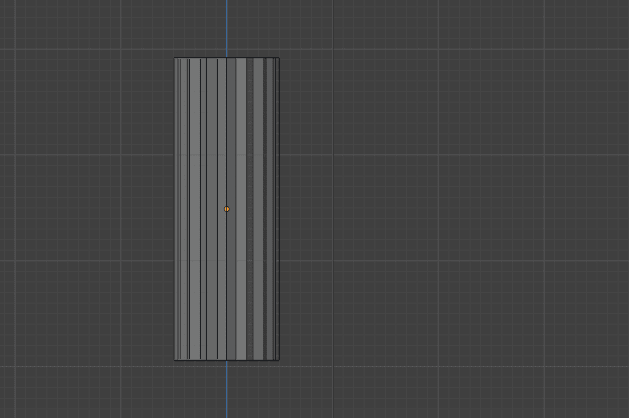
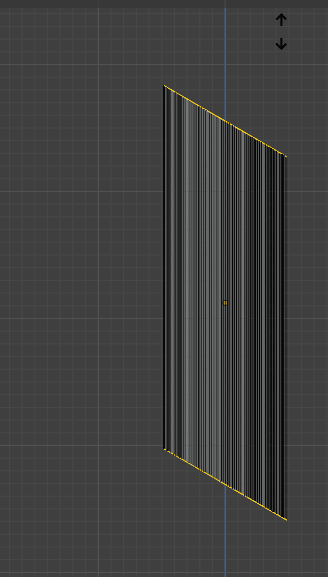
Turn on X-ray mode with “ALT+Z”.
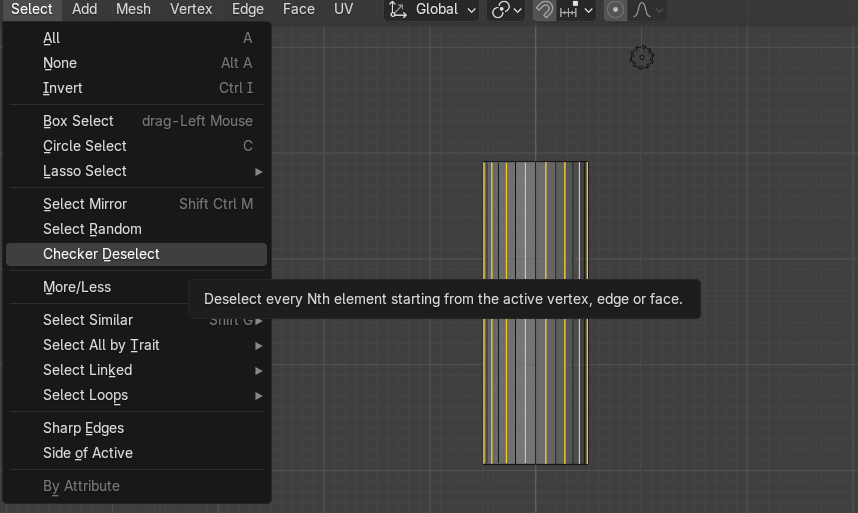
Select all edges as shown.
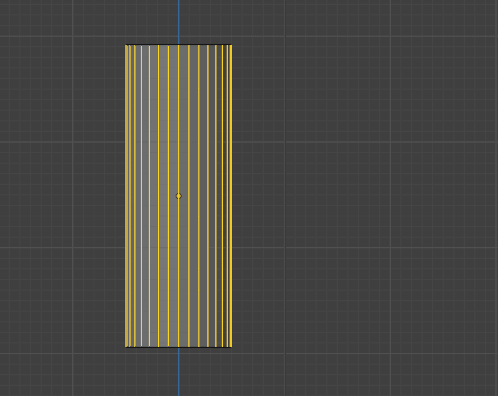
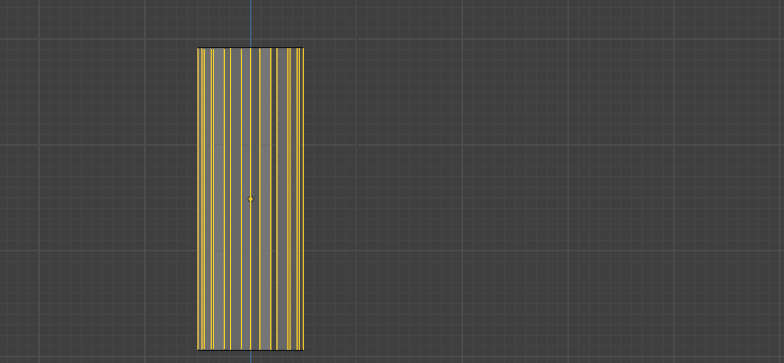
Go to select - checker deselect. Turn off X-ray mode with “ALT+Z”.
Beginners guide to Blender
Press “S+X+0,9” and then “S+Y+0,9” to get this shape.
Turn on X-ray mode with “ALT+Z”. Select all edges as shown.
Select all edges as shown.
Turn off X-ray mode with “ALT+Z”.
Beginners guide to Blender
Bevel them with “CTRL+B”. I added again 4 segments.

Switch to selecting faces with 3.
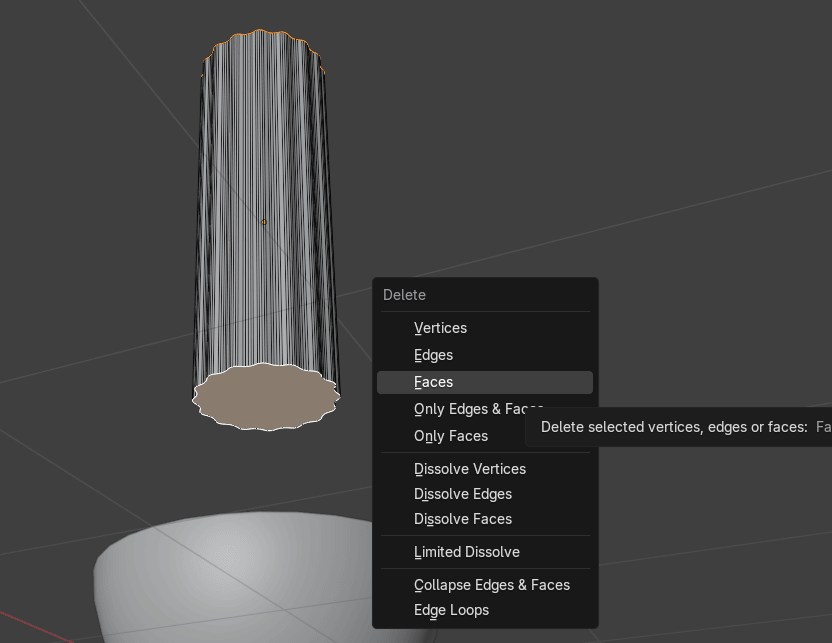
Choose the top

and bottom faces.
Beginners guide to Blender

Press “X” and delete faces.
Switch to selecting vertices with 1.
Change view to front orthographic with 1 on the numpad.
Turn on the X-ray mode.
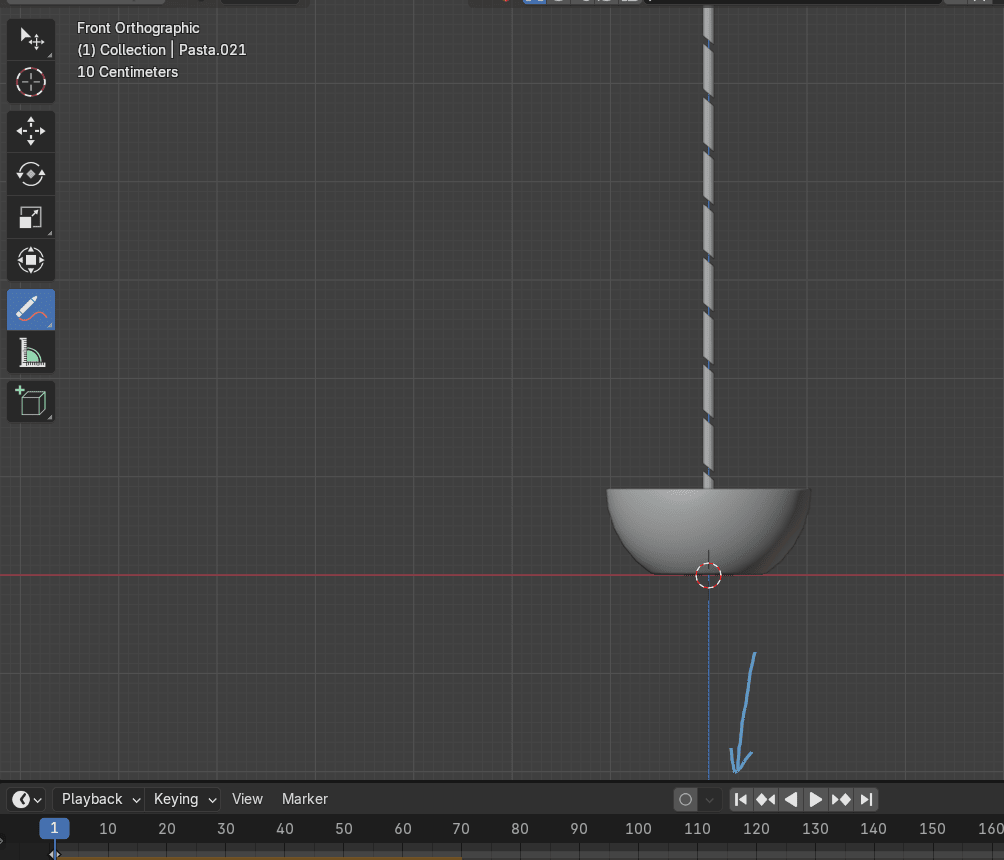
Now you will learn a new tool called Shear.
Beginners guide to Blender
Shear is a tool that shear selected items along the given axes.
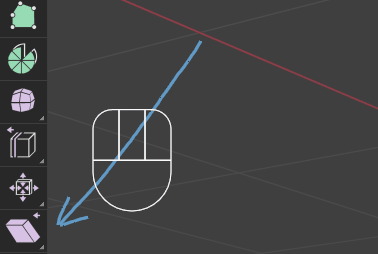
You can activate it by clicking on that icon that arrow is pointing, by pressing

“SHIFT+SPACEBAR” and selecting SHEAR
or by pressing combination of keys: “SHIFT+CTRL+ALT+S”
Beginners guide to Blender

Switch to selecting edges with 2.
Change view to front orthographic with 1 on the numpad.
Turn on the X-ray mode.
Select the top and bottom edge(or top and bottom vertices - works both ways in this case),click “SHIFT+CTRL+ALT+S” + Y to move it along the Y-axes and move it down with a mouse.
Turn off the X-ray mode.
Beginners guide to Blender
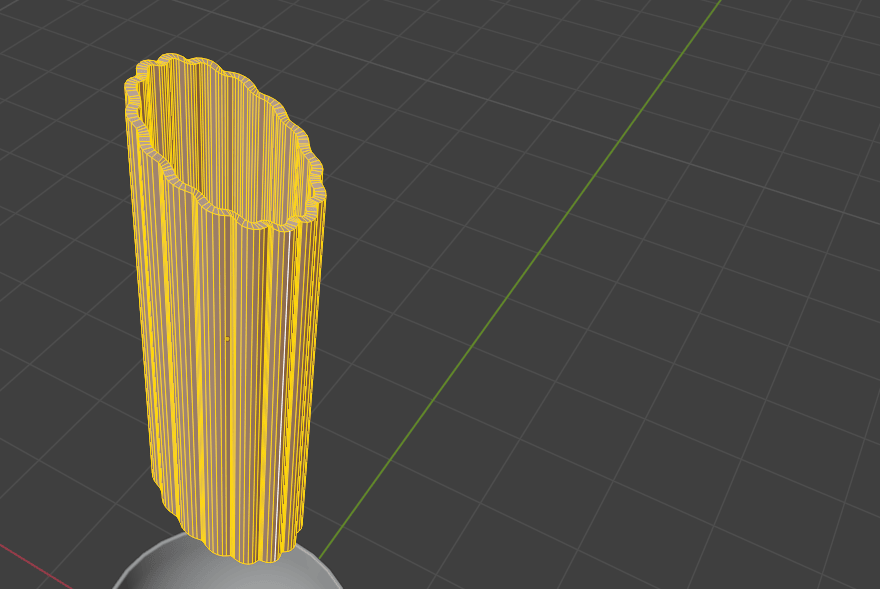
Select all with “A”.
Click “ALT+E” and select extrude faces along normals to the outside.

Select all with “A” and scale it with “S+Y”.
Beginners guide to Blender
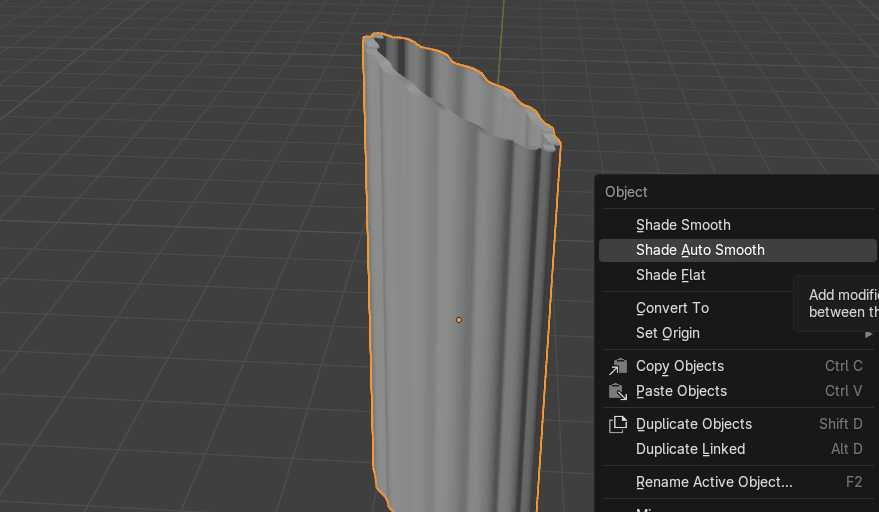
Switch to object mode with “TAB”.
Click the RMB and choose Shade auto smooth. Check face orientation just in case. If it isblue, it’s all good.
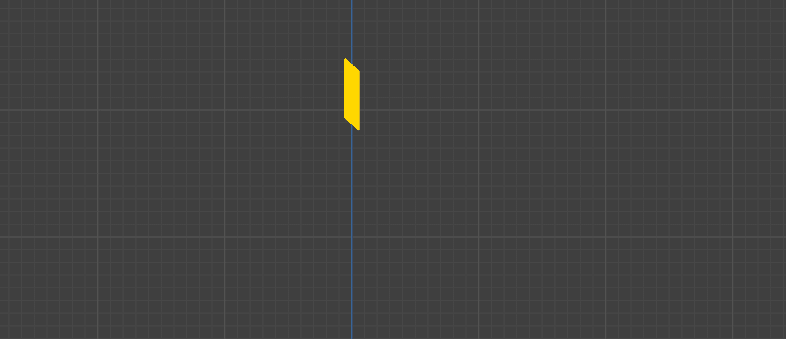
Select a piece of pasta and change the view to the front orthographic with 1 on the numpad.
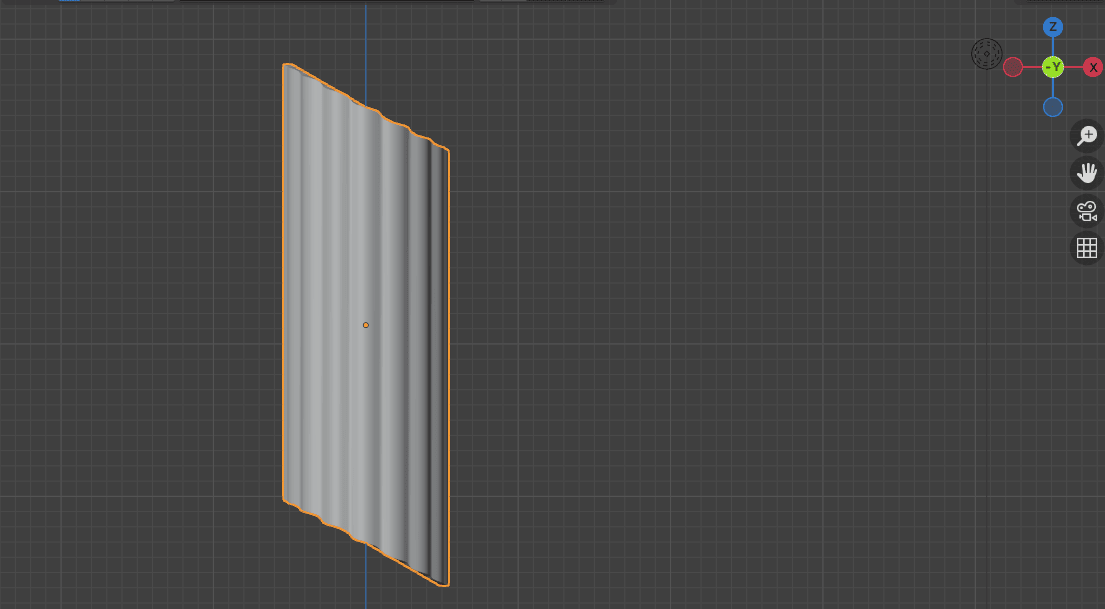
Switch to the edit mode with “TAB”.
Select all with “A” and scale with “S”.
Beginners guide to Blender

If necessary, scale it a bit more with S and “S+Z” to look smaller and longer.
Switch to the object mode with “TAB”.
Click “CTRL+A” and apply scale.
Because you scaled the object everytime in the edit mode, scale is already correct, but it is agood practice to remind yourself to apply scale just in case if you did change the scale in theobject mode.
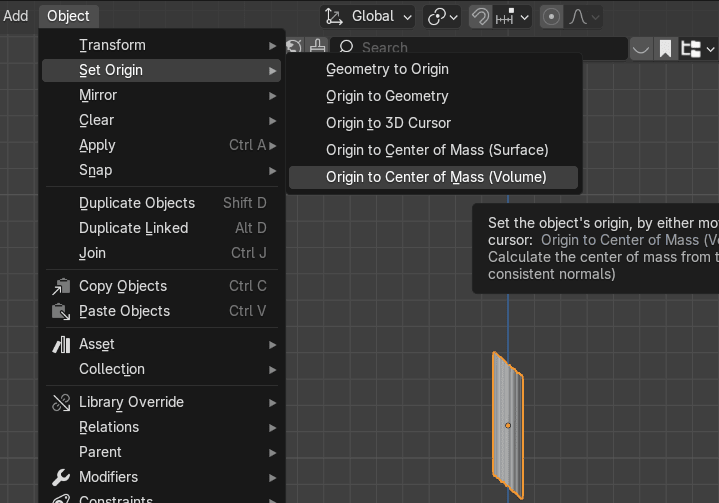
Go to object - set origin - origin to center of mass (volume).
Beginners guide to Blender
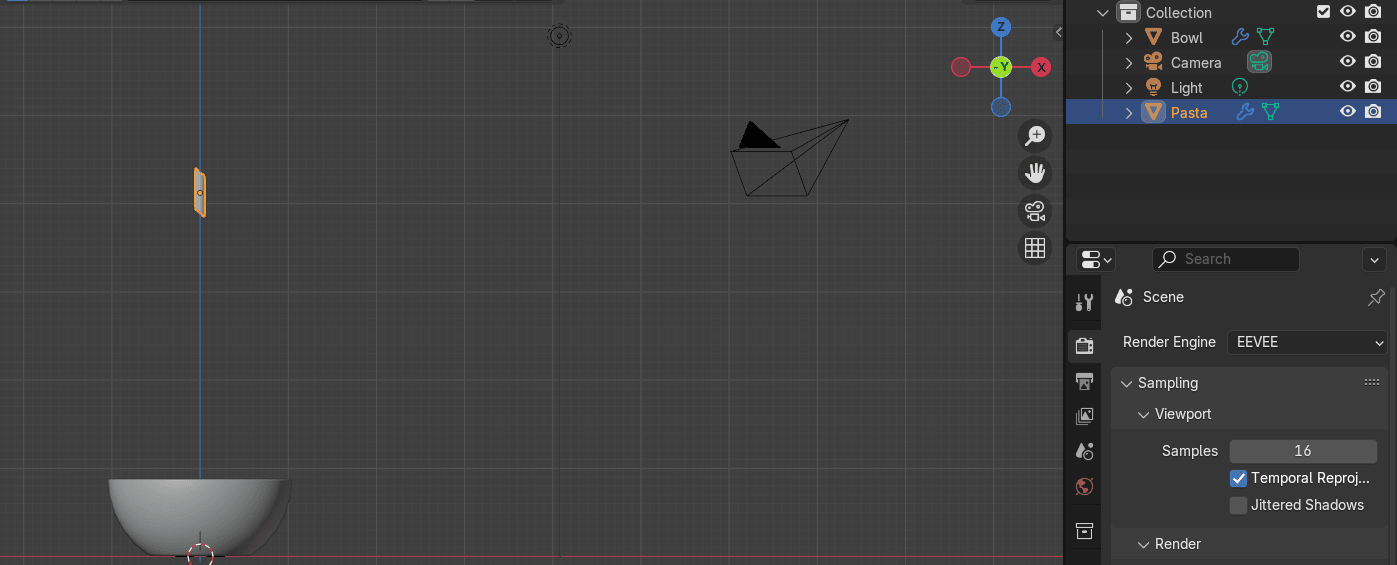
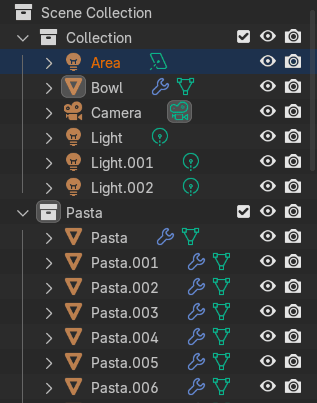
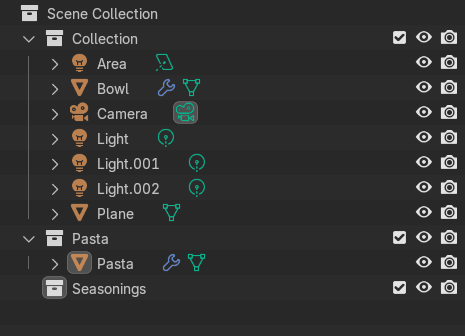
Select the bowl and rename it to “Bowl” (or anything else).
Choose pasta and rename it to “Pasta”.
It is time to learn a new thing!
I want that pasta and bowl are not in the same collection.
How to put object, in this case pasta, in a new separated collection?
Choose the object that you want to put in a new selection, press M, and you will get this
Beginners guide to Blender
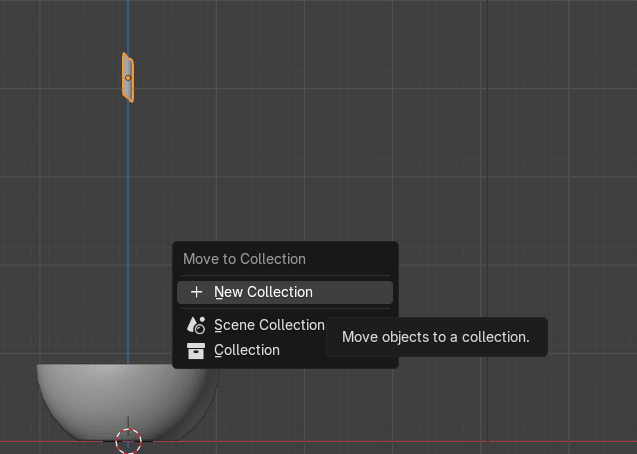
You can make an entirely new collection by choosing New Collection,
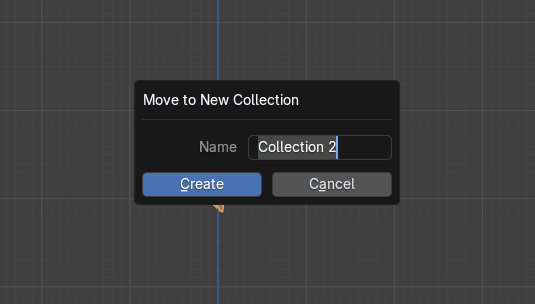
giving it a name and creating it.
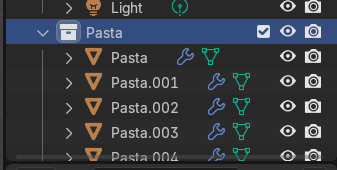
Beginners guide to Blender
I named it Pasta and here it is - Pasta collection with the Pasta object.

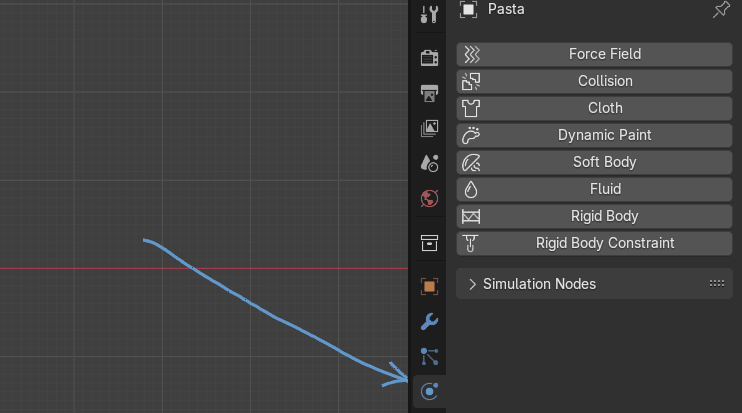
Now when all preparations are done, it is time to introduce some basic Physics in Blender.
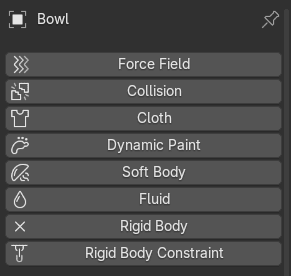
If you click here, you will open a new part called Physics Properties. You have there forcefield, collision, cloth, etc. As always, I will teach you on a real examples little by little so youdon’t feel overwhelmed.
Now it is time to learn about rigid body.
If you select an object and click on a rigid body, you will add active object as a rigid body.
Also, some new properties will appear.
Beginners guide to Blender
To remove rigid body settings from the object, just click on that left X in Rigid Body.
Now I will add a rigid body to the bowl.
Select the bowl, and click on the rigid body.
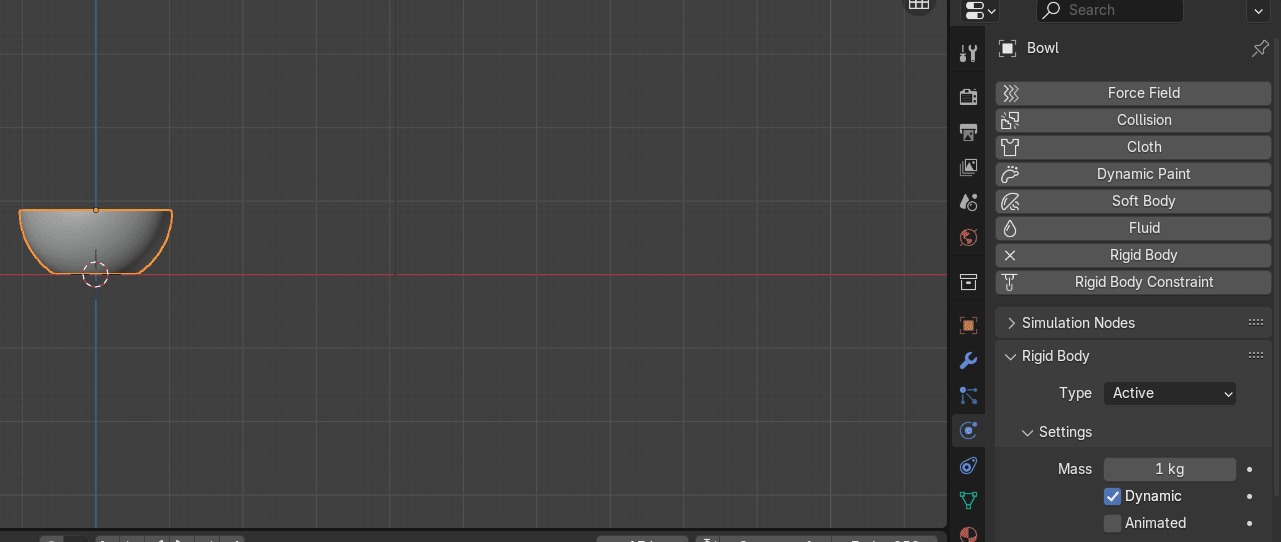
If you are not sure on which object are you putting any of physics, just check the name ofyour object in the top left part. It says Bowl so we are good.
Beginners guide to Blender
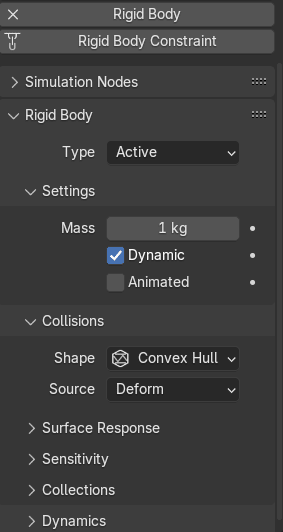
Part that you need is this one - Rigid Body Type: Active or Passive.
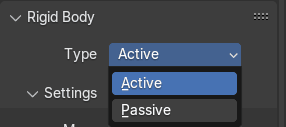
If you choose Active Type then your object is directly controlled by simulation results.
If you choose Passive Type then your object is directly controlled by animation system.
Because you want your object to be controlled by animation system, select Passive Type.
Based on the type you choose, you get new options to adjust.
Beginners guide to Blender
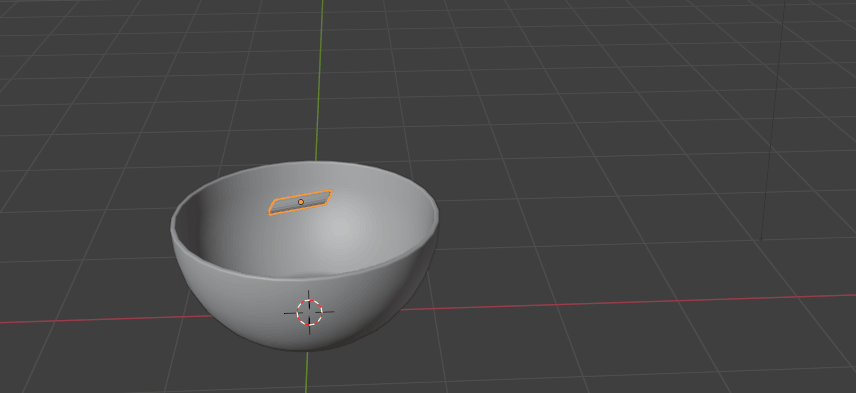
Now, select the pasta and click again on a rigid body.
This time Rigid type will be Active so you don’t need to change anything.
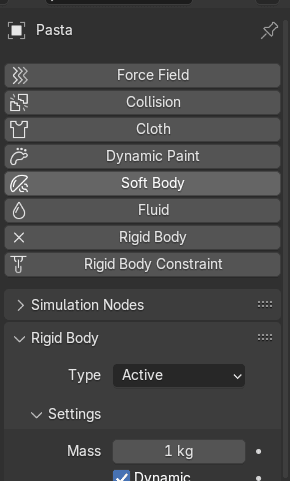
Press Spacebar to start the simulation. Press Spacebar to start the simulation and to stop thesimulation as well.
Beginners guide to Blender
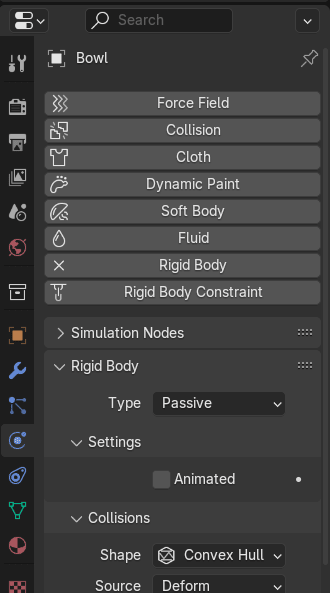
As you can see, pasta is flying in the space so we need to fix that.
Select bowl, and change shape from Convex Hull to Mesh
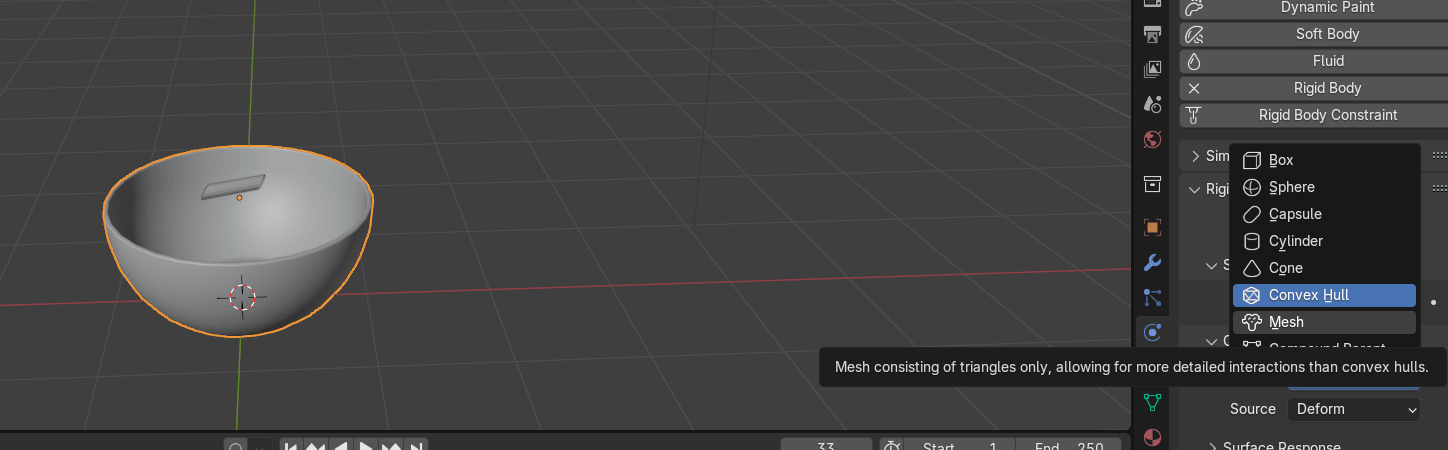
Convex Hull is the best for a mesh-like surface encompassing (i.e. shrinkwrap over) allvertices (best results with a fewer vertices.)
Mesh is the best for a mesh that consists of a triangles only, allowing for more detailedinteractions than convex hull.
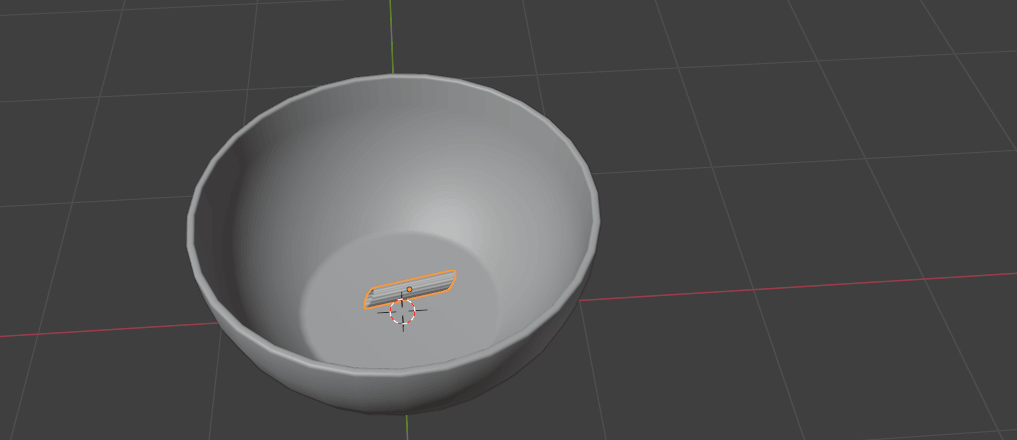
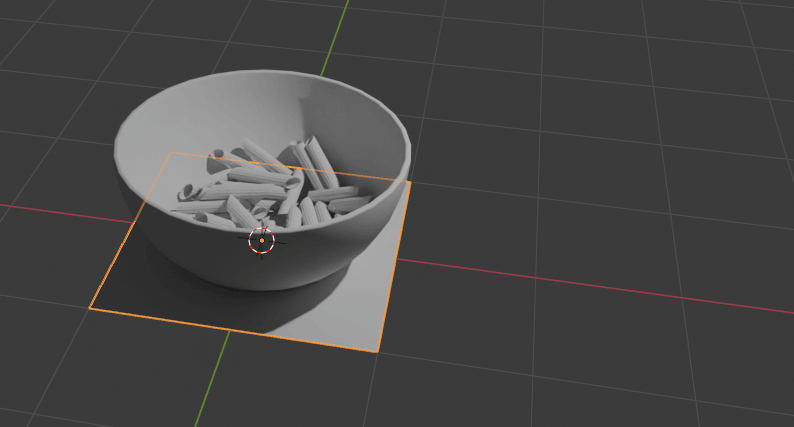
Check your simulation again. Pasta is now in the bowl.
Change view to front orthographic with 1.
Beginners guide to Blender
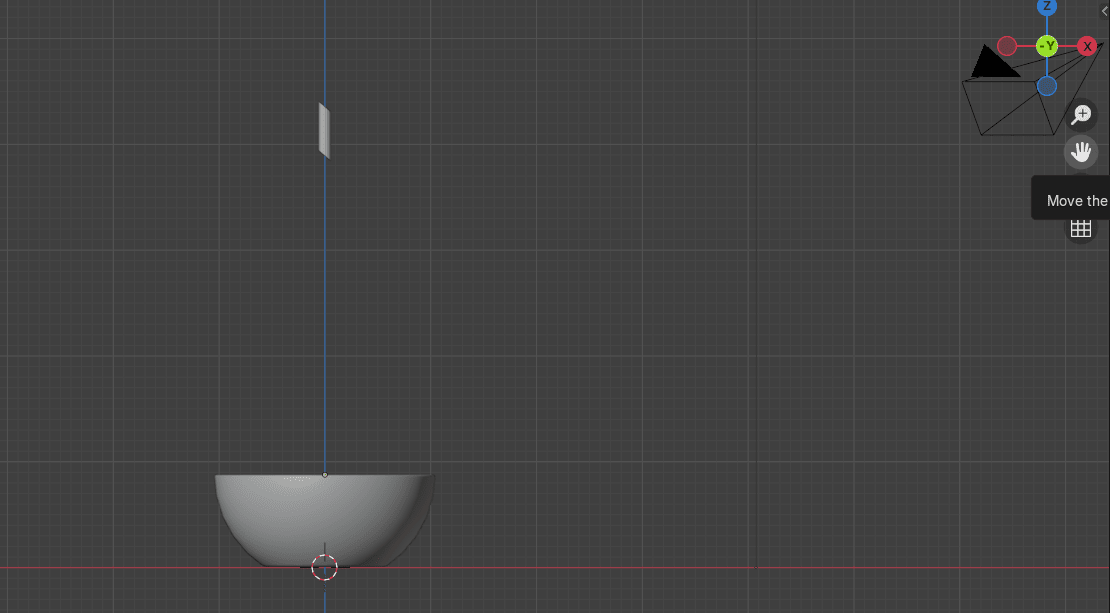
Select the pasta and move it down with “G+Z”
It is again time to learn something new and very useful.
There are two ways to duplicate object in Blender.
The first way you already know - “SHIFT+D.”
What you will learn now is another way of duplicating and that is “ALT+D”
What is the difference? Instead of giving you a definition, I will explain it on the new example.
Difference between ALT+D and SHIFT+D?
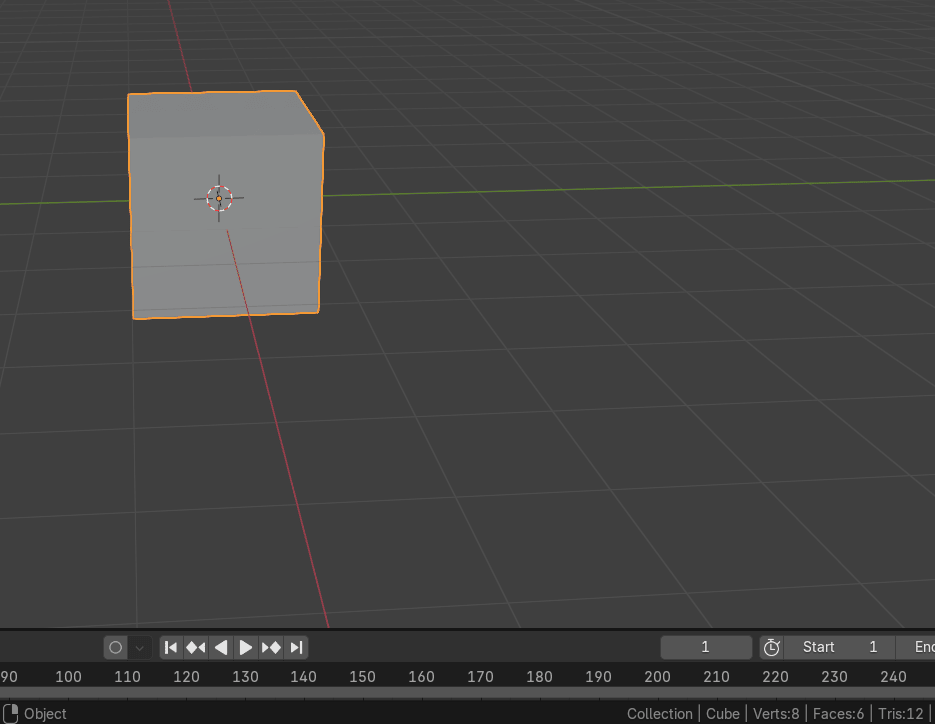
I opened a new Blender file so I can show you on the easiest possible way, with a defaultcube.
This scene currently has: 8 vertices. 6 faces and 12 tris.
Beginners guide to Blender
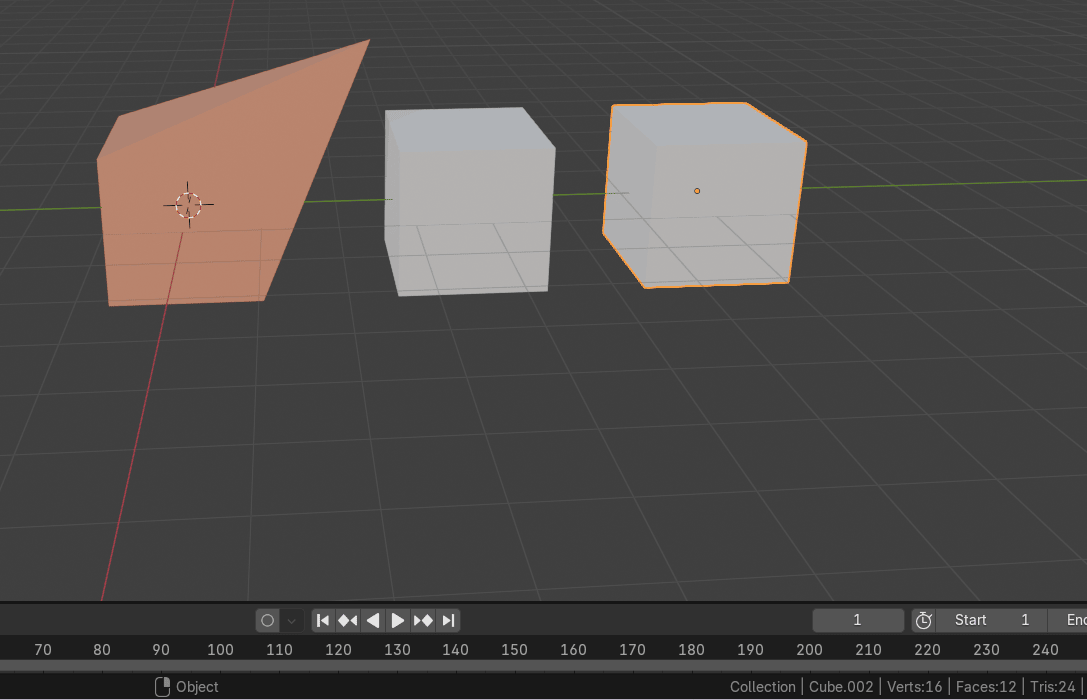
If you add a new cube by duplicating it with “SHIFT+D”
this scene will have: 16 vertices. 12 faces and 24 tris.
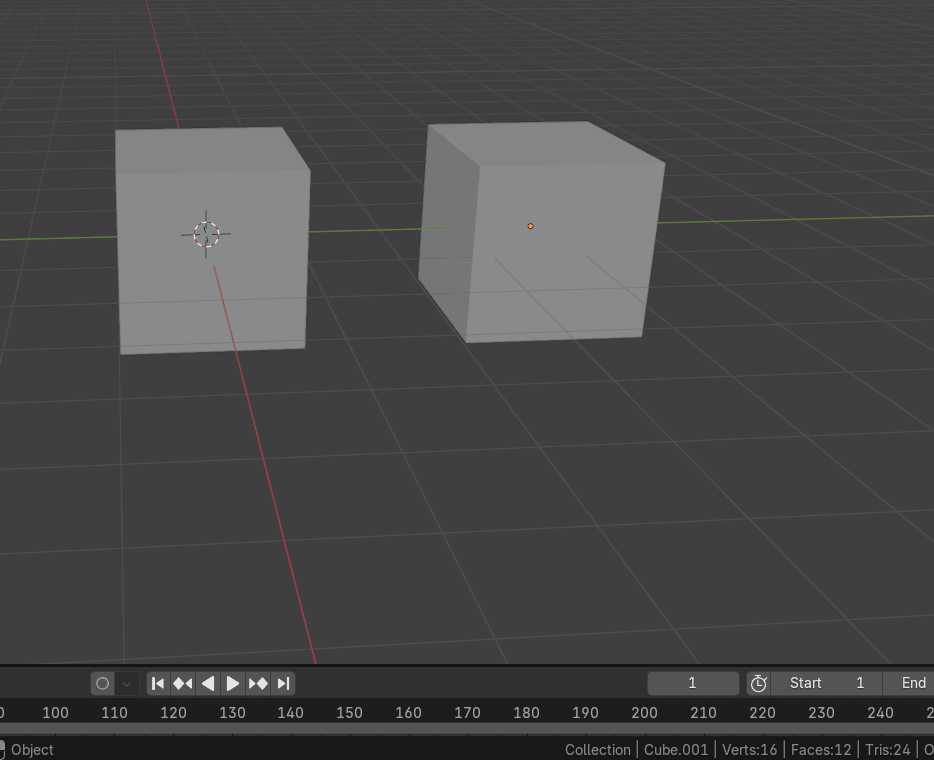
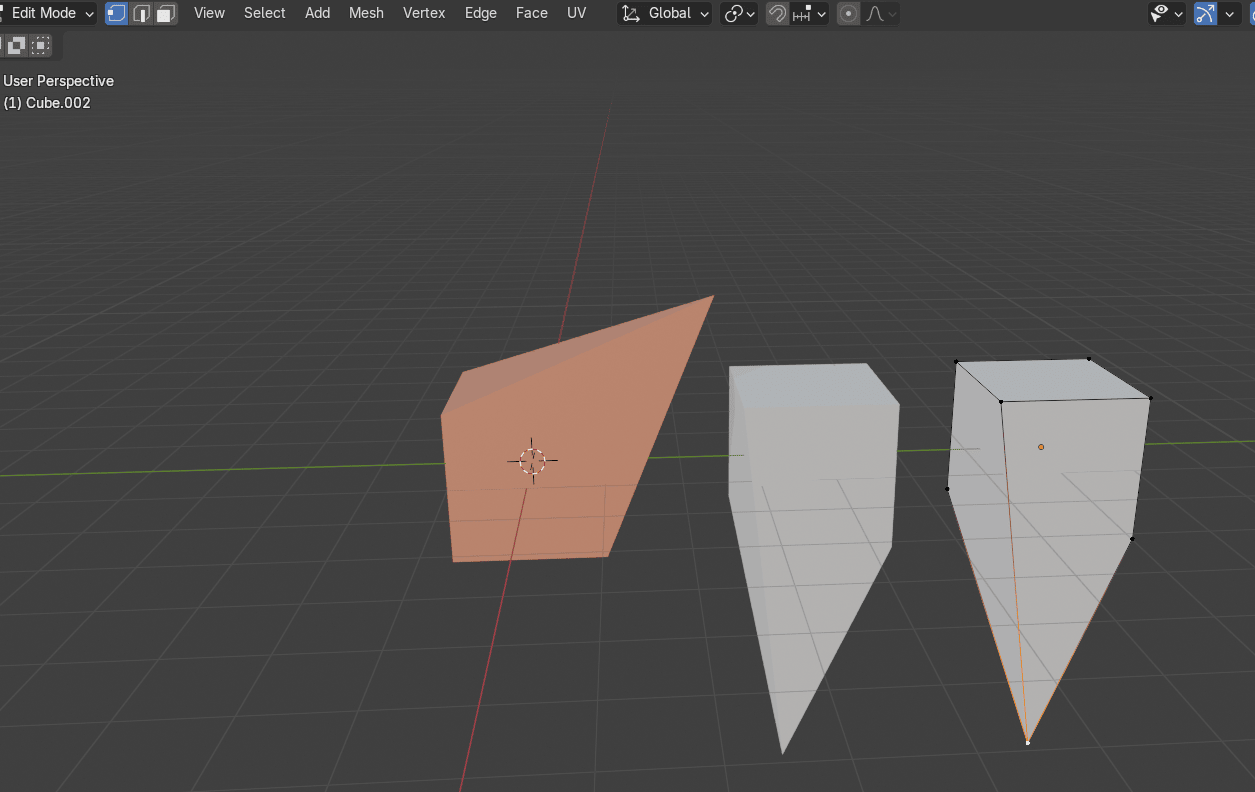
If you select one cube, and switch to the edit mode, no matter what you do, move, scale,change color, the other cube will stay the same.
Beginners guide to Blender
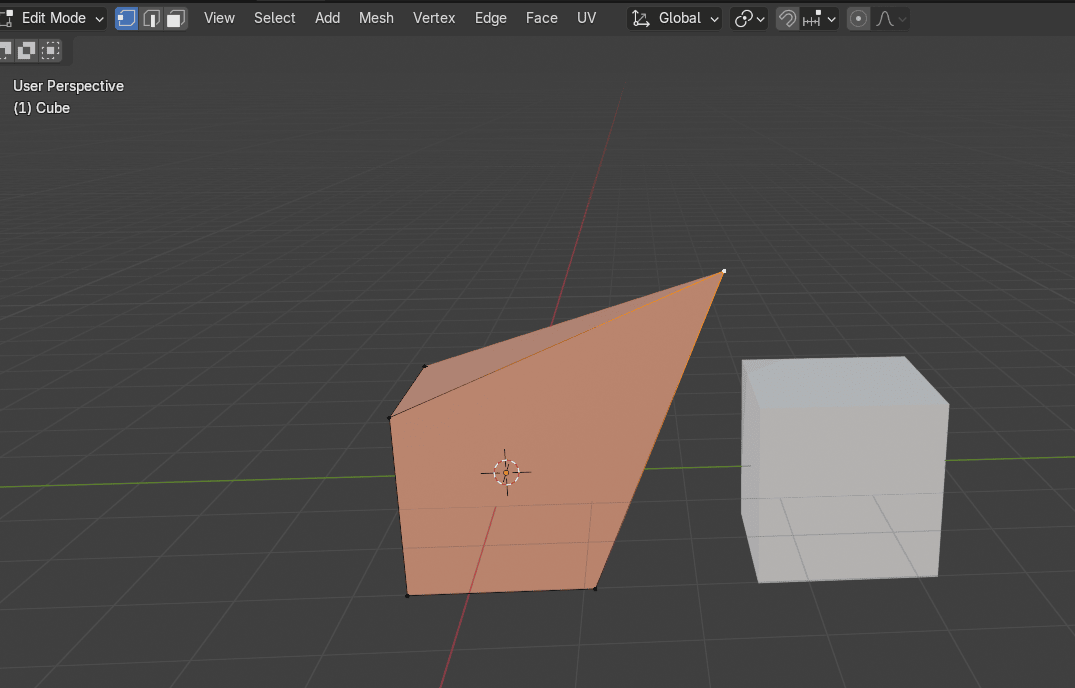
If you add a new cube by duplicating it with “ALT+D”, switch to the object mode because youcan do it only in the object mode.
This scene will still have: 16 vertices. 12 faces and 24 tris.
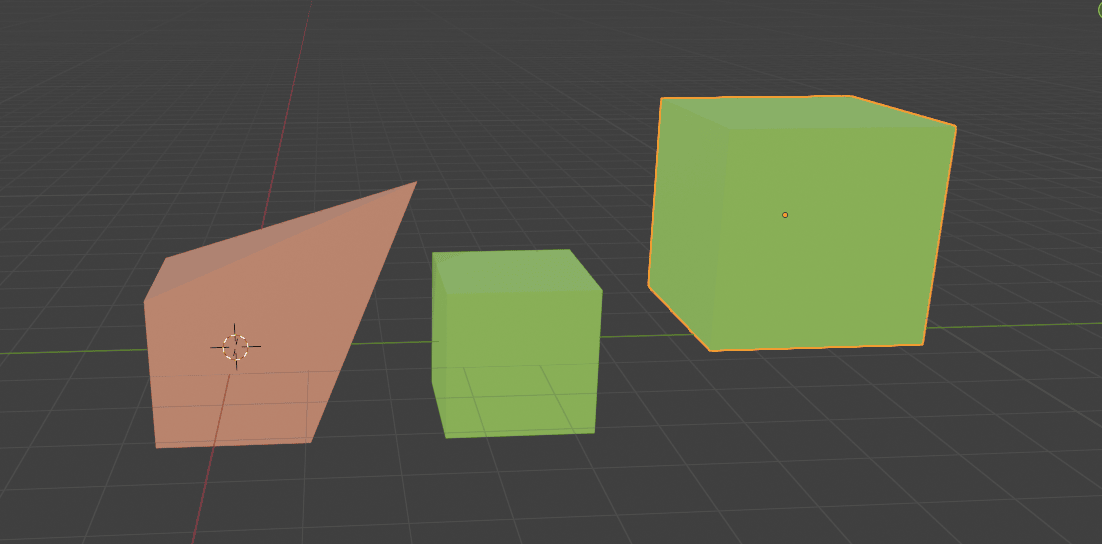
If you select the third cube that you duplicated with “ALT+D”, and switch to the edit mode,whatever you do to the third cube it will be replicating to the second cube.The same willhappen if you select the second cube as well.
Beginners guide to Blender
If you change the color in object or edit mode to the one of the cubes it will happen the sameto the other.
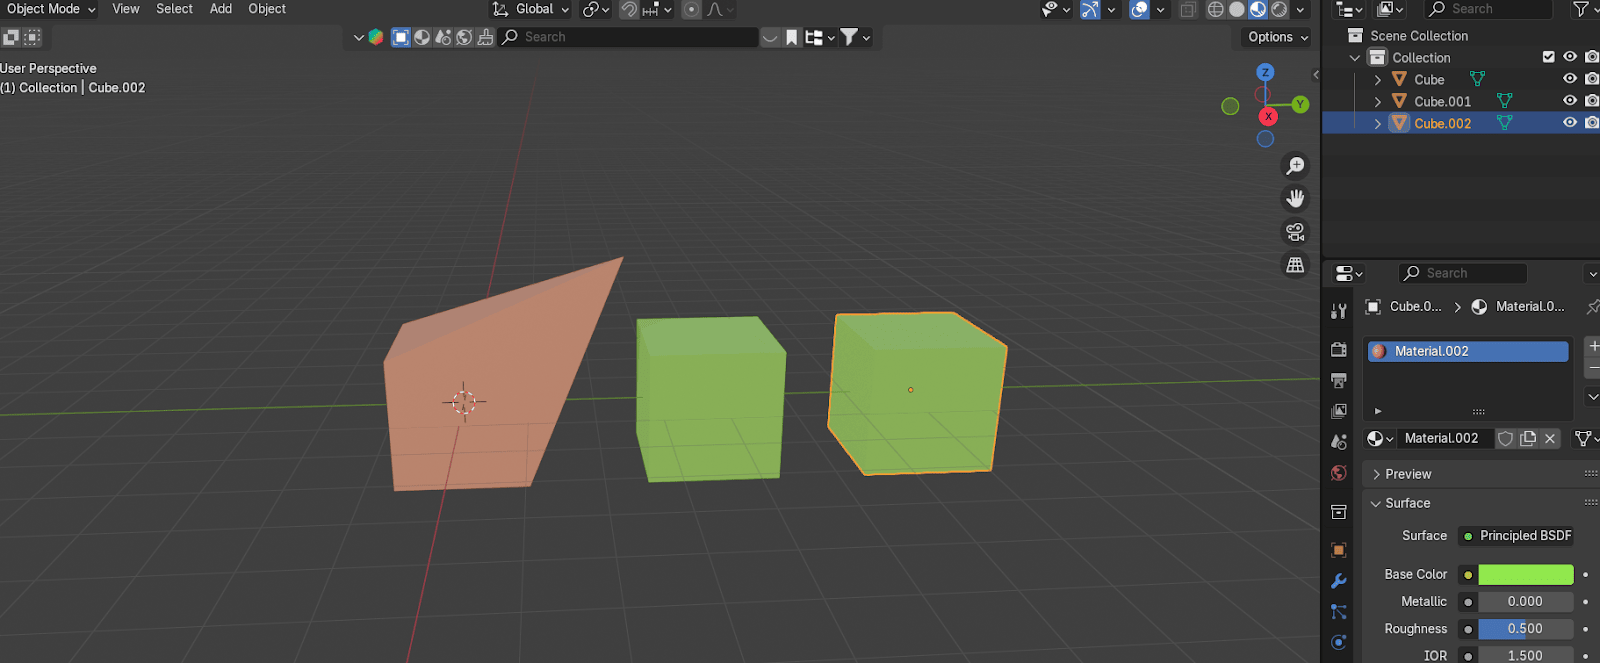
But if you scale or move an object in the object mode, nothing will happen to the other one.
Beginners guide to Blender
What is the conclusion?
If you duplicate the object with “SHIFT+D” number of your polygons will increase, but you willhave separated objects and whatever you do on other object it won’t be replicated to yourduplicated object automatically.
If you duplicate the object with “ALT+D” number of your polygons will stay the same, but youwill have connected objects and whatever you do on other objects in the edit mode, it will bereplicated to your duplicated object automatically. But if you move, scale or rotate your objectin the object mode, it won’t affect the other object.
If you change colors, your other objects will change the color as well.
But what if you made a mistake and you realized that you need to change your object coloror edit in edit mode?
Don’t worry, the moment when you press “CTRL+A” and apply any transformation (location,rotation or a scale), you will get this message
Beginners guide to Blender
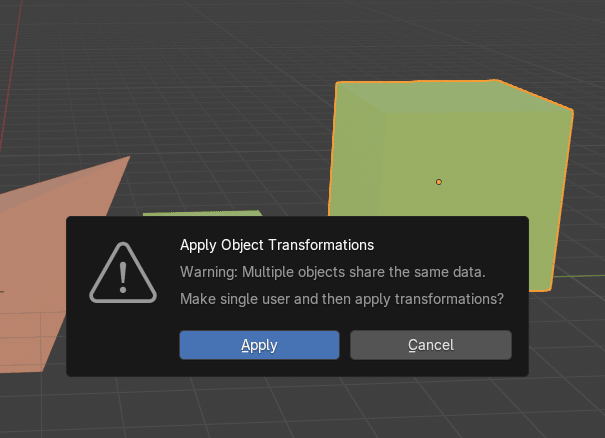
If you click apply, your object will be separated and your polygons will automatically increase.If you don’t want to have separated objects, just click cancel.
In case of pasta, it is better to use “ALT+D” because we won’t increase our polygons and allpasta are the same color so it is a good way to save a bit of memory and fasten therendering time ( more polygons and materials means more rendering time).
Now, let’s continue with our pasta.
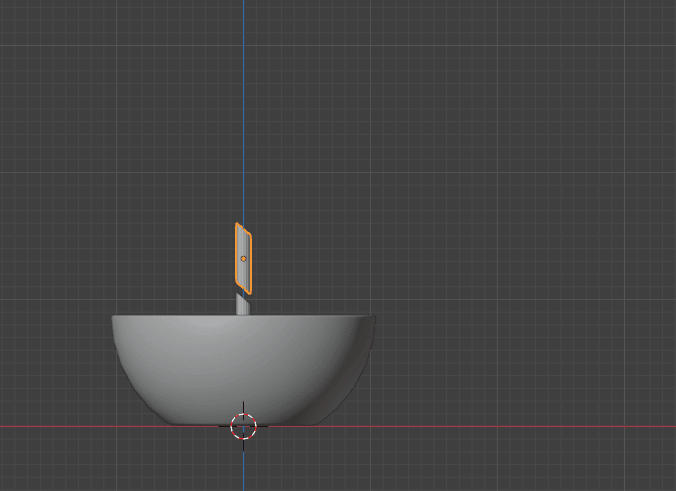
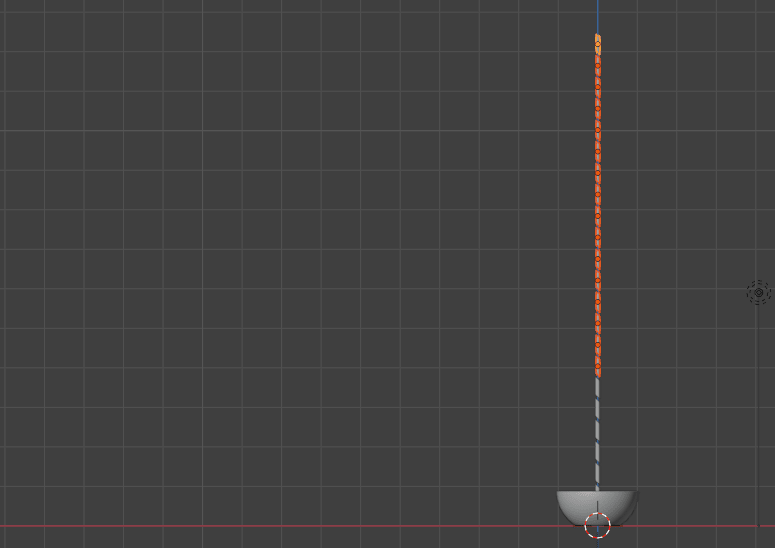
Select the pasta and duplicate it with “ALT+D” and move it up with “Z”
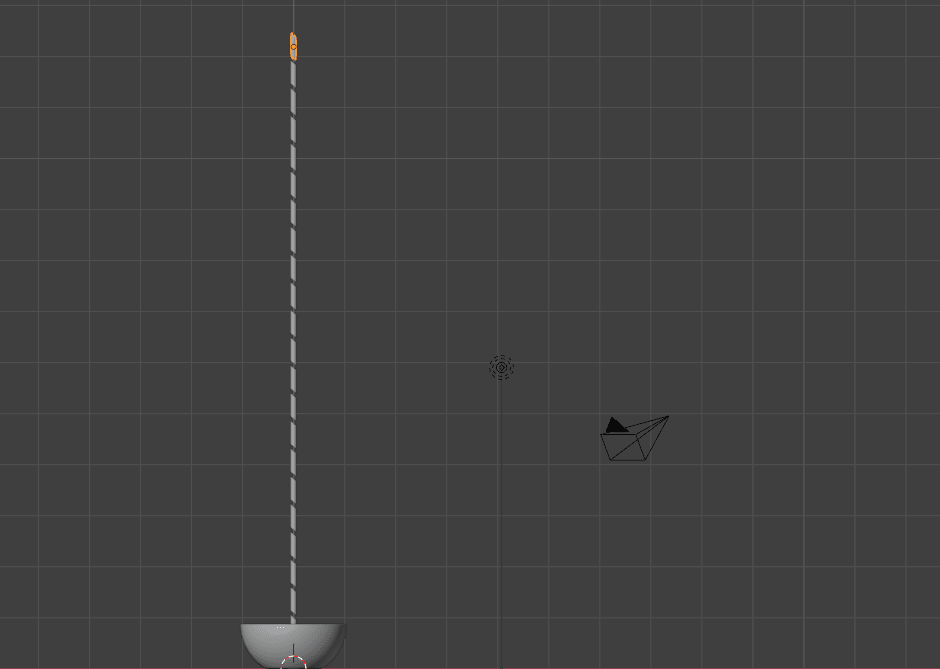
Click “SHIFT+R” to repeat that last step at least 20 more times to have enough pasta in yourbowl.
Beginners guide to Blender
Check your simulation again.
Jump to the first frame again.
Beginners guide to Blender
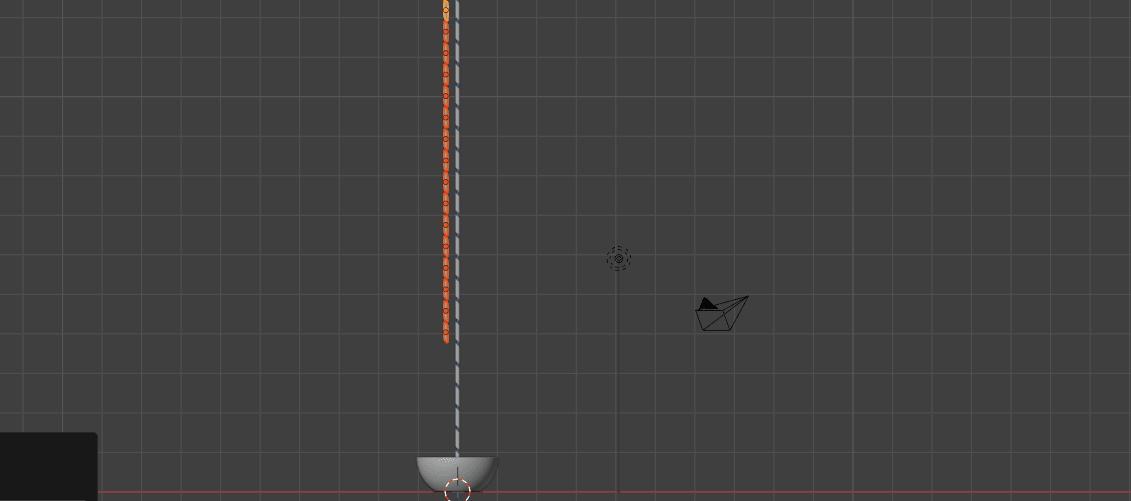
Select more than a half of pasta pieces
Beginners guide to Blender
and duplicate them with “ALT+D” and move them with “X” along the X-axis.
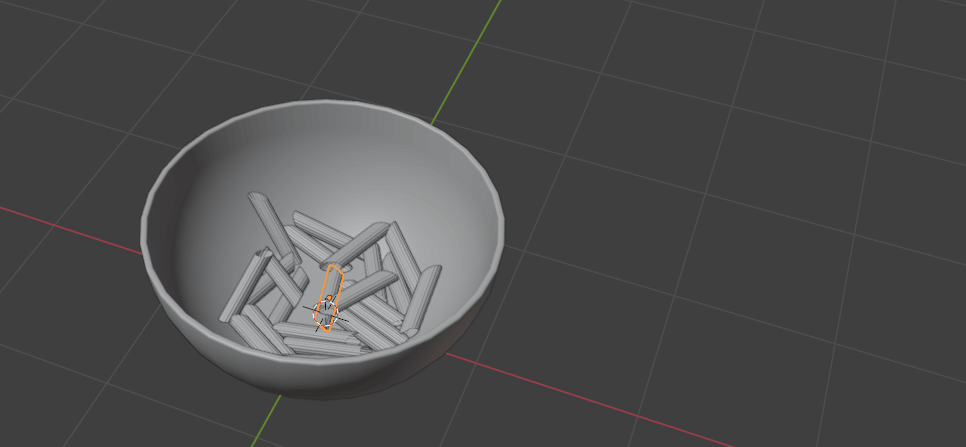
Check your simulation again.

If there are any pasta pieces outside the bowl, just delete them with “X”.
Select all pasta pieces, click one more time on the first pasta piece, click “CTRL+A” - applyVisual Transform.
Beginners guide to Blender

When you apply visual transform you're applying rotation and location at that current frameand it becomes default.
If you don't do that, your pasta will just reset whenever you go back to the first frame on thetimeline.
When you apply visual transform you can remove all physics because you don’t need itanymore.
Select pasta collection
and click RMB and choose Select objects.
Beginners guide to Blender
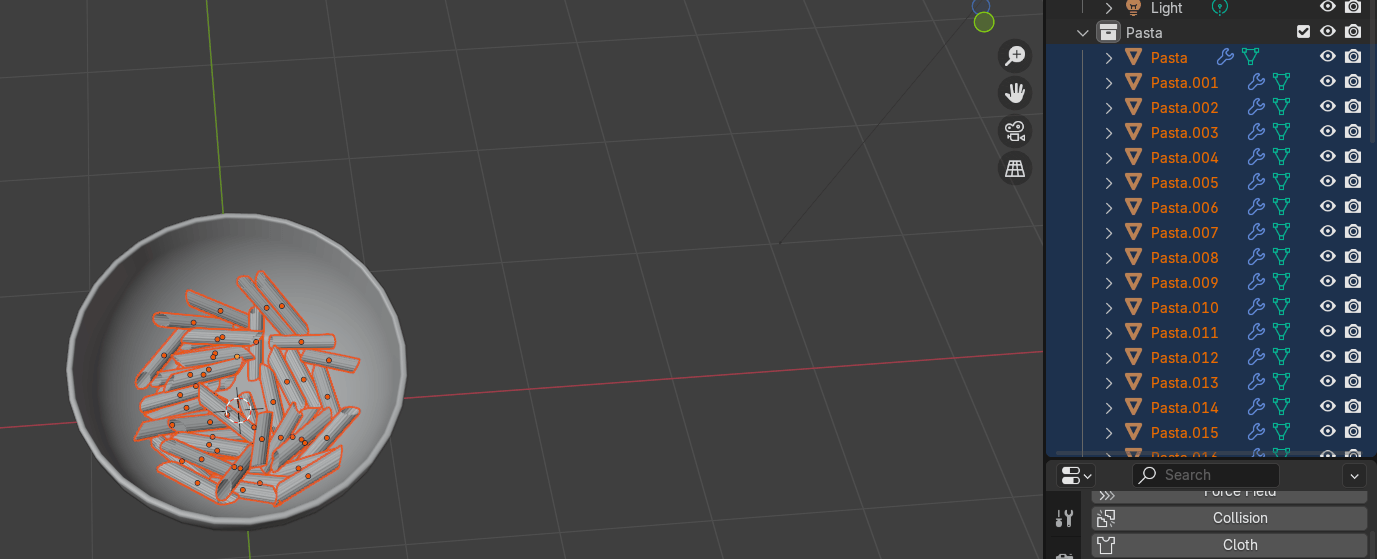
Go to object - rigid body - remove.
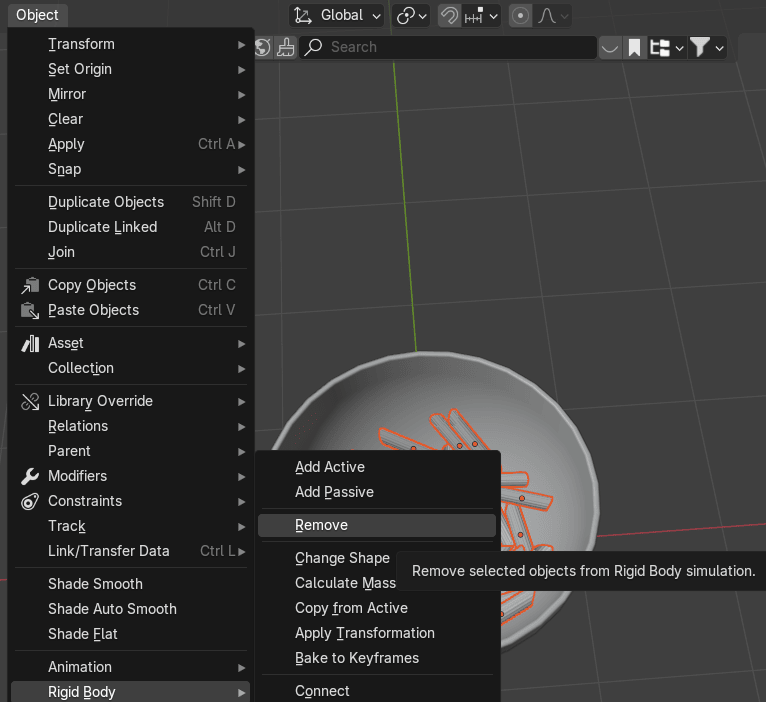
Beginners guide to Blender
Select the bowl and remove rigid body.
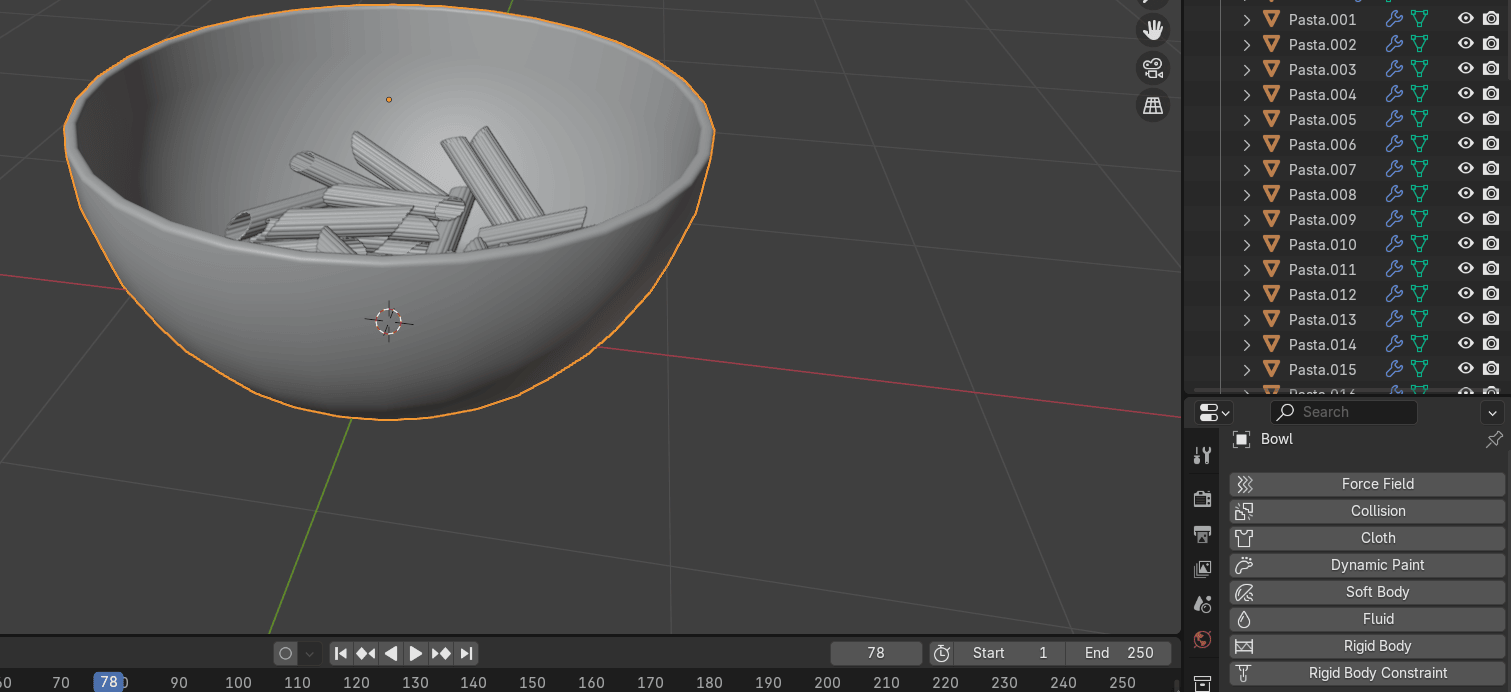
Until now you have been in the solid mode. Now switch to the Rendered mode so you canadd lights and materials and see how pasta looks with proper lighting.
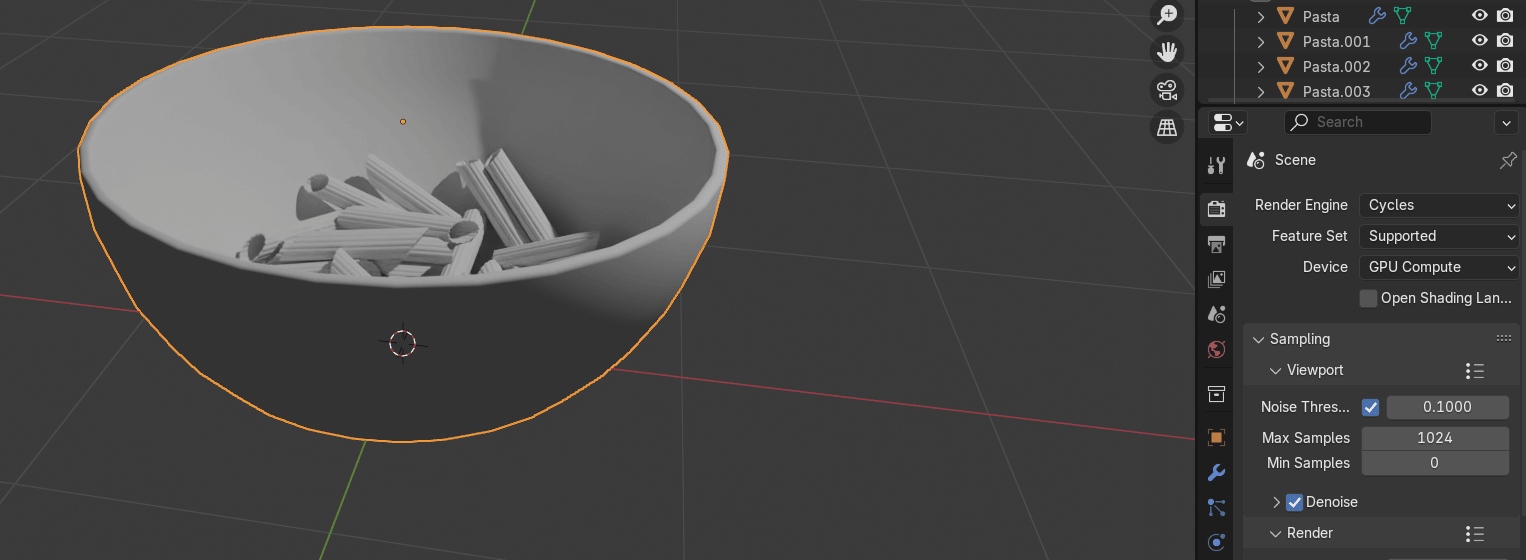
Now go to render properties, and switch from Render engine Eevee to Cycles.
Also if you have a good graphics card, you can switch from CPU to GPU.
Turn on the viewport denoise to get rid of the noise and make things easier for the eyes.
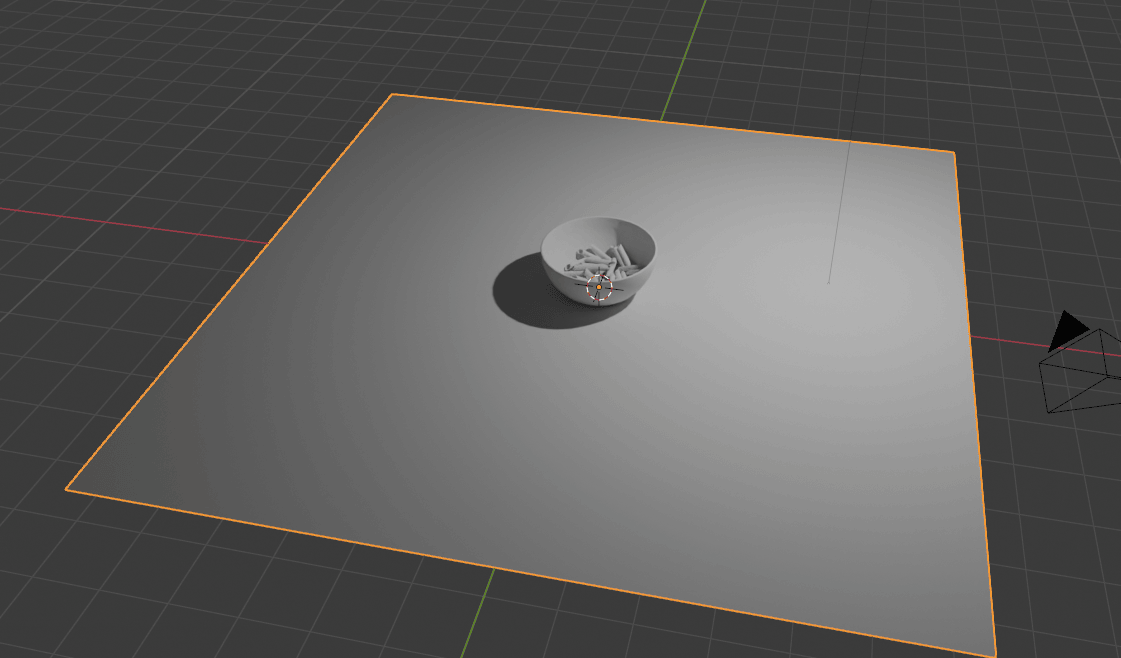
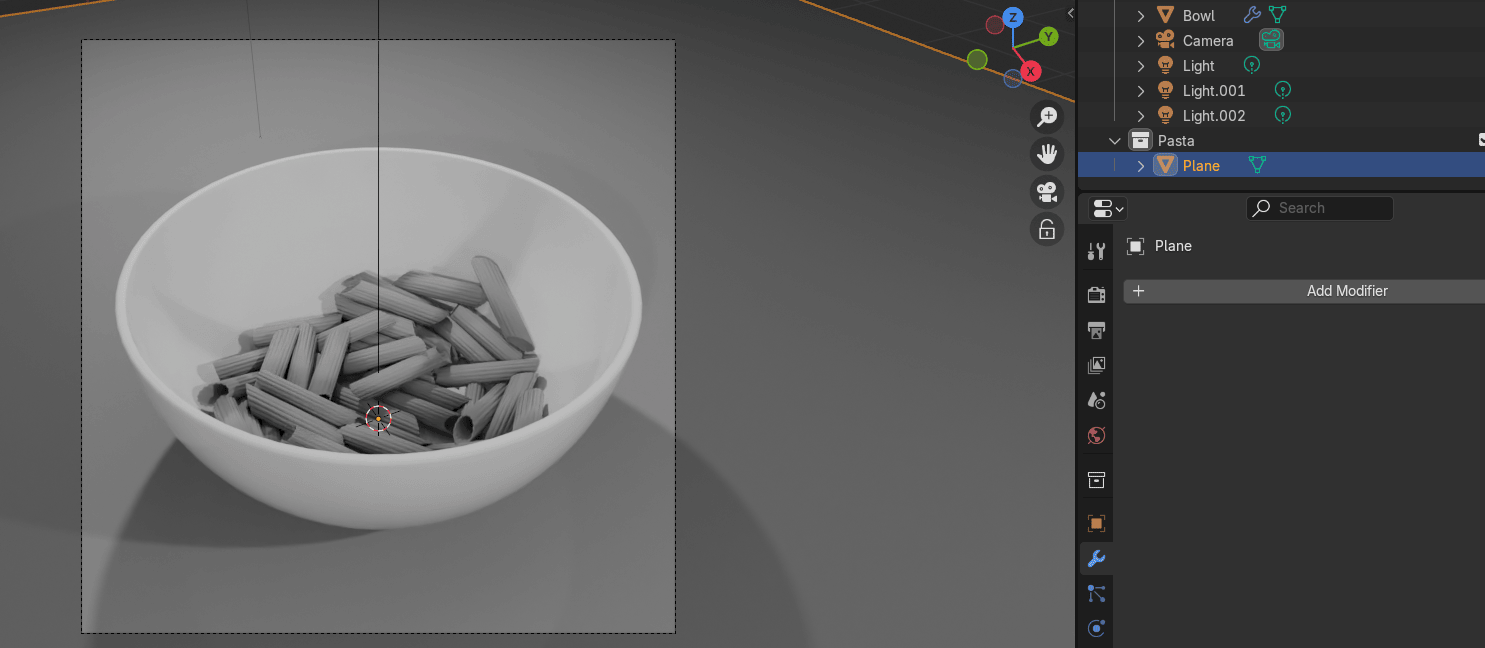
Add - mesh - plane.
Beginners guide to Blender
Scale it with “S”.
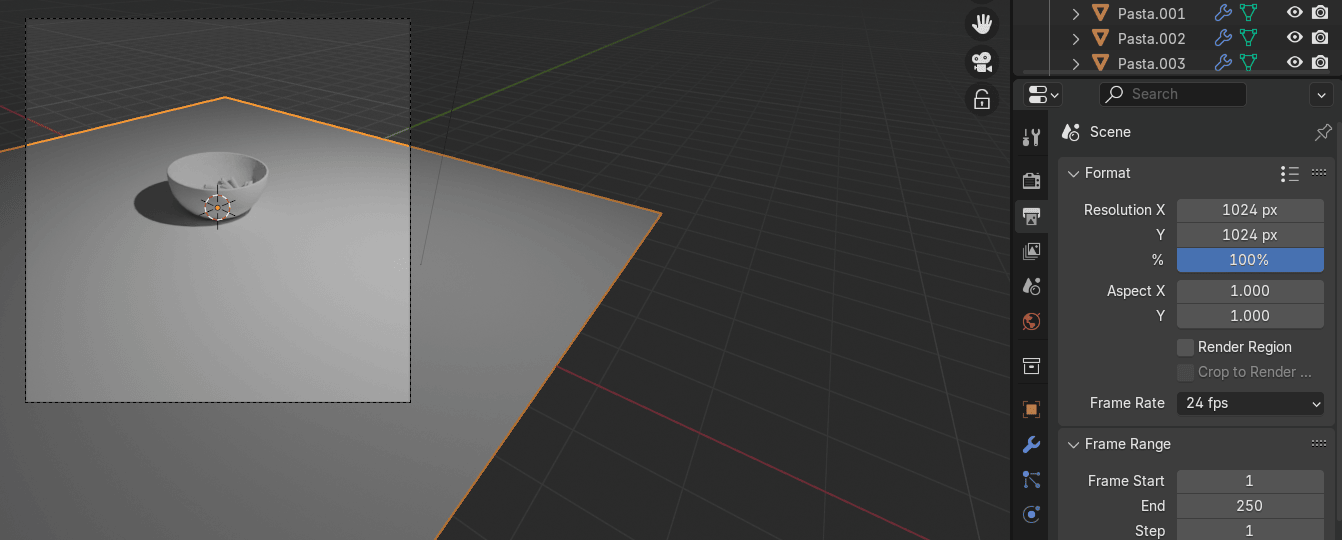
Click on the camera icon.
You can change the resolution to 1024x1024 if you want.
Beginners guide to Blender
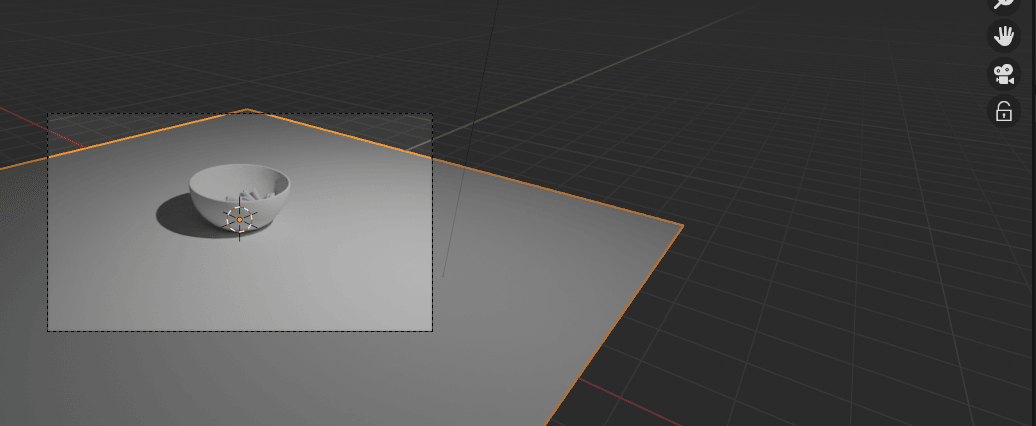
Press N to get a hidden sidebar. Go to view, and turn on camera to view.
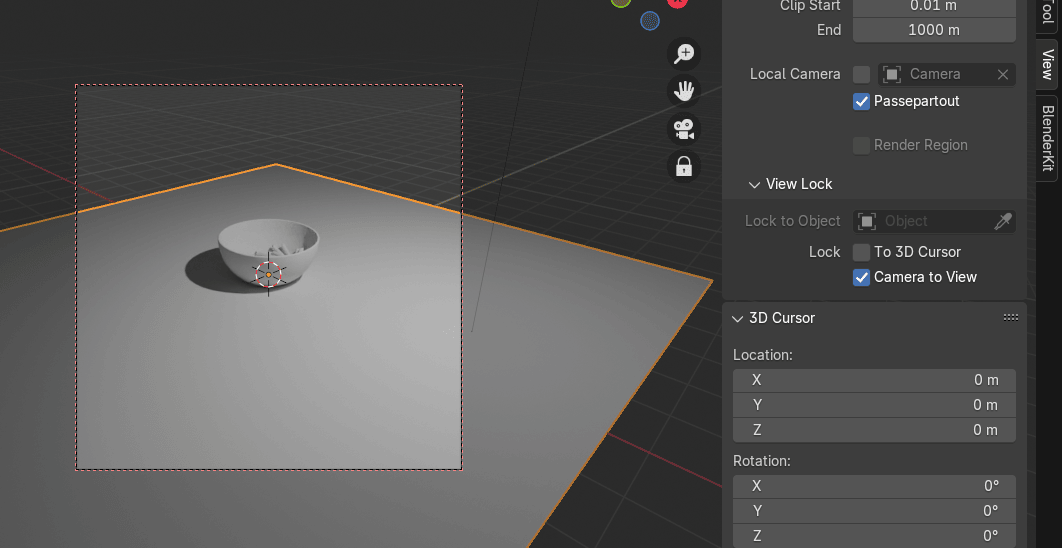
Adjust the camera as you think is the best and turn off camera to view.
Beginners guide to Blender

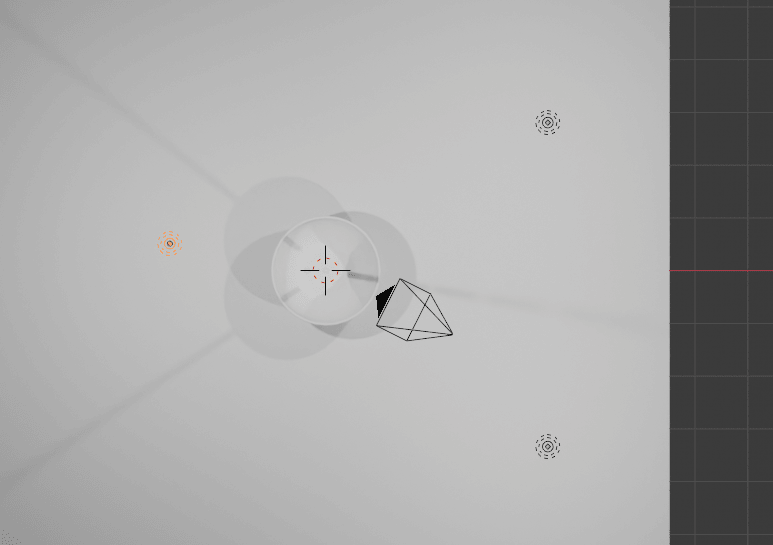
Change the view to the top orthographic with 7.
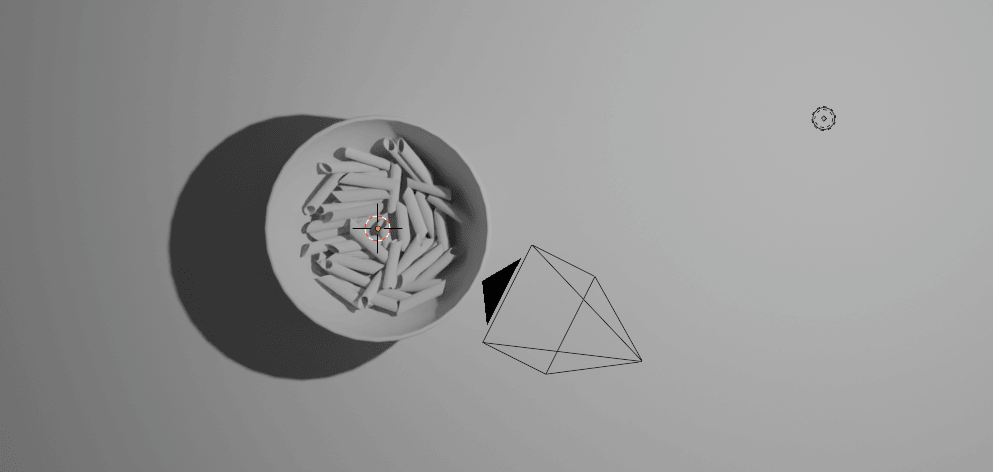
Choose the point light and move it with “G”
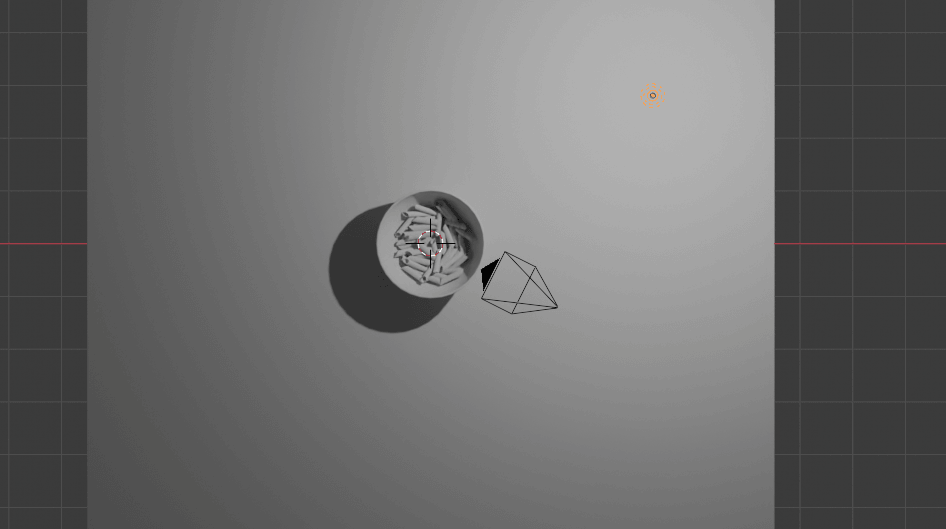
Duplicate it with “ALT+D” and move it with “Y”.
Beginners guide to Blender
Duplicate it with “ALT+D” and move it with “G”.
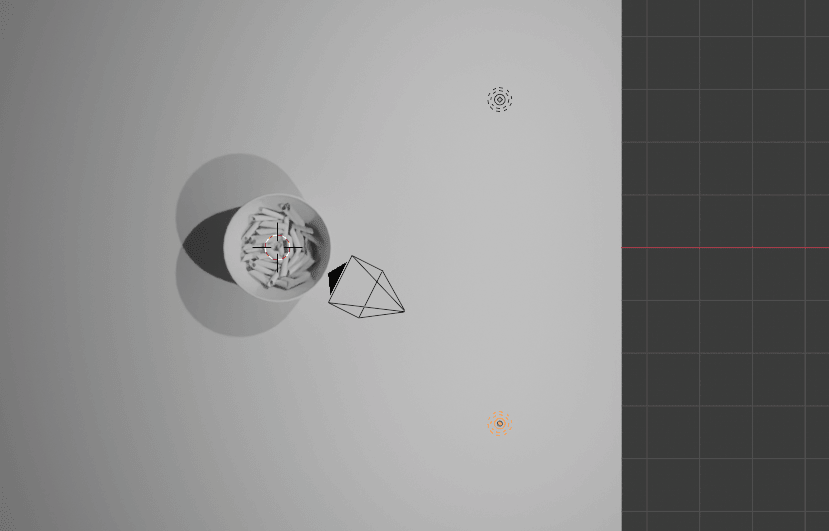
Select all 3 lights
Beginners guide to Blender
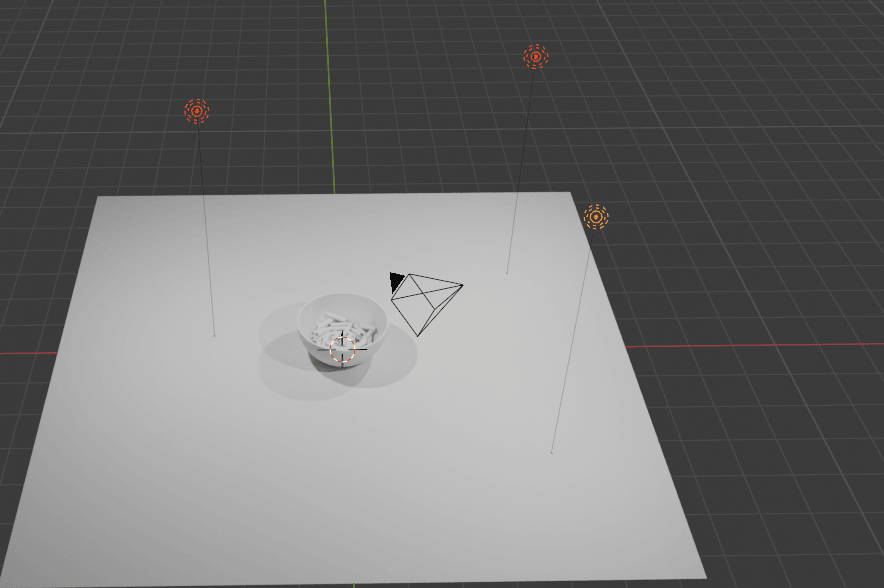
and move them down with “G+Z”.
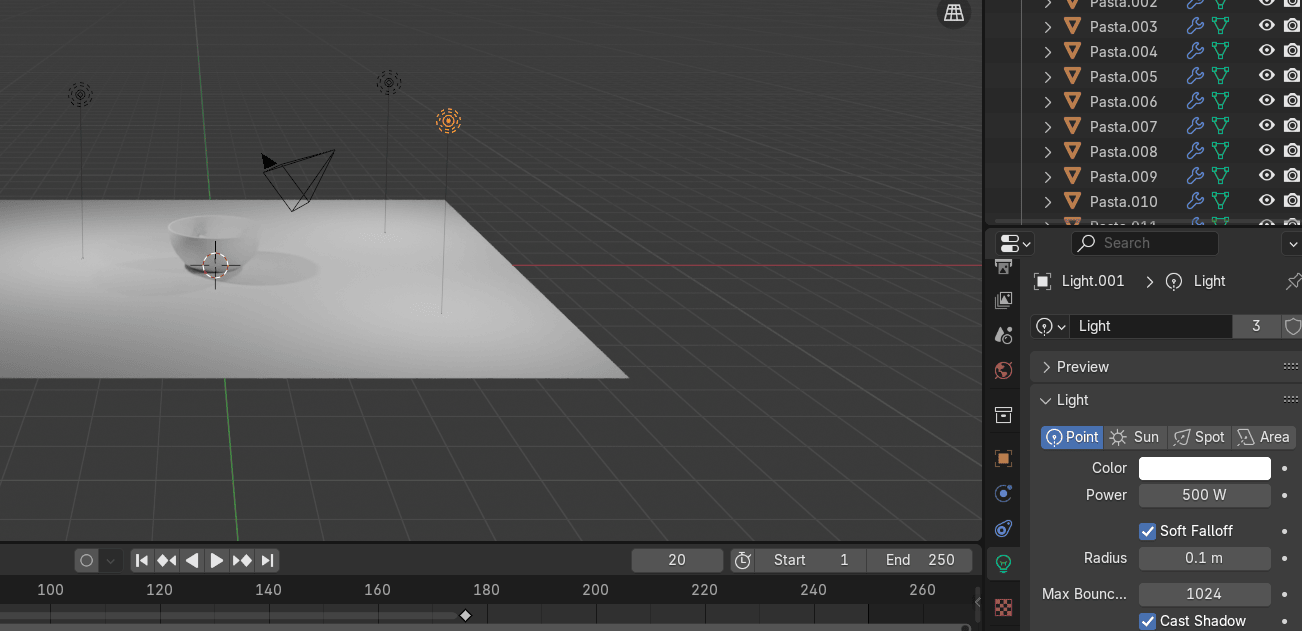
Change the power of this light to around 500 Watts. Because you duplicated the lights wit“ALT+D” when you change power of a one light, power is changed for all other lights as well.
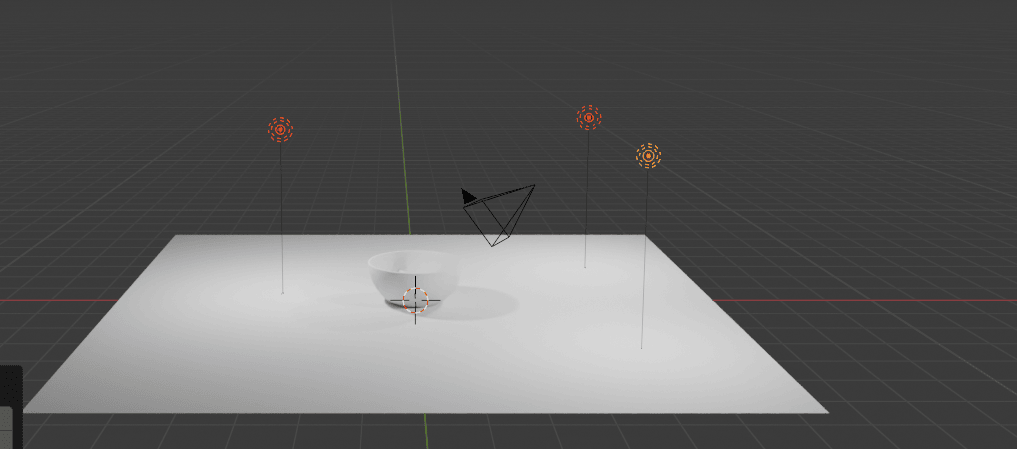
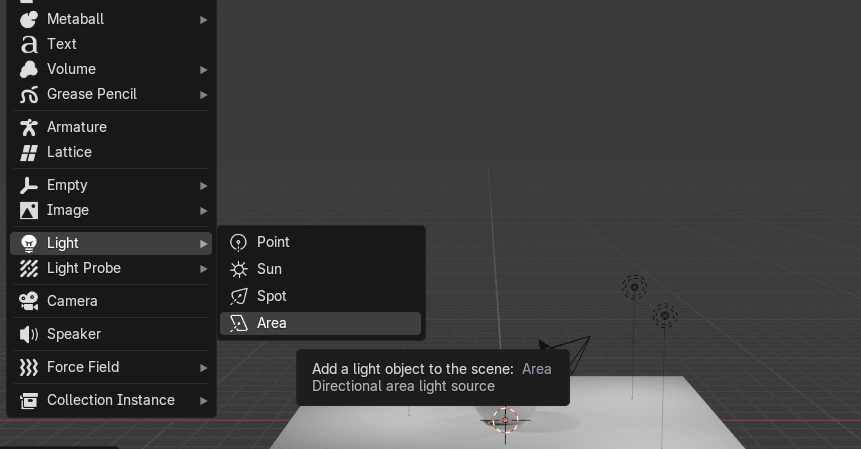
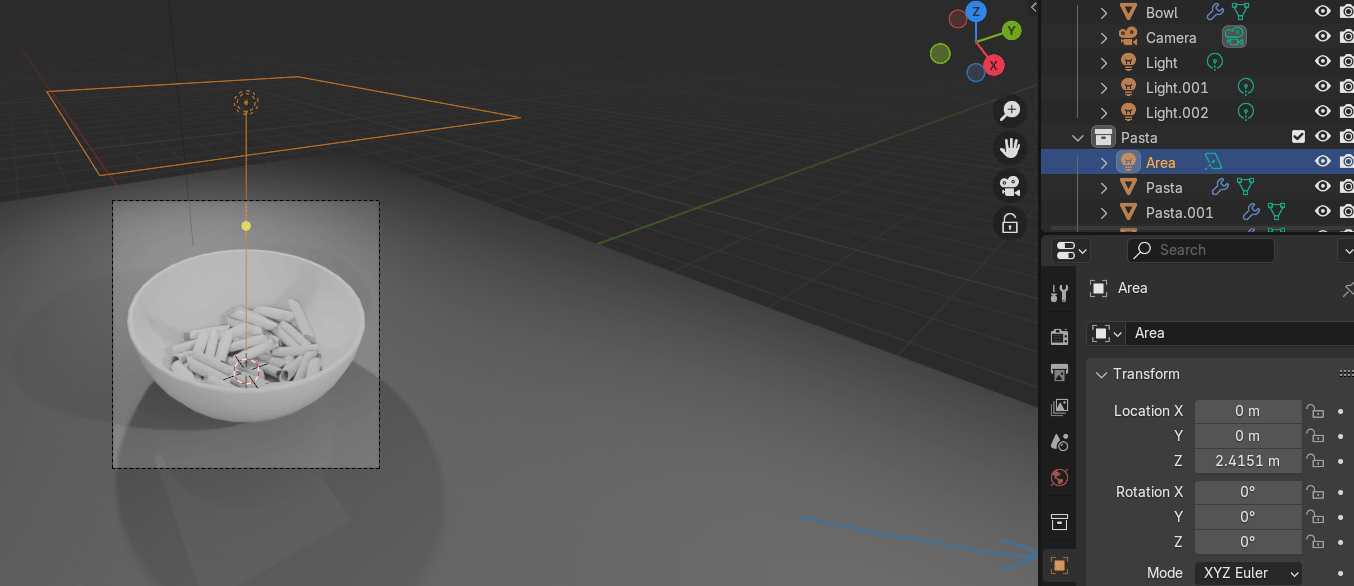
Add - light -area.
Beginners guide to Blender
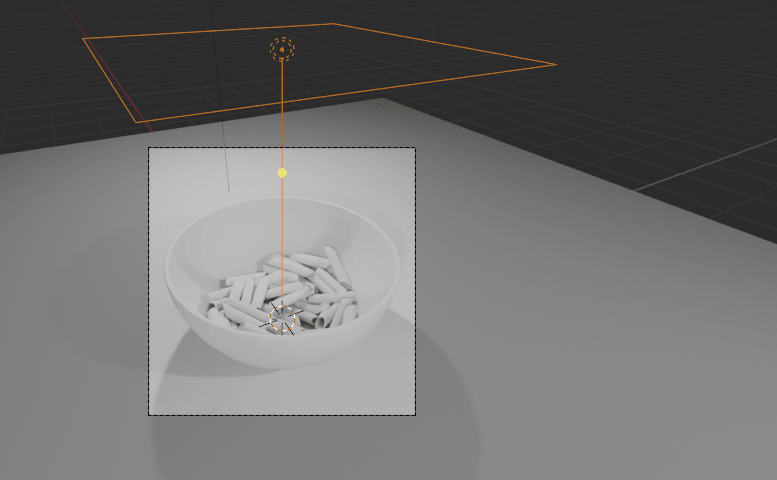
Move it up with “G+Z”.
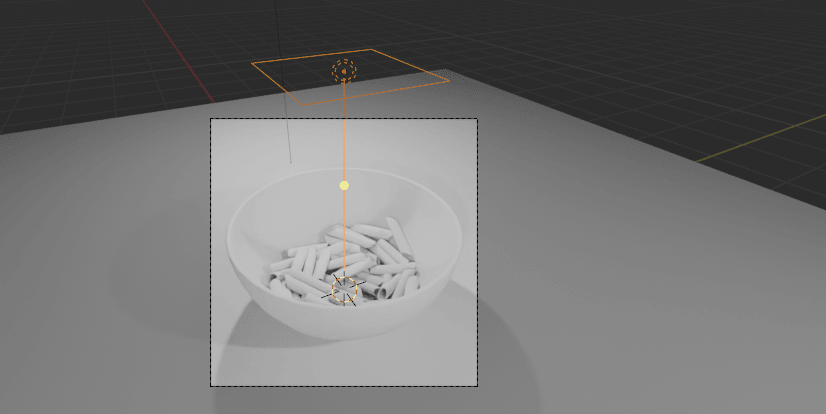
Scale it with “S” and move it around with “G” until you are satisfied.
Beginners guide to Blender
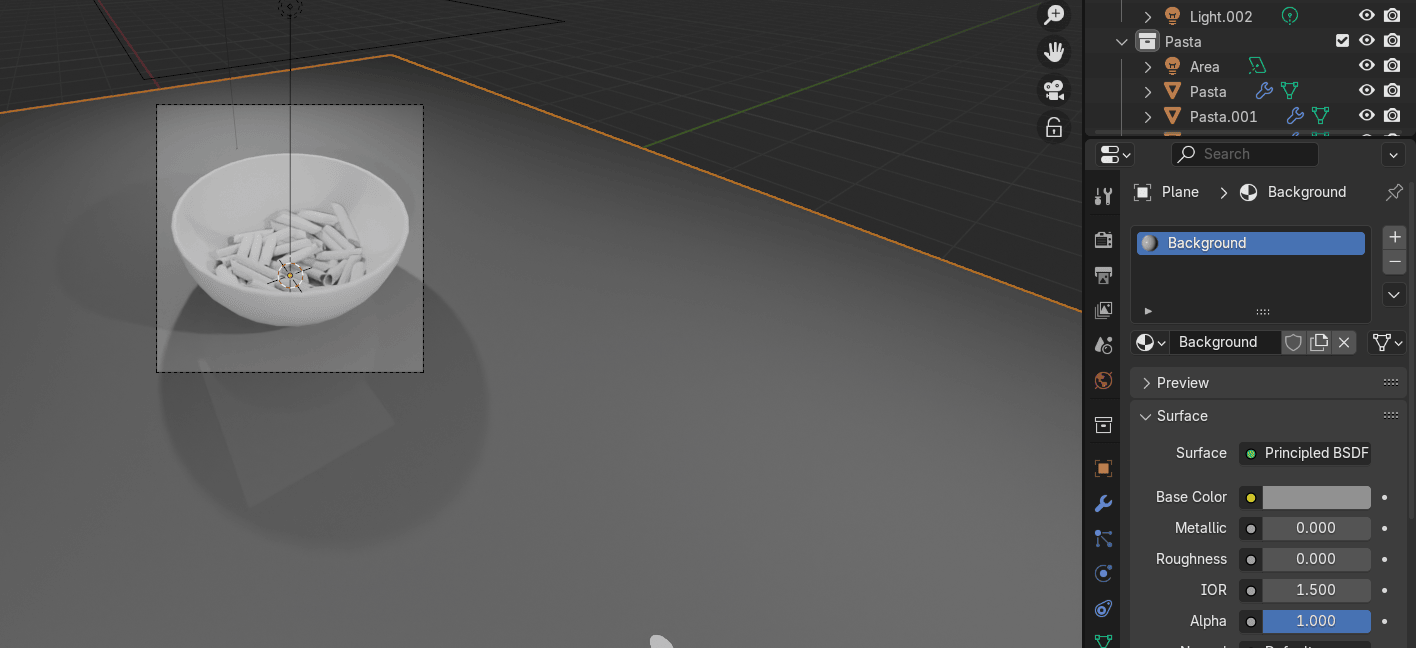
Select the plane. Click on the material. Click New. Rename it to background or anything elseyou want.
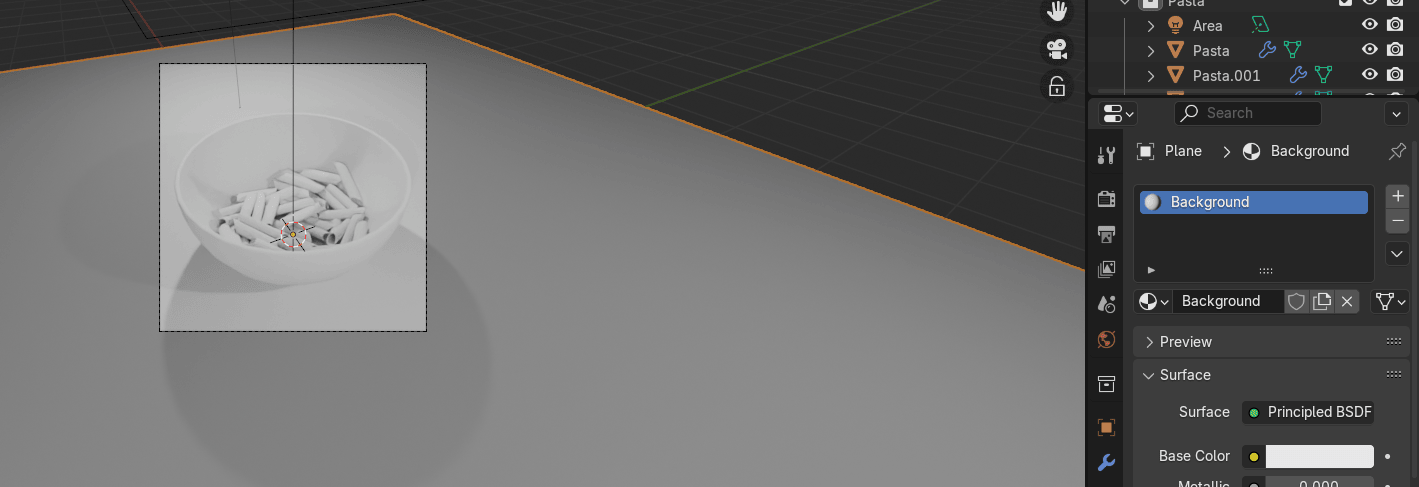
Switch roughness to 0. Change the base color to grey (or whatever you prefer).
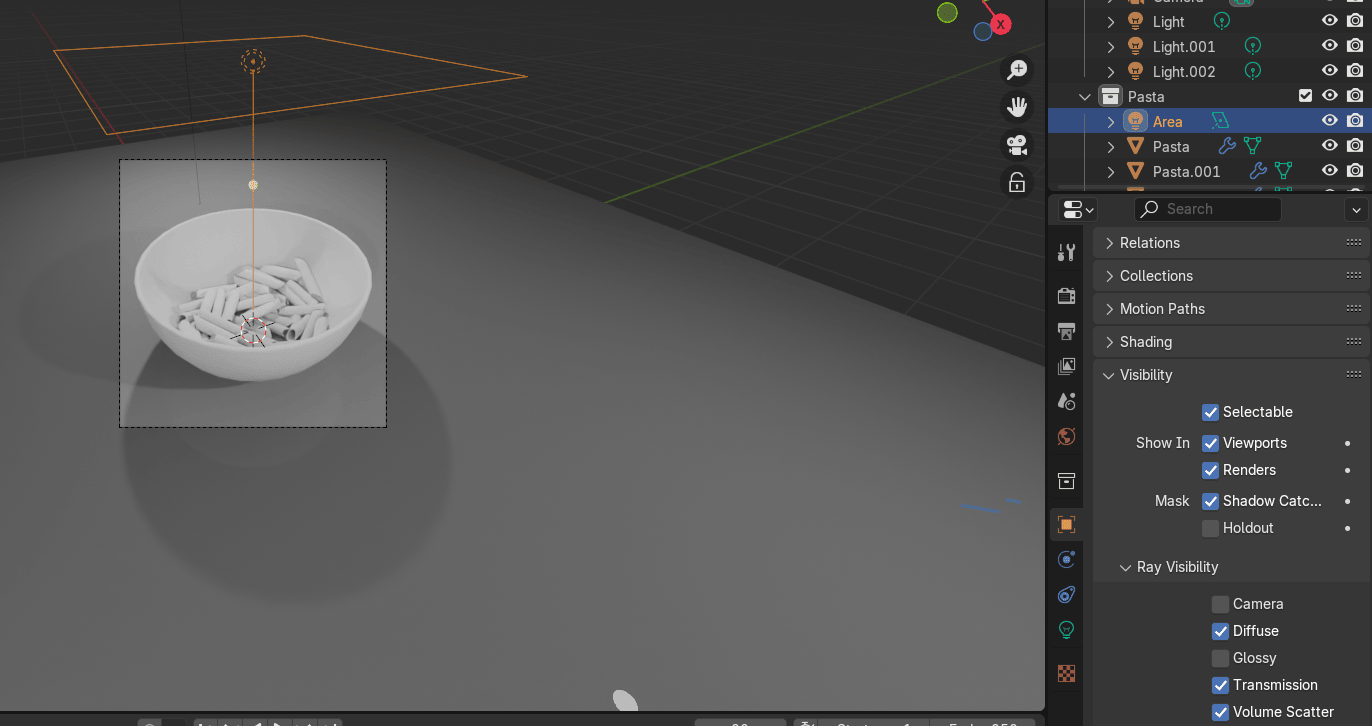
Choose the point light and area light, go to objects, and turn off glossy in Ray visibility. Youneed to turn off for all the lights no matter if they are duplicated or not.
Beginners guide to Blender
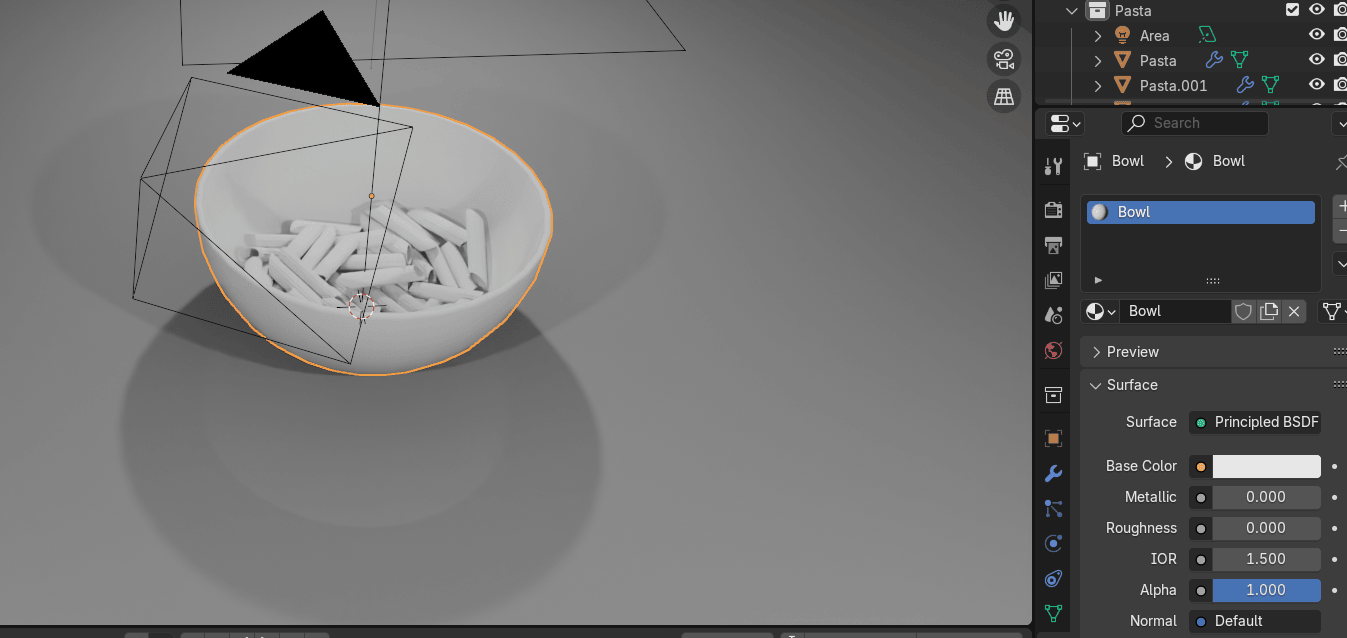
Select the bowl.
Click on the material. Click New. Rename it to “Bowl” or anything else.
Switch roughness to 0.
If your area light is in Pasta collection just move it to the original Collection.
Beginners guide to Blender
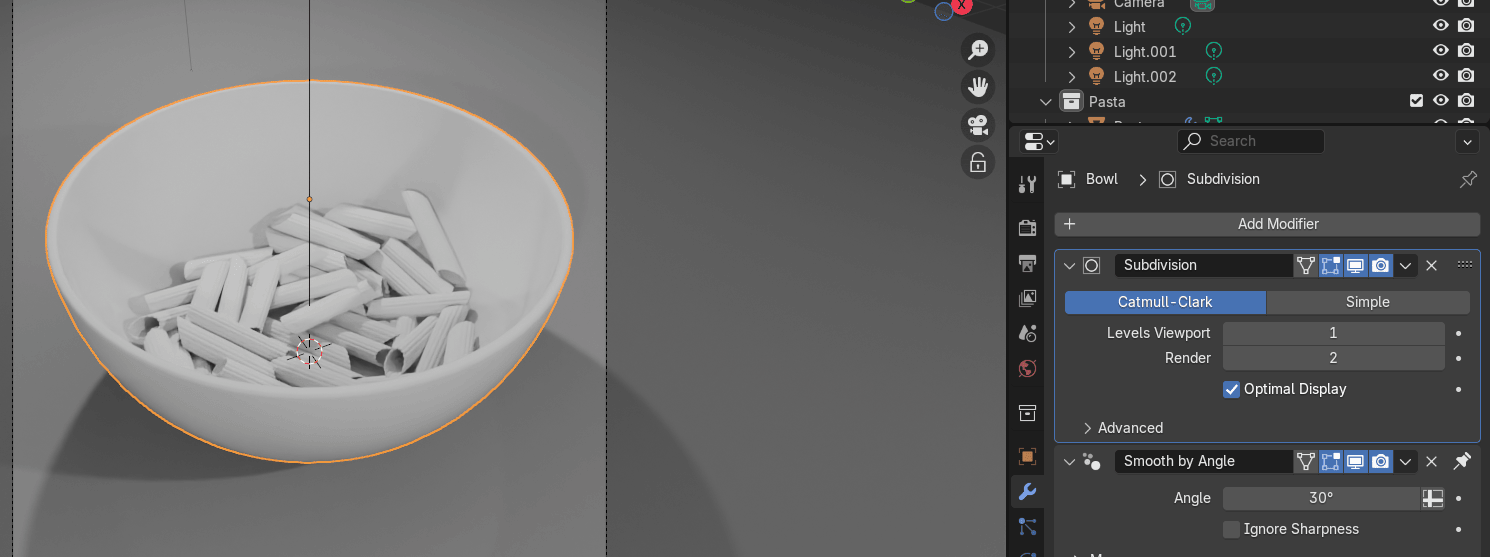
Go to modifiers - add modifier - generate - subdivision subsurface.
Select all objects in Pasta collection and join all with “CTRL+J”.
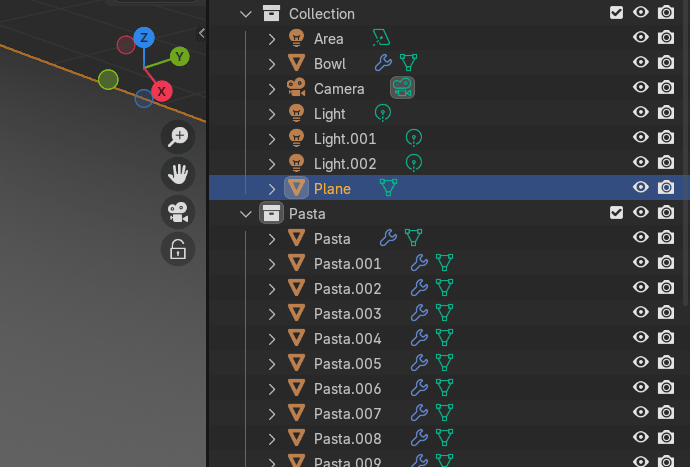
If this happens, undo the action with “CTRL+Z” , select the plane and also put it in theoriginal Collection.
Beginners guide to Blender
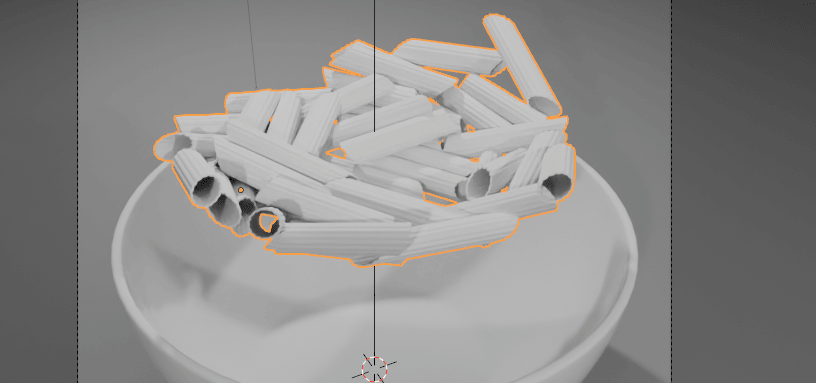
Now select all objects in Pasta collection again and join all with “CTRL+J”.
With that action, all your pasta pieces became one piece.
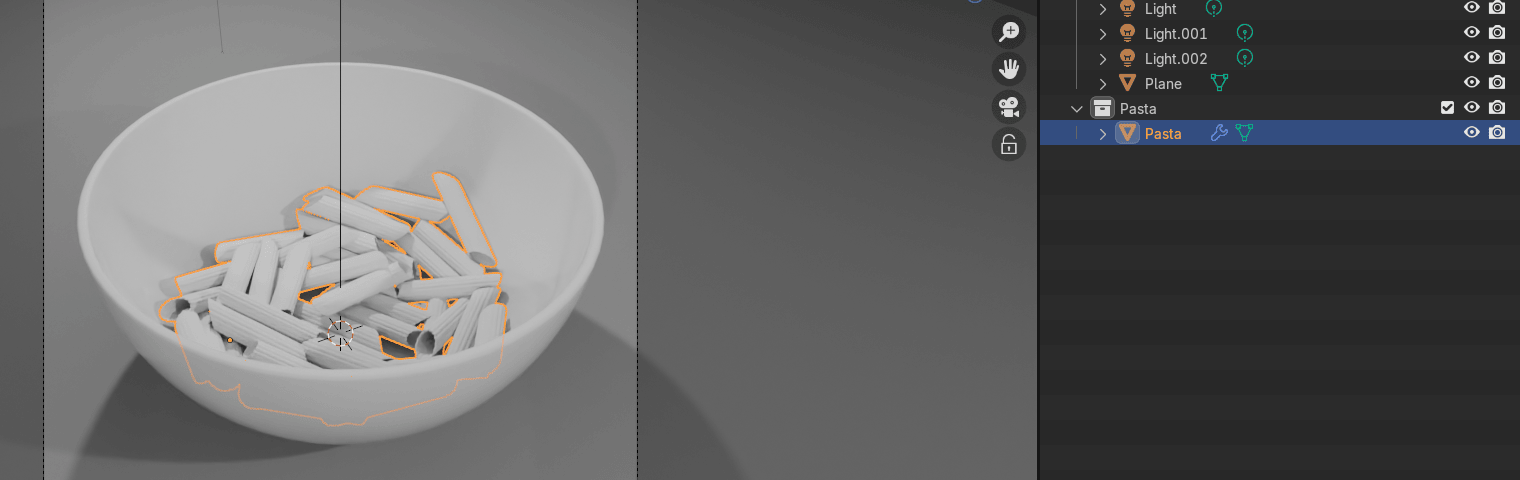
Select the pasta.
Click on the material. Click New. Rename it to the Pasta.
Beginners guide to Blender
Decrease roughness to around 0.2
Change the base color to something pasta-like.
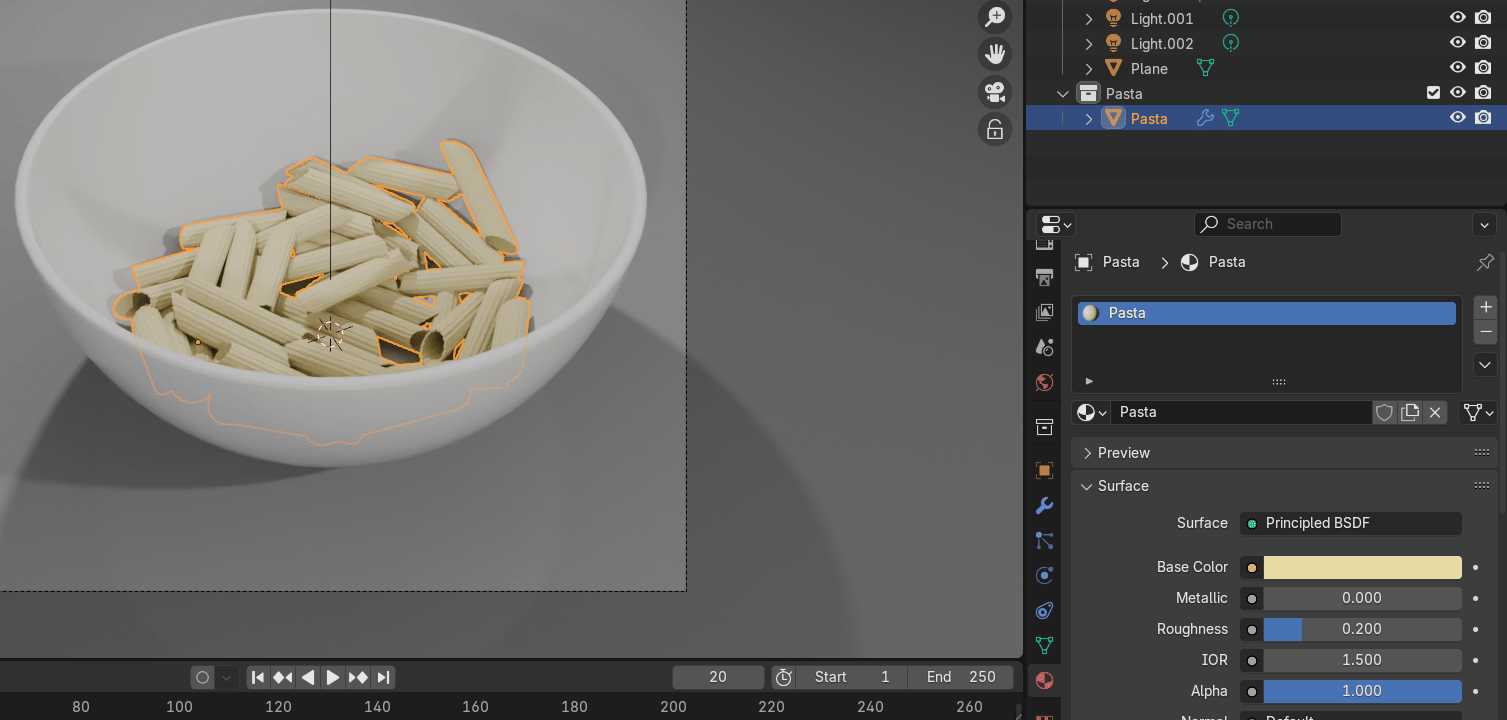
Click on transmission and add weight to around 0.1
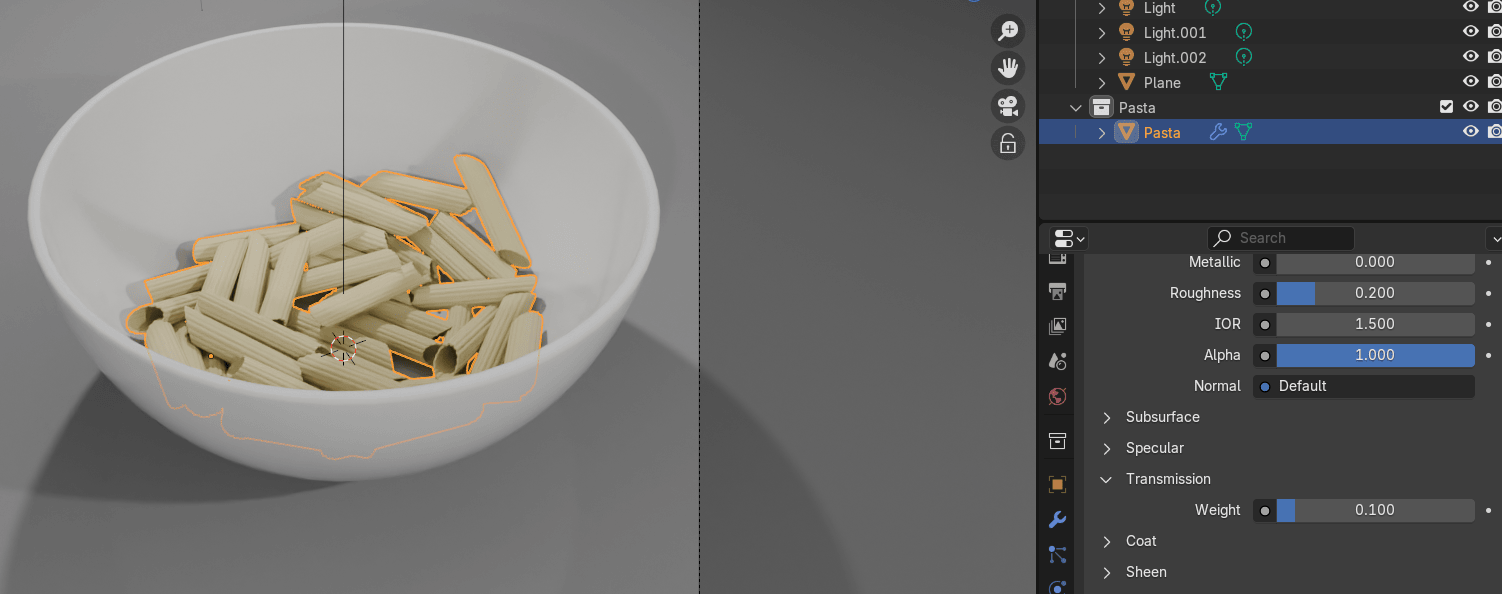
Click on subsurface and add weight to around 0.2
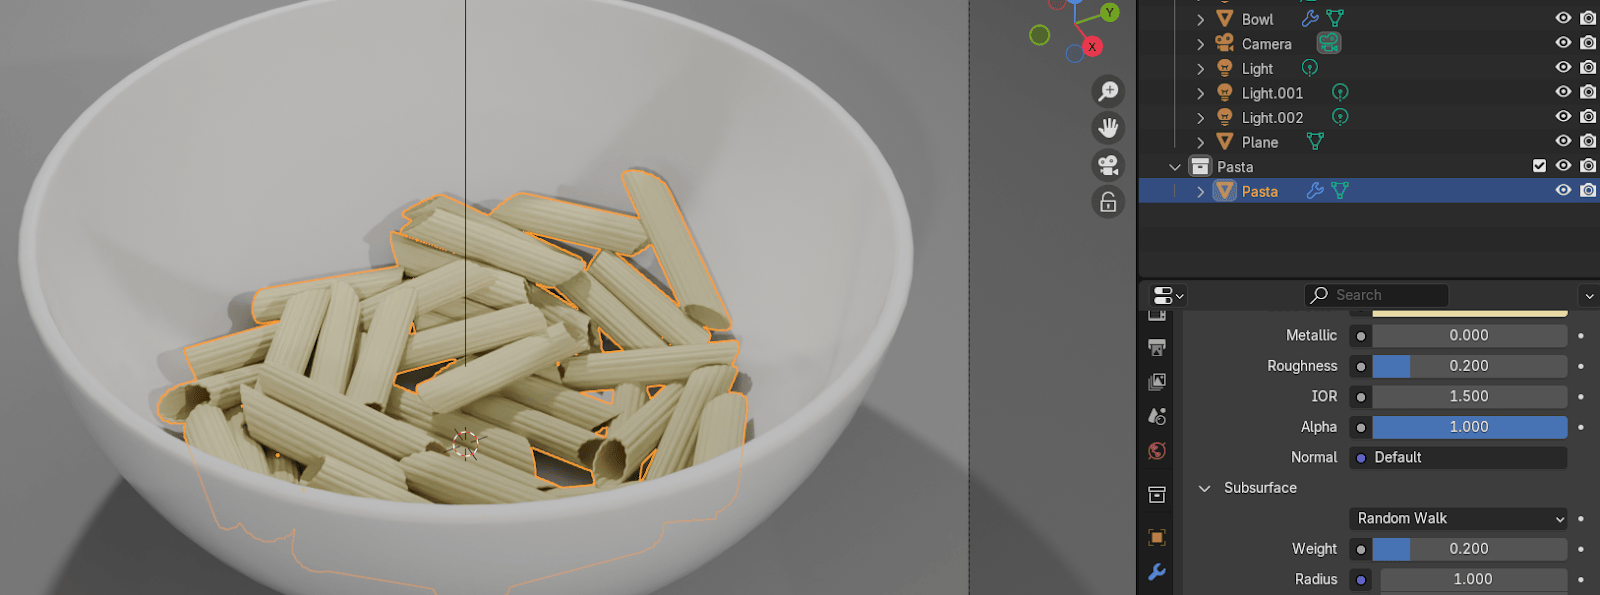
Beginners guide to Blender
Add a new collection and rename it to the seasonings.
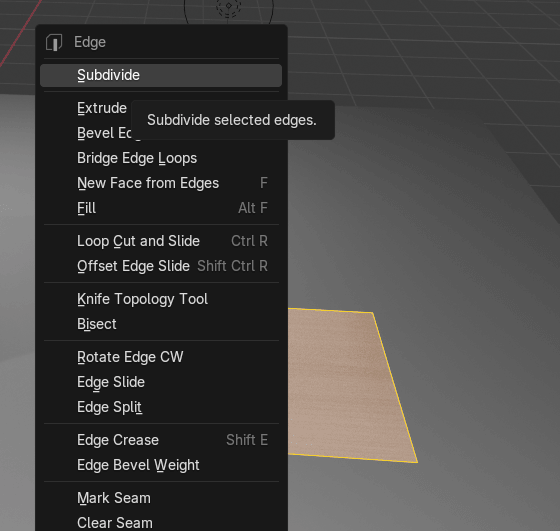
Add - mesh -plane and move it a bit to the side.

Switch to edit mode with “TAB”.
Click RMB and subdivide 2x.
Beginners guide to Blender
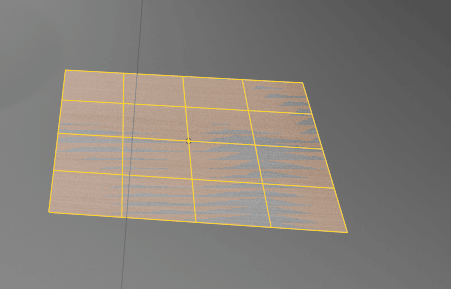
Click RMB and choose smooth vertices. If you don’t see that option switch first to selectingvertices with 1.
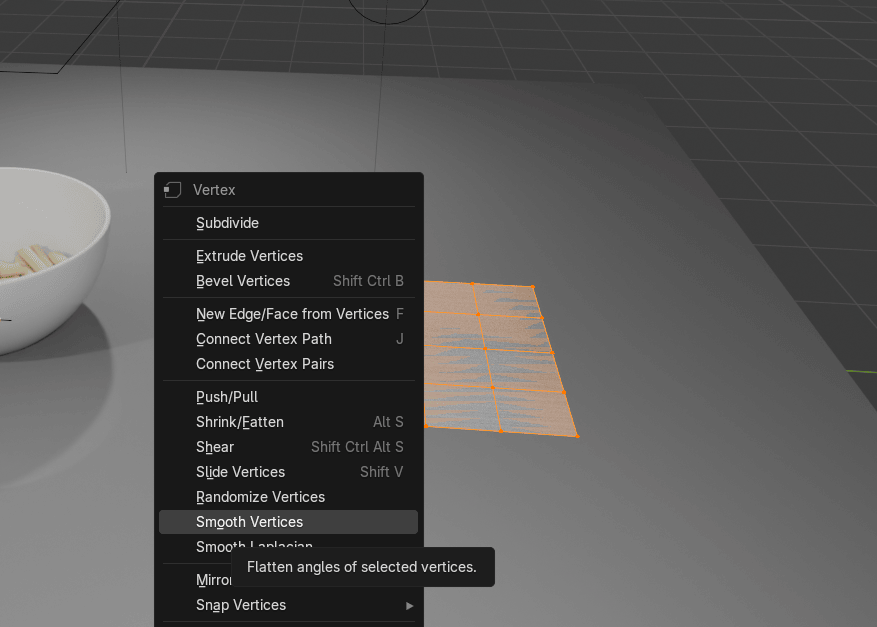
Beginners guide to Blender
Click on the smooth vertices part on the left and put smoothing to 1.

Choose this vertex
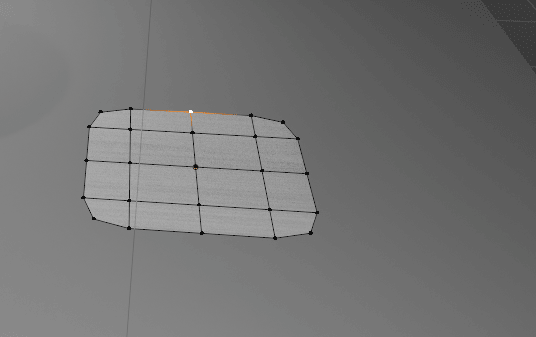
and turn on proportional editing with “O”.
Now move that vertex and other vertices with G along X and Y axis as you want until you aresatisfied with the look of your parsley.
Beginners guide to Blender
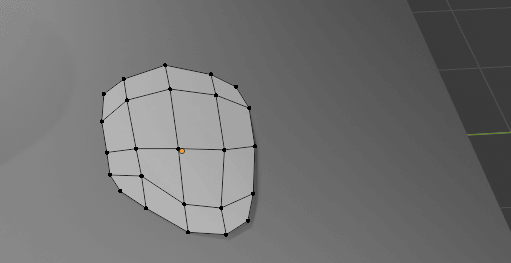
Switch to object mode with “TAB”.
Move it with up “G+Z”.
And adjust it more in the edit mode if necessary.
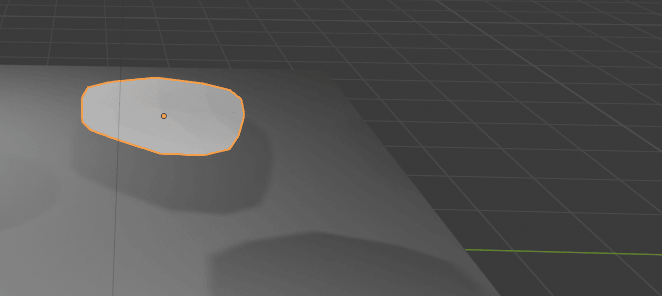
Switch to object mode and RMB and choose Shade Auto Smooth.
Beginners guide to Blender

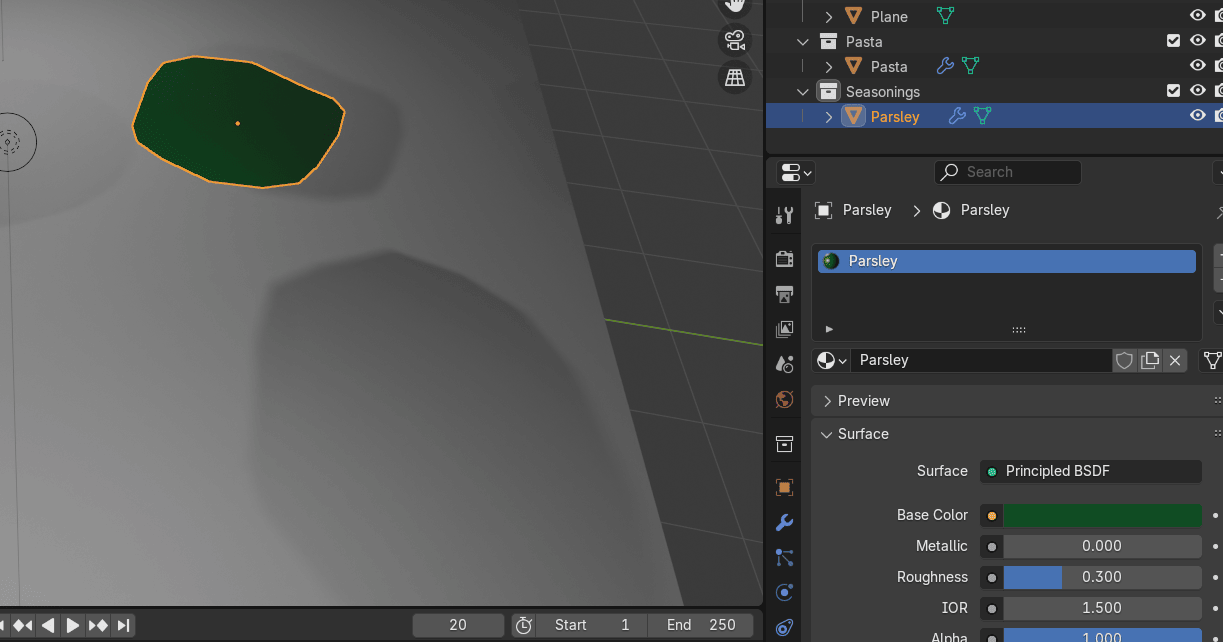
Rename it to “Parsley”.

Click on the material. Click New. Rename it to “Parsley”.
Change the color to something dark green to make it look more like parsley.
Change roughness to something around 0.3
Beginners guide to Blender
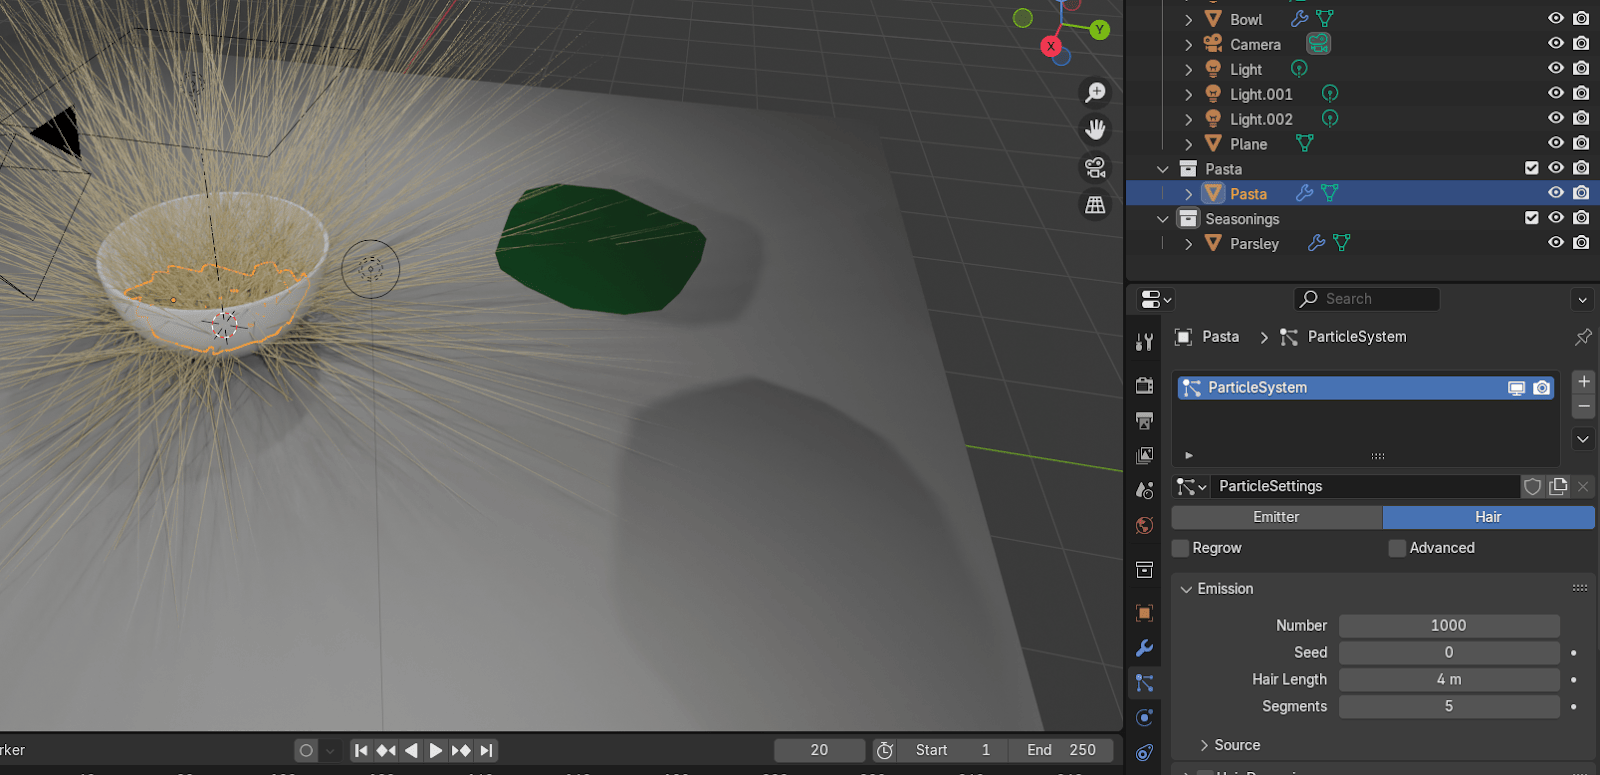
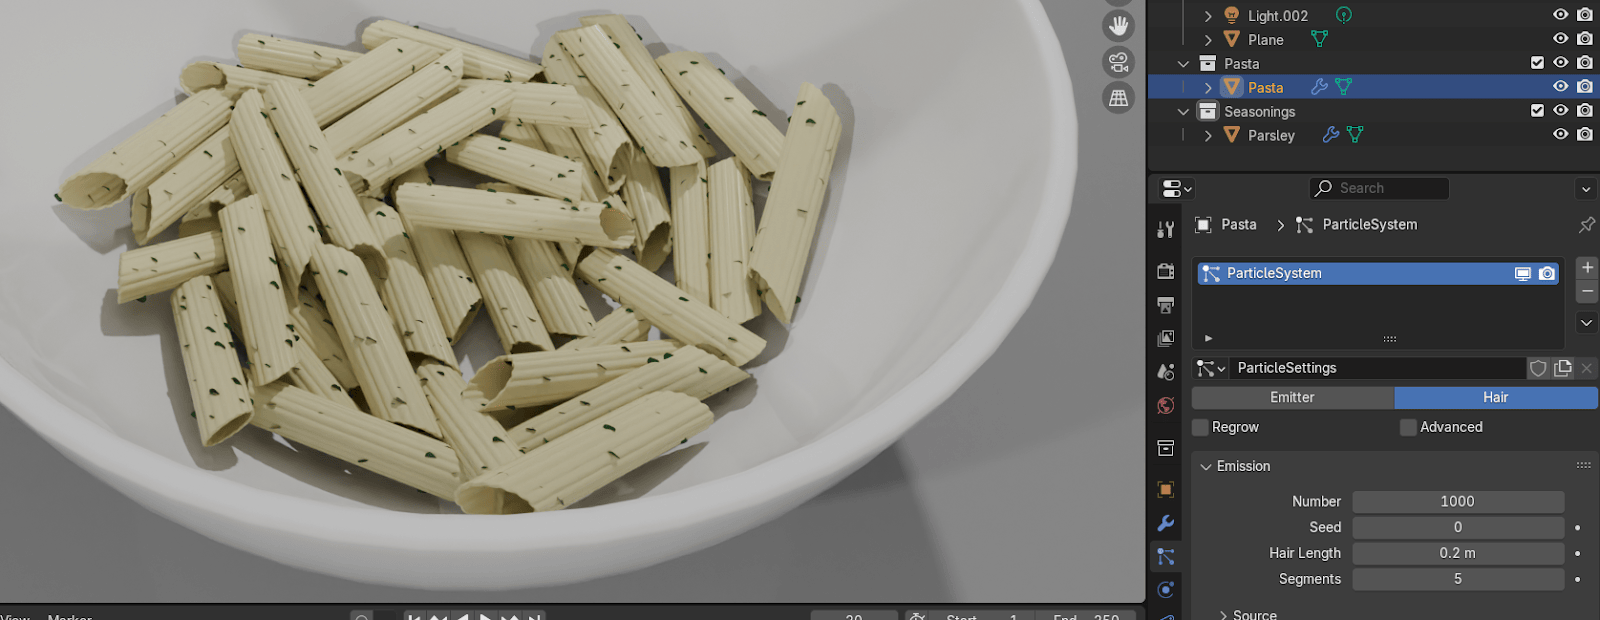
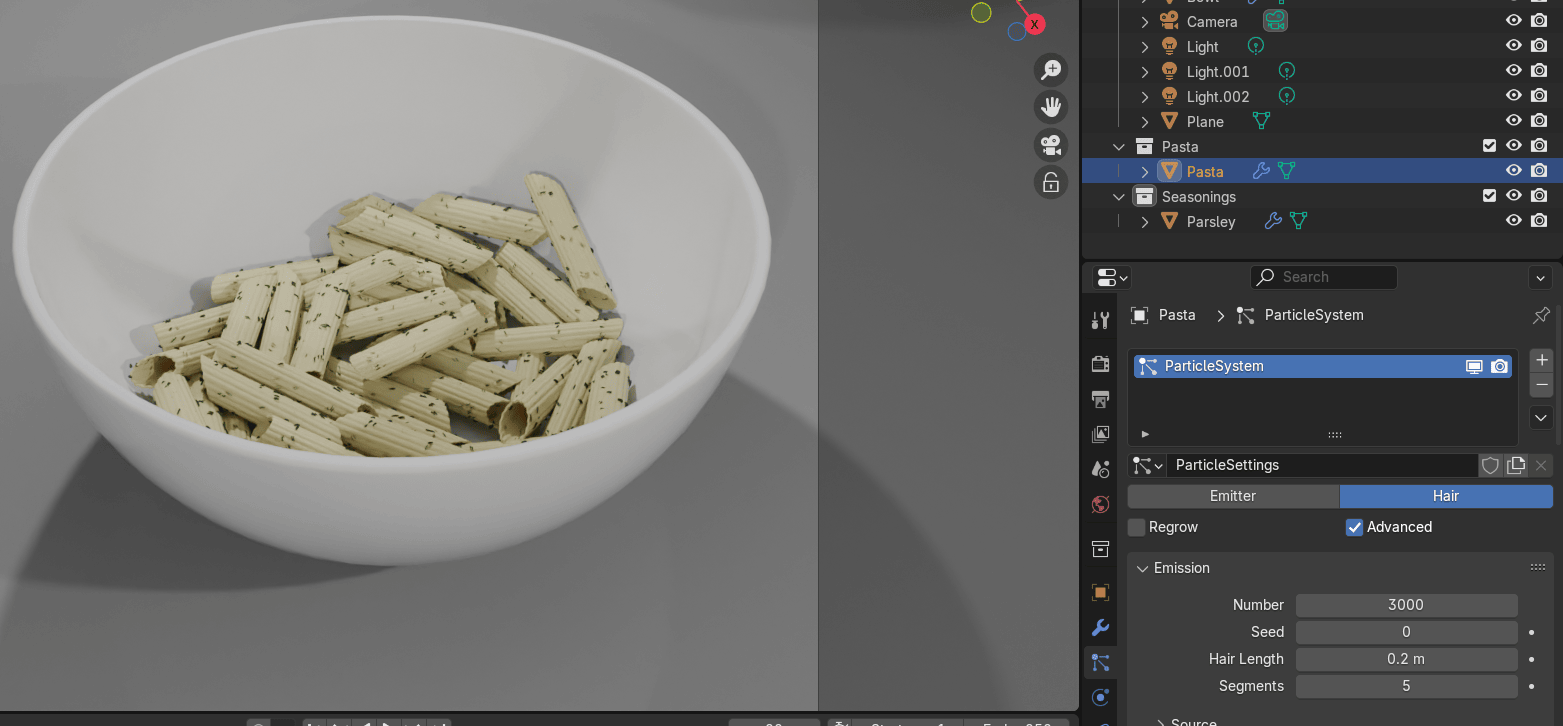
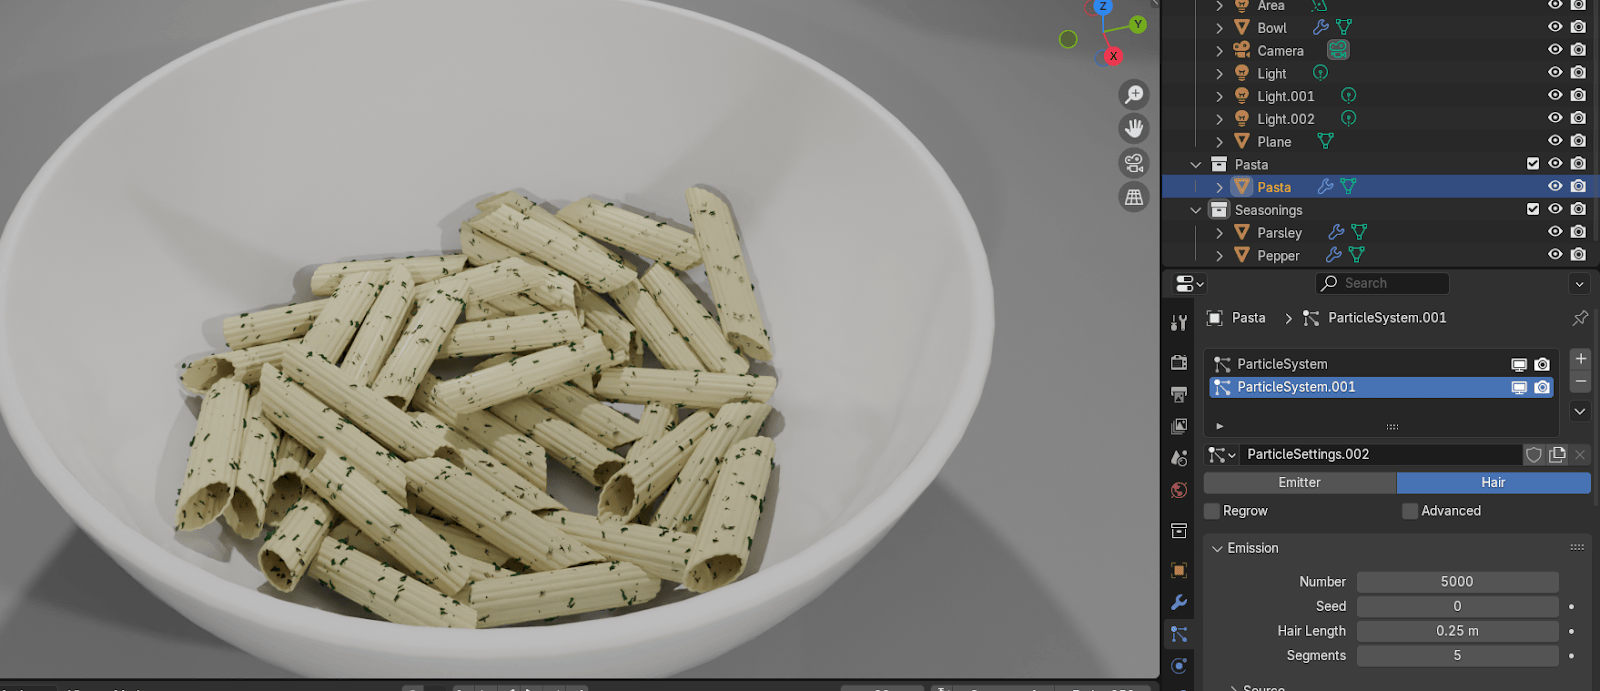
Select the pasta.
Go to particles. Click on + to add a new ParticleSystem.
Change from emitter to hair.
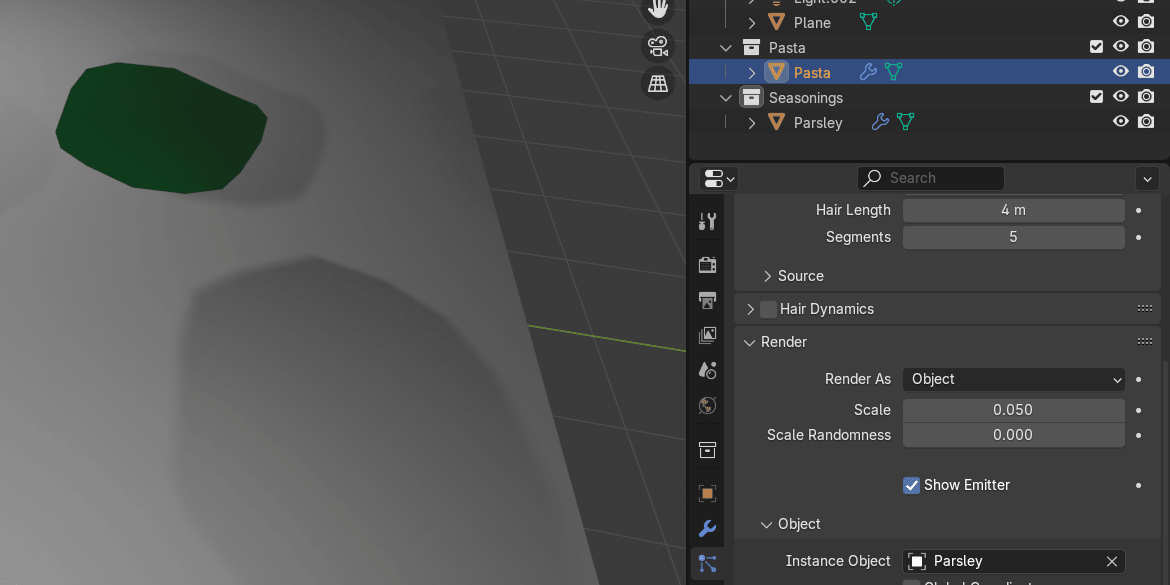
Choose render and switch to render as object because in this case particles will be renderedas an object (parsley).
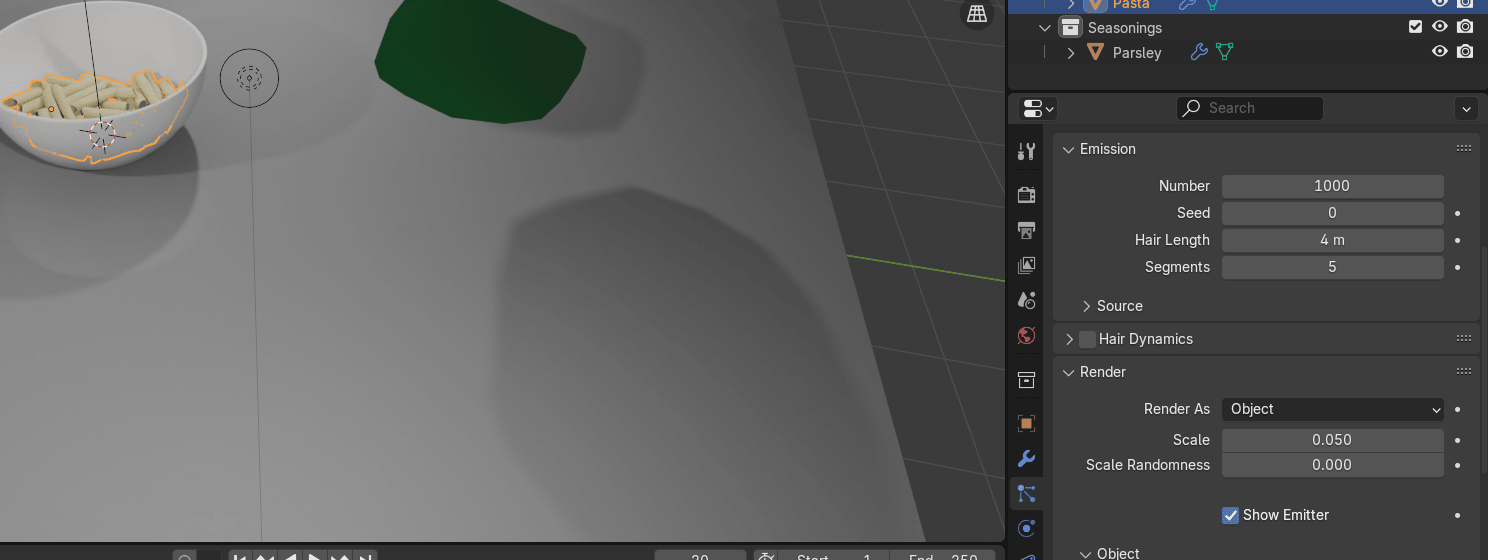
Pick parsley with a picker for an instance object to show it in place of particles.
Beginners guide to Blender
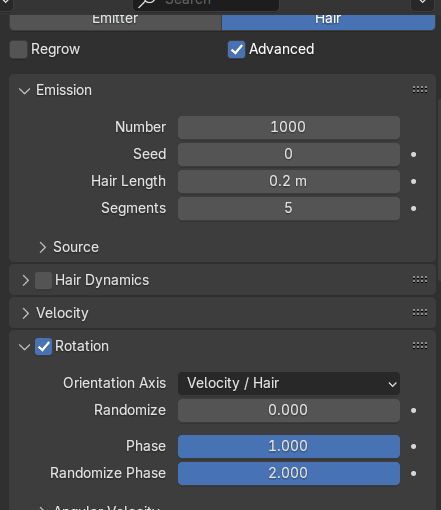
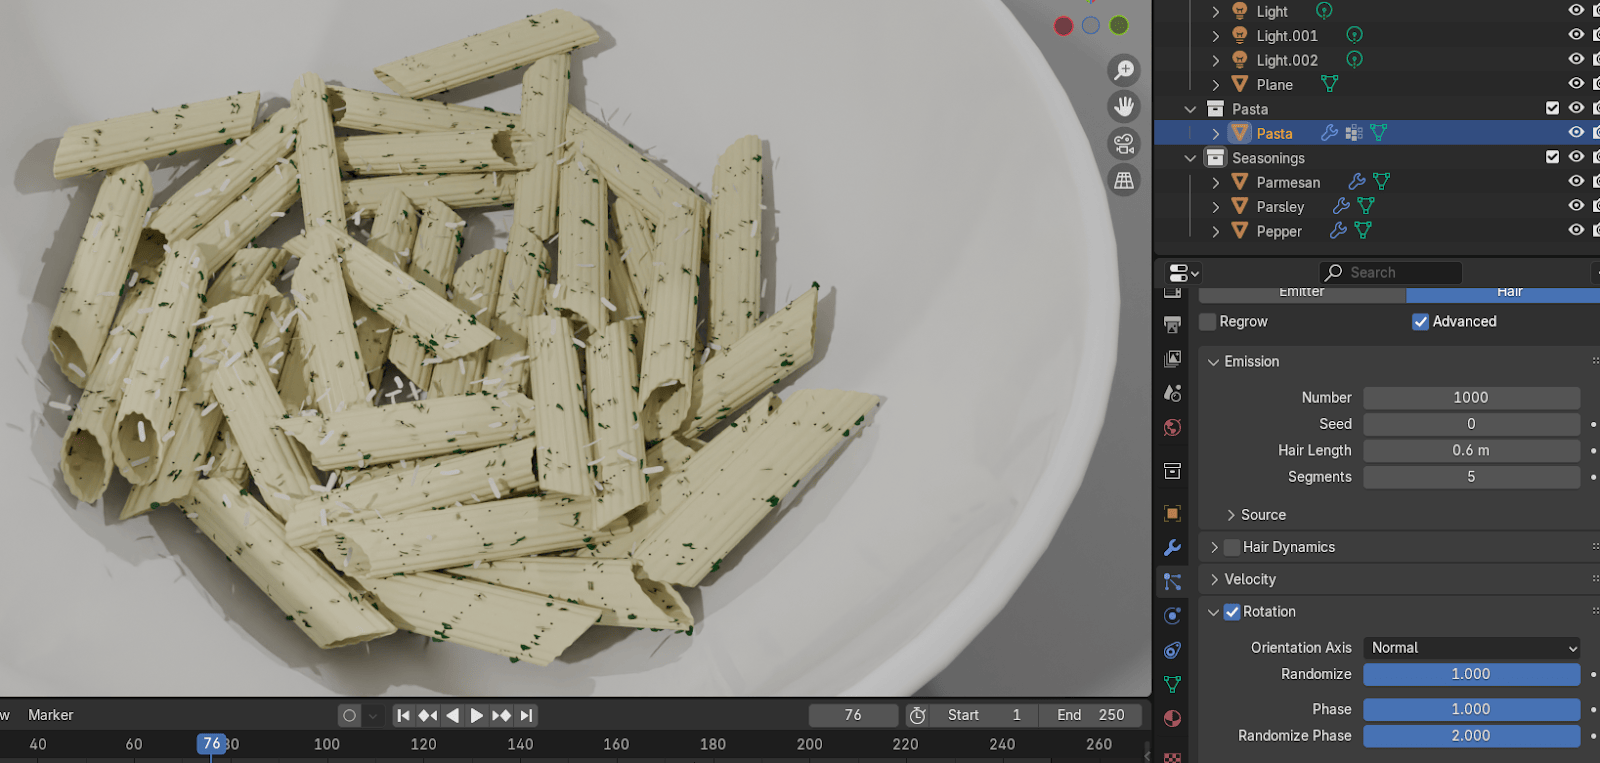
Change hair length to something around 0.2
Turn on advanced.
Turn on rotation.
Change phase to 1 (rotation around the chosen orientation axis) and randomize phase to 2(randomize rotation around the chosen orientation axis).
Beginners guide to Blender
Click on children.
Switch to simple.
Put the display amount to 2 and render amount to 2.
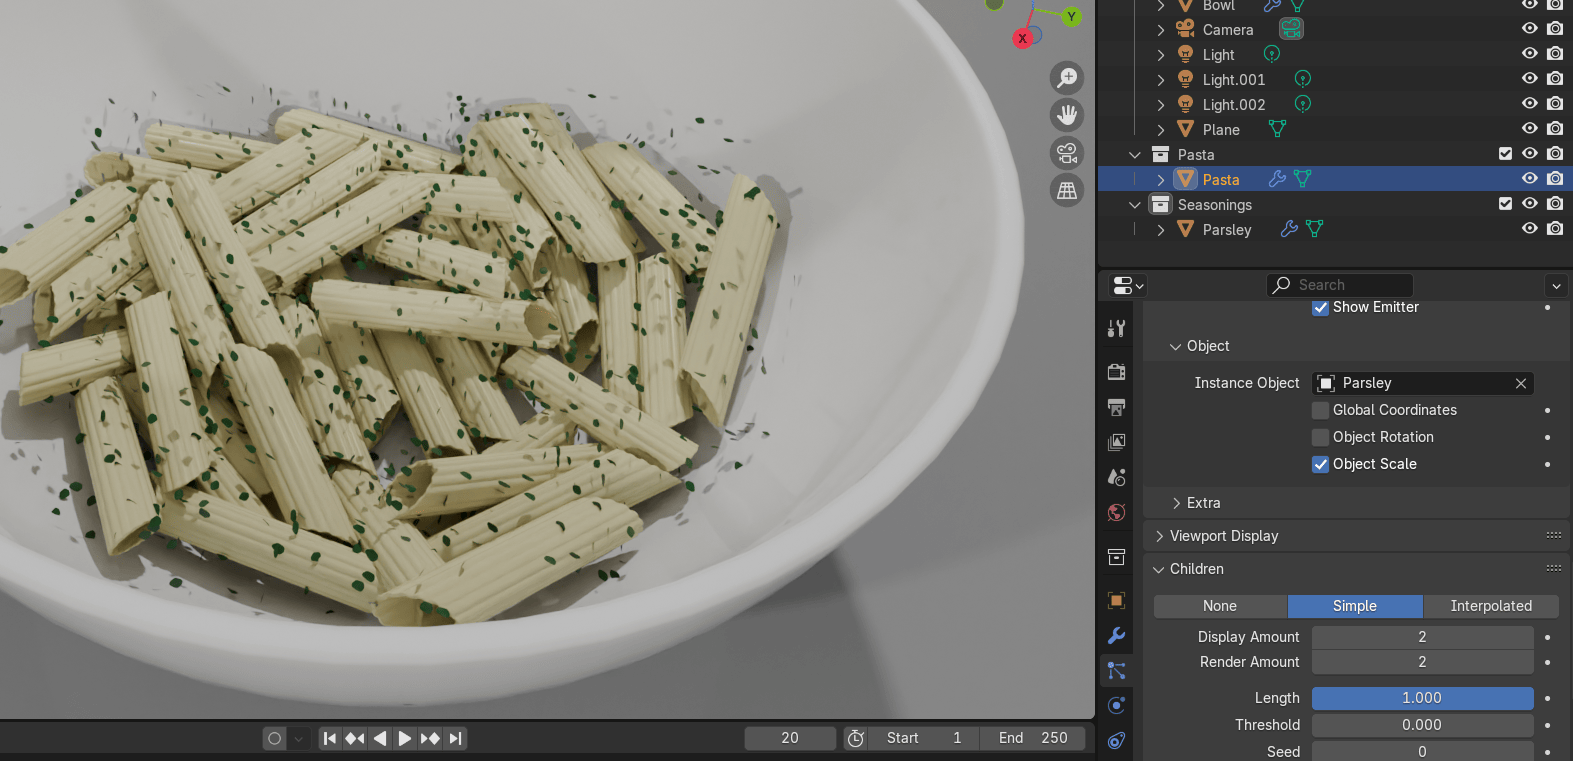
Change the length to somewhere around 0.7 and the radius to somewhere around 0.01
Beginners guide to Blender
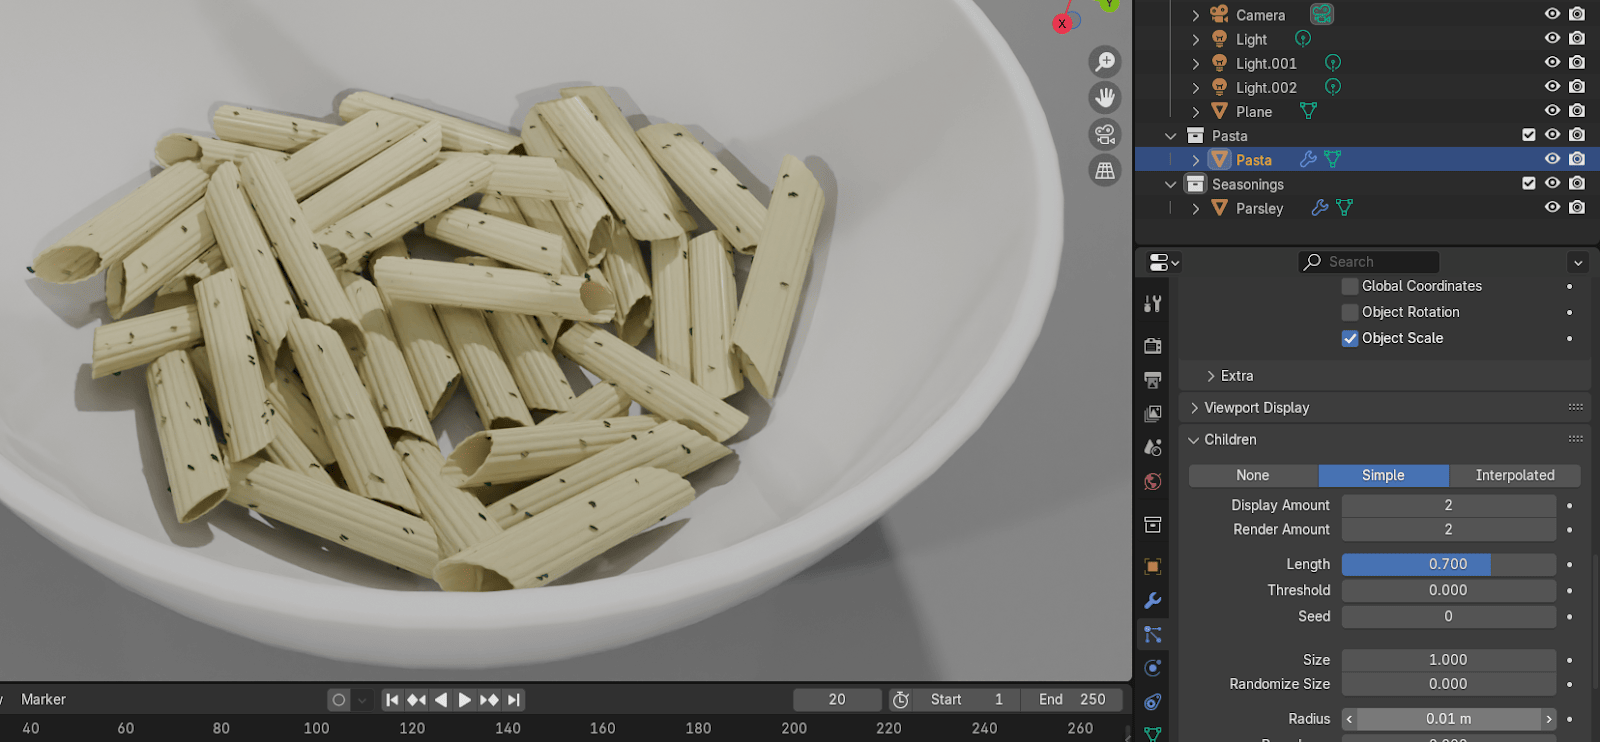
Click on the camera icon and see how all looks.
Increase the number of emission if you think it’s necessary.
Choose the Seasonings collection and go to add - mesh - cube.
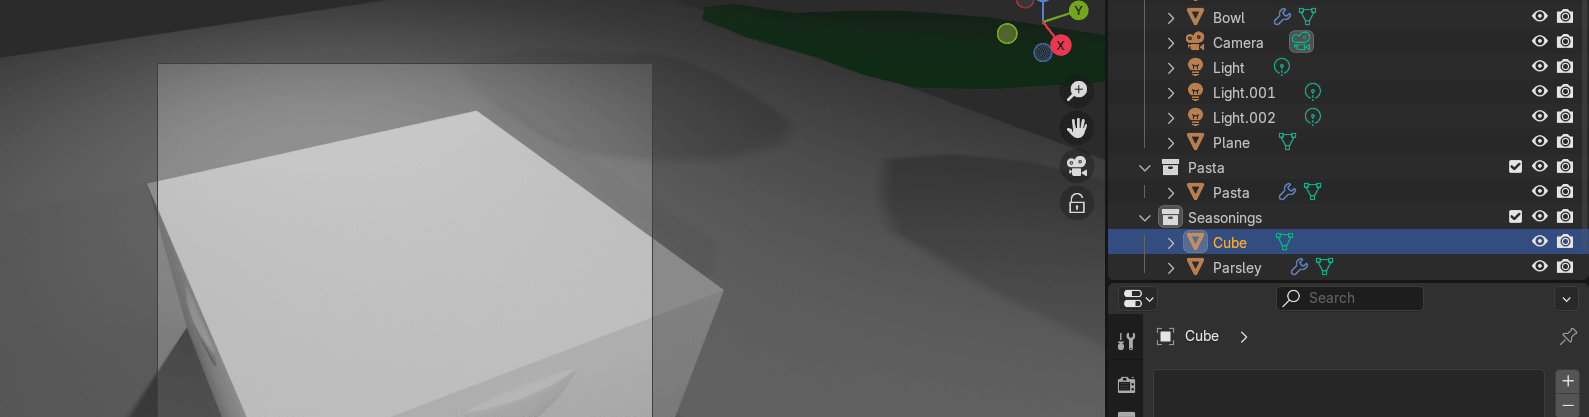
Select the cube and move it up with “G+Z” and to the side along one of the axes.
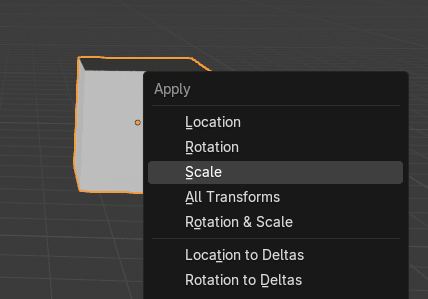
Scale it with “S”.
“CTRL+A” - apply scale.
Beginners guide to Blender
Switch to edit mode with “TAB”.
Click RMB and subdivide 2x.
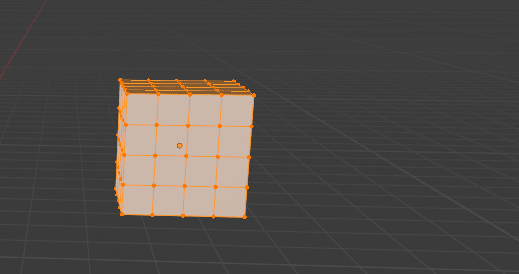
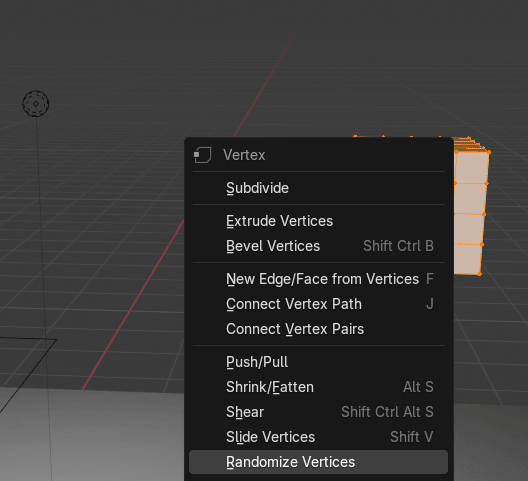
Click RMB and choose randomize vertices.
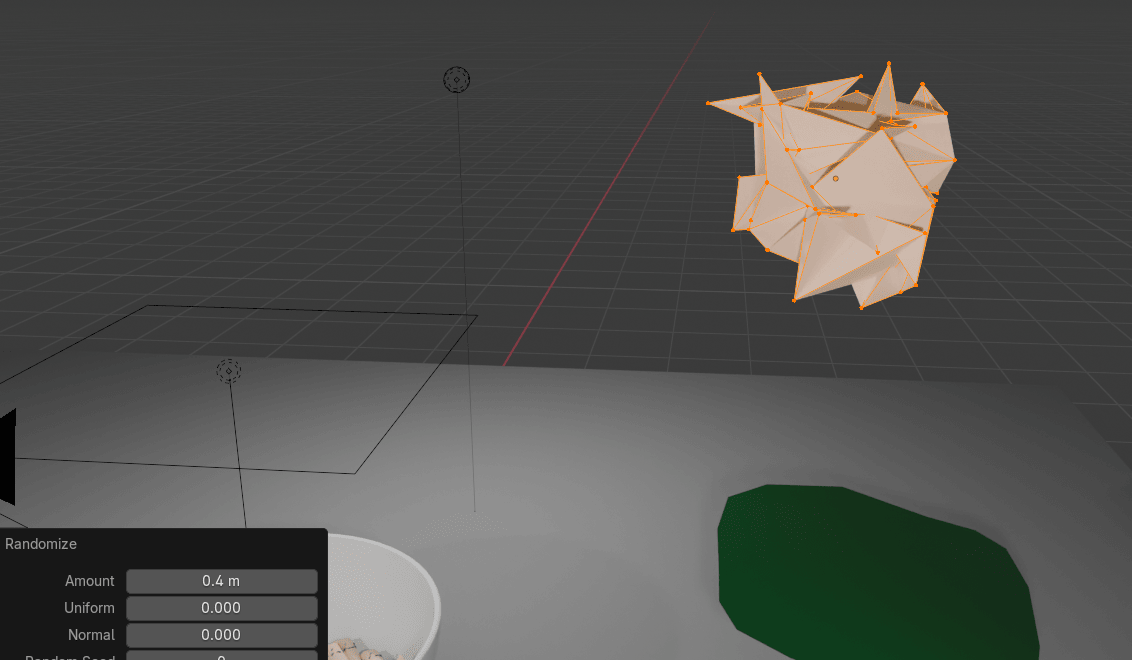
Beginners guide to Blender
Change amount to somewhere around 0.4
Click RMB and choose smooth vertices.
Change smoothing to somewhere around 0.6
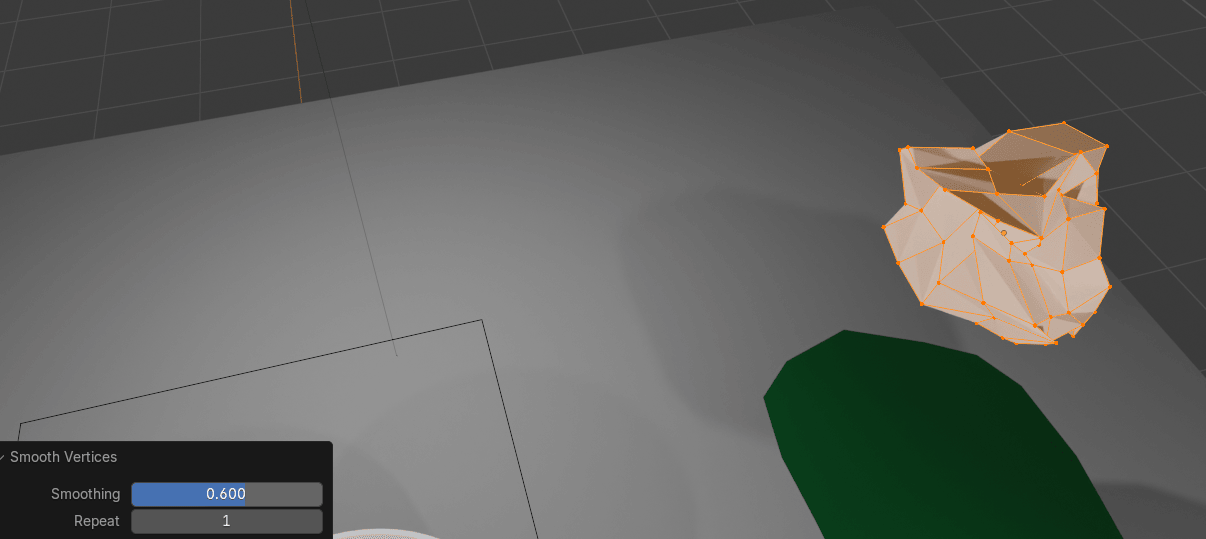
Beginners guide to Blender
Switch to object mode with “TAB”.
Click the RMB and choose Shade auto smooth.
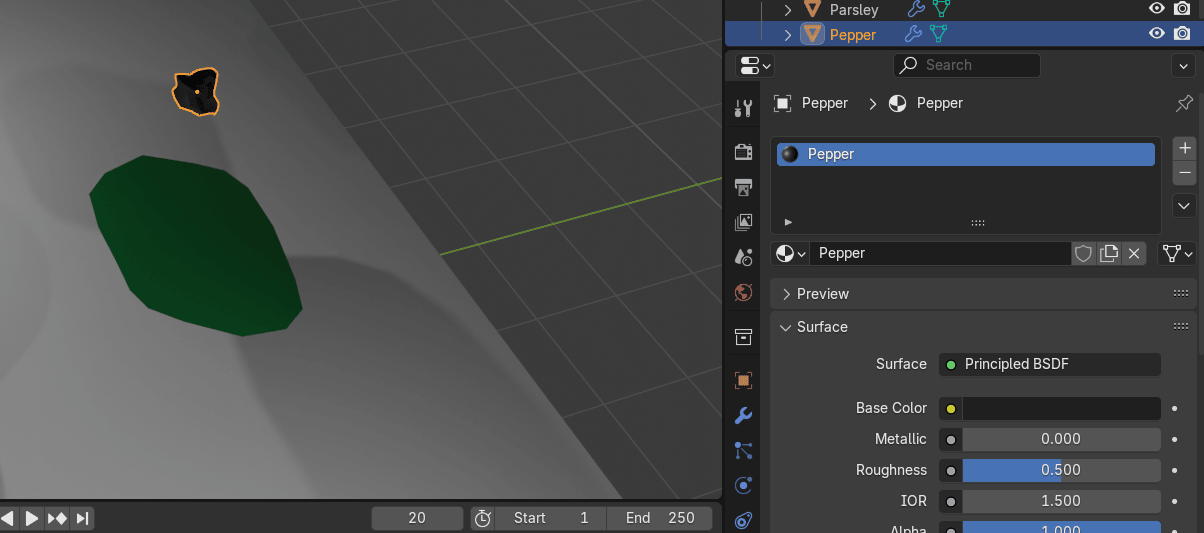
Rename the cube to Pepper.

Click on the material. Click New. Rename it to “Pepper”.
Change the base color to dark brown (something that looks like Pepper.)
Scale it with “S”.
“CTRL+A” - apply scale.
Select the pasta.
Go to particles. Click on + to add a new ParticleSystem.
Change from emitter to hair.
Choose render and switch to render as object.
Beginners guide to Blender
Pick pepper with a picker for an instance object.
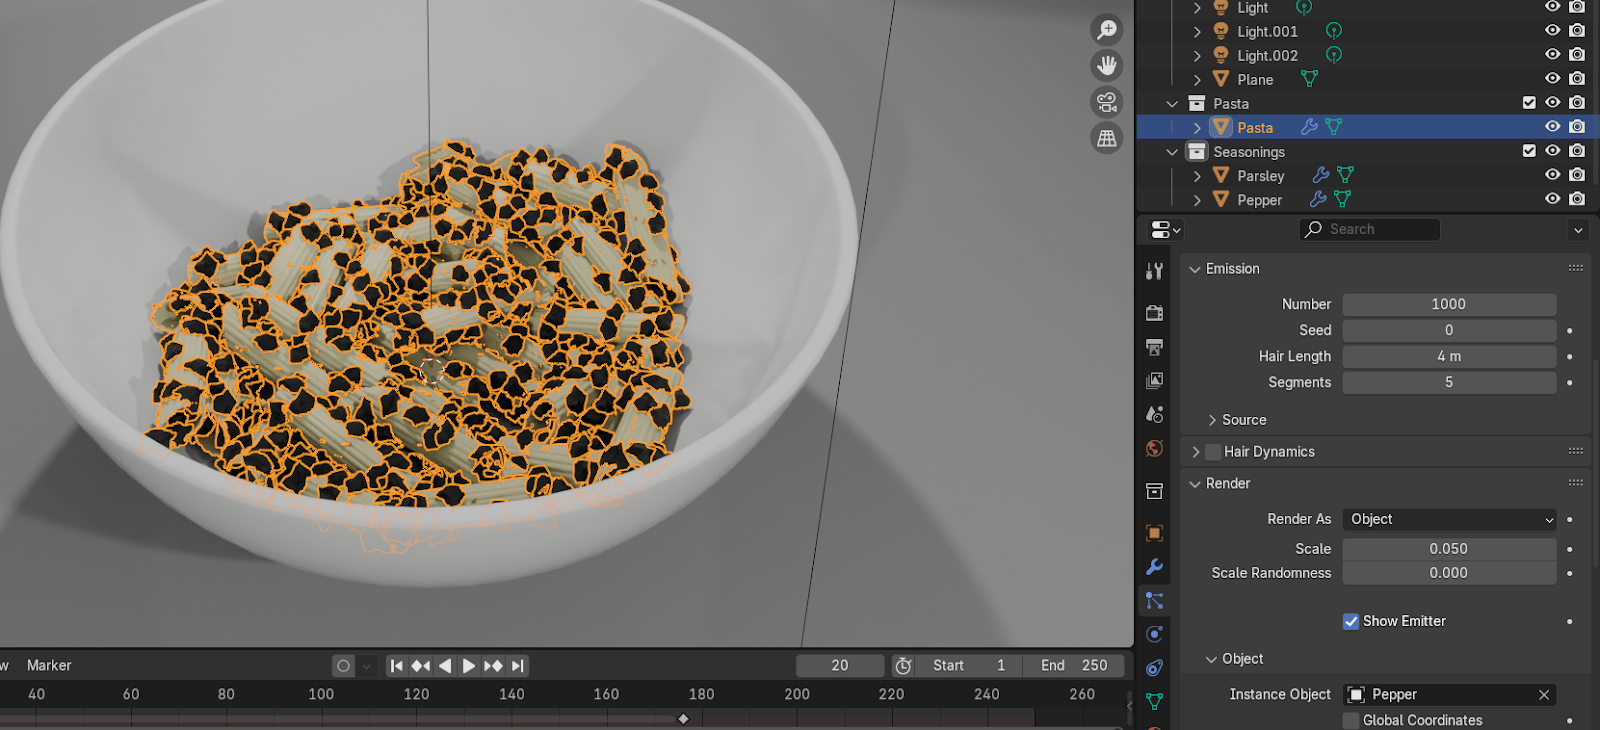
Change hair length to something around 0.2
Increase the number of particles if you think is necessary.
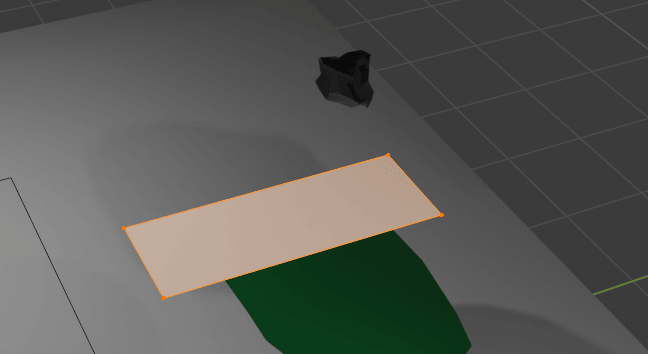
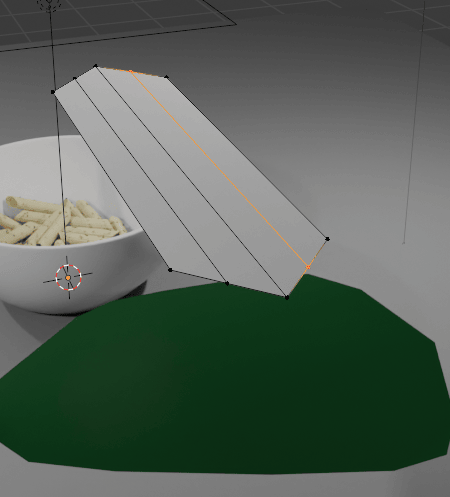
Add - mesh -plane.Move it up and a bit on the side.
Switch to edit mode.
Scale it with “S+Y” and “S+X”.
Beginners guide to Blender
Turn off proportional editing with “O”.
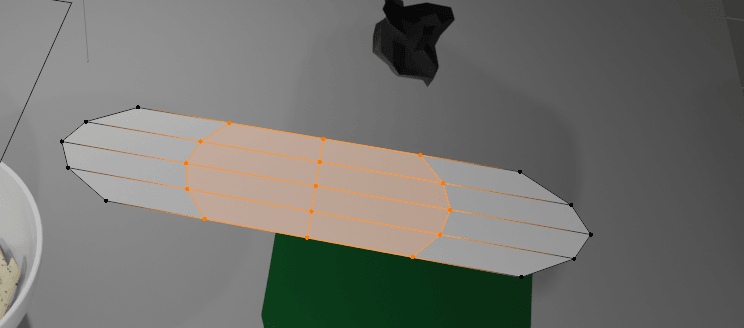
Add one loop cut with “CTRL+R”.
Scale it with “S+Y”.
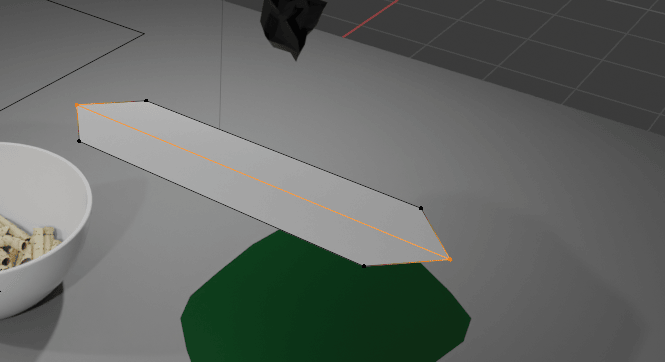
Add two more loops with “CTRL+R”.
Beginners guide to Blender
Select them both and scale them with “S+Y”.

Add three more loops, select the middle loop, turn on the proportional editing,
and move them down with “G+Z” as shown.
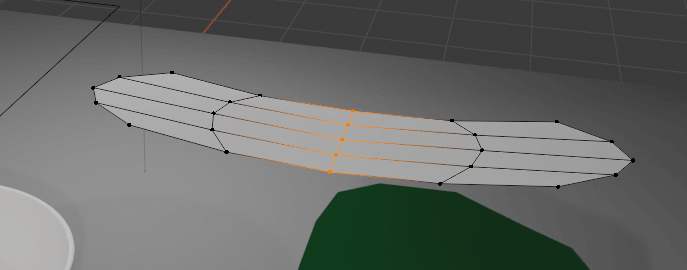
Switch to object mode.
Scale it with “S”.
“CTRL+A” - apply scale.
Beginners guide to Blender
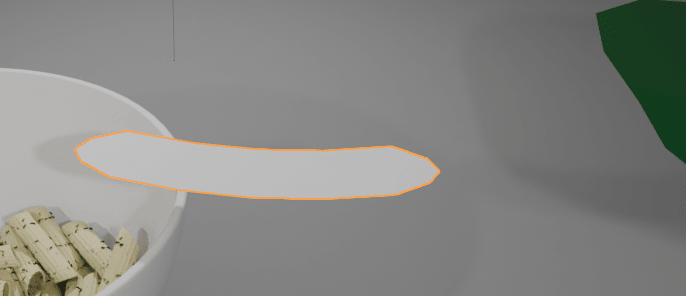
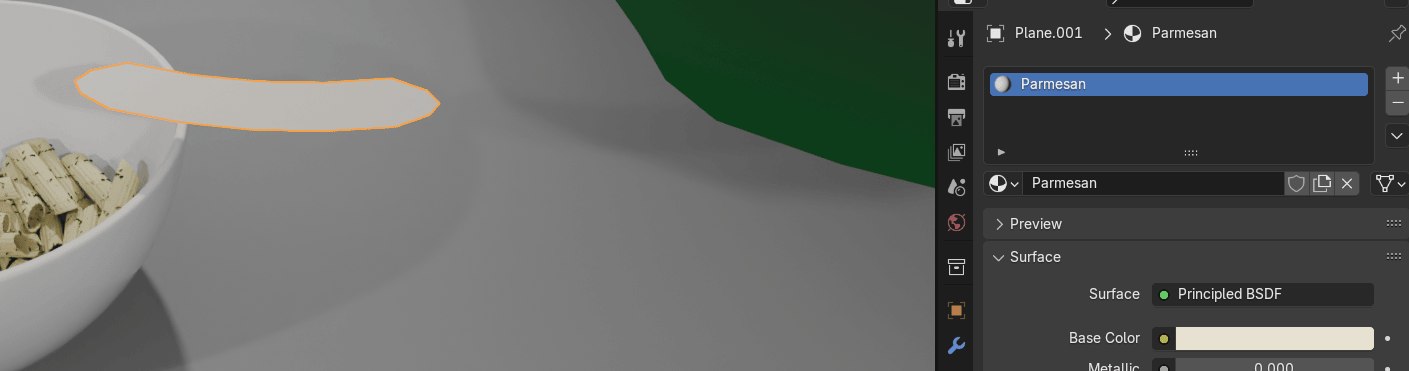
Click on the material. Click New.
Change the base color to something that looks like Parmesan cheese.
Rename the object and material to “Parmesan”.
Select the pasta.
Go to particles. Click on + to add a new ParticleSystem.
Turn off the first two ParticleSystems in real time for the sake of your computer.
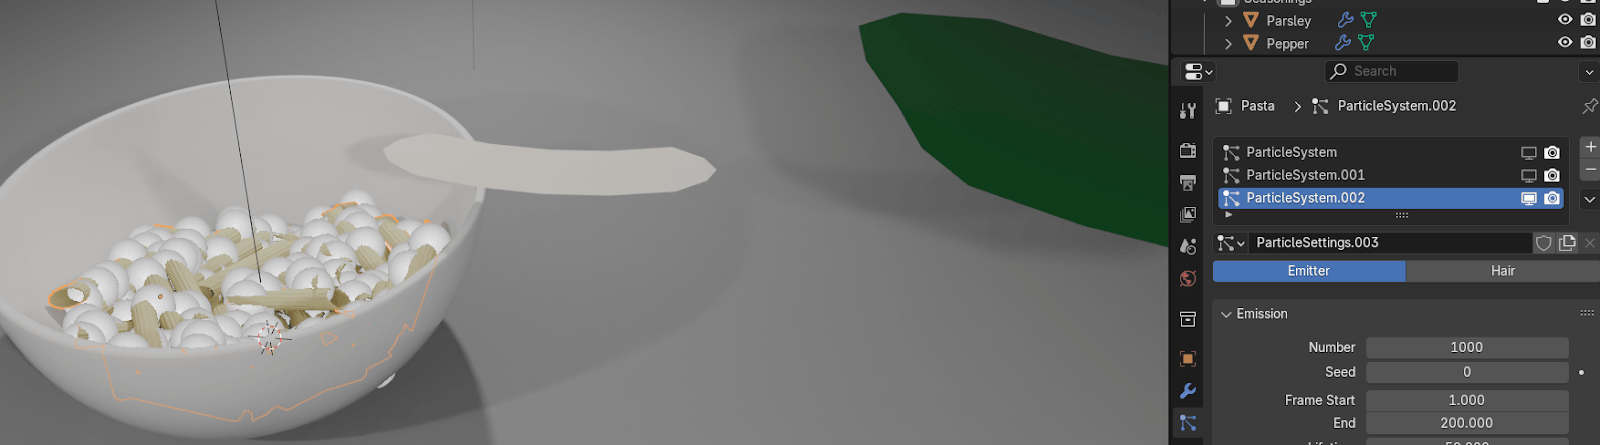
Beginners guide to Blender
Choose render and switch to render as object.
Change from emitter to hair.
Pick Parmesan for an instance object
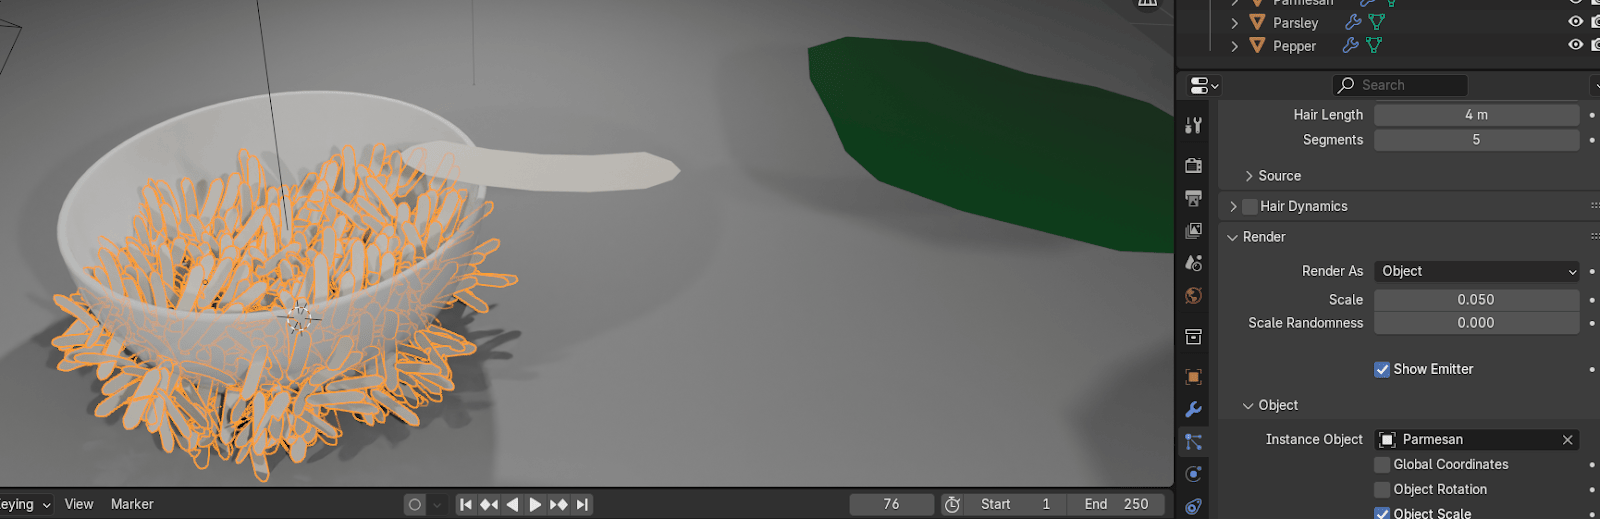
Change hair length to something around 0.6
Turn on advanced.
Turn on rotation.
Change phase to 1 and randomize phase to 2.
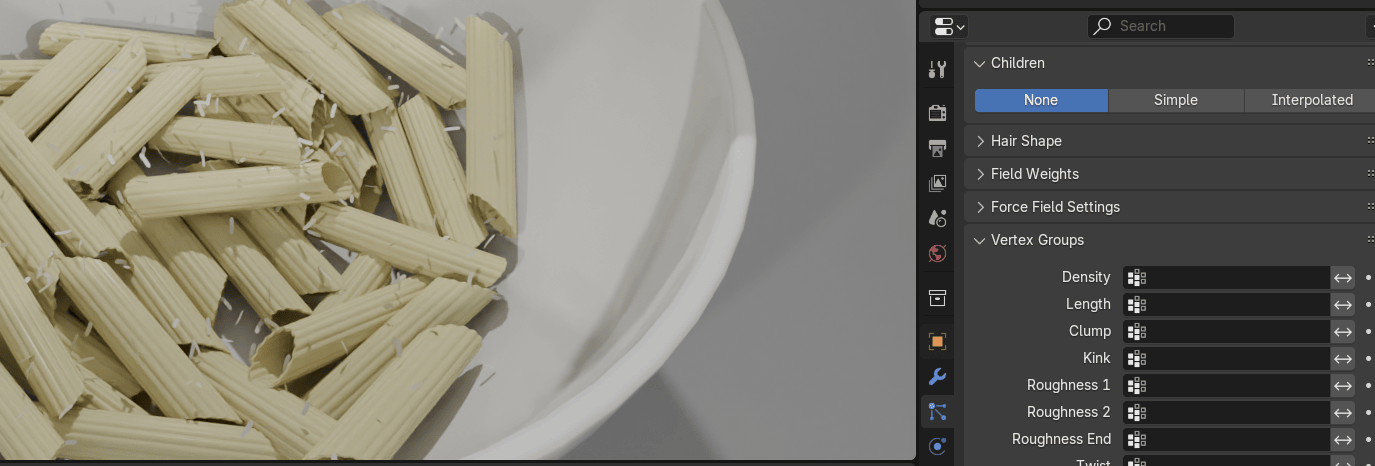
Click on vertex groups.
Beginners guide to Blender
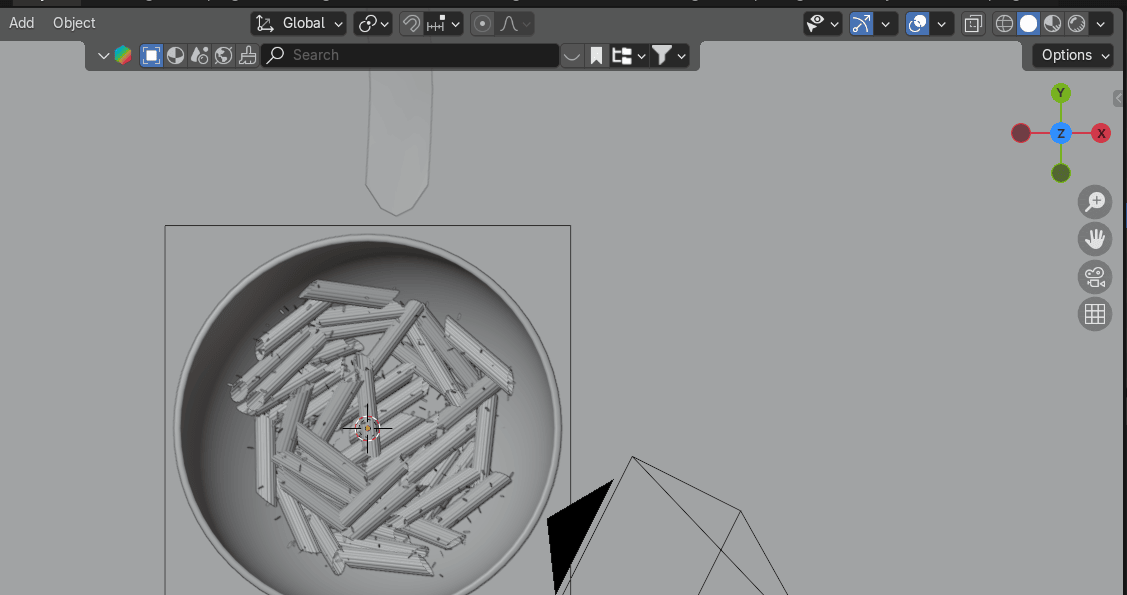
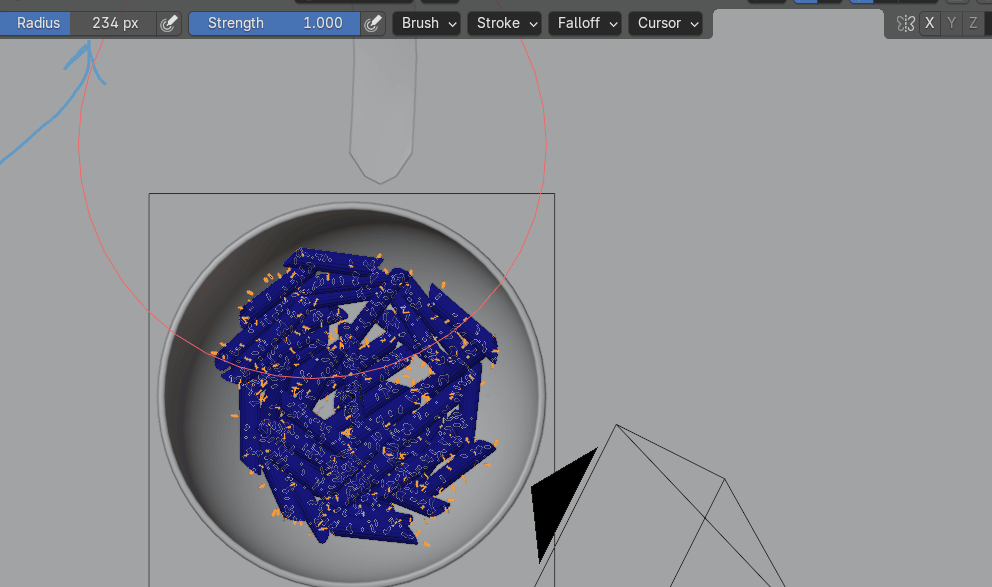
Change the view to the top orthographic with 7 on the numpad.
Switch to solid mode. Select the pasta.
Beginners guide to Blender
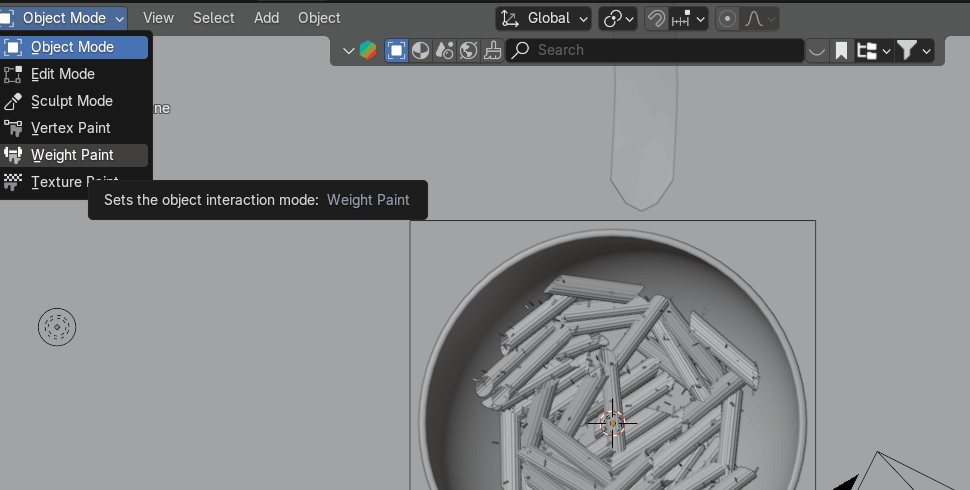
Go to weight paint.
Go to Data
Click + on vertex groups 2x.
Beginners guide to Blender
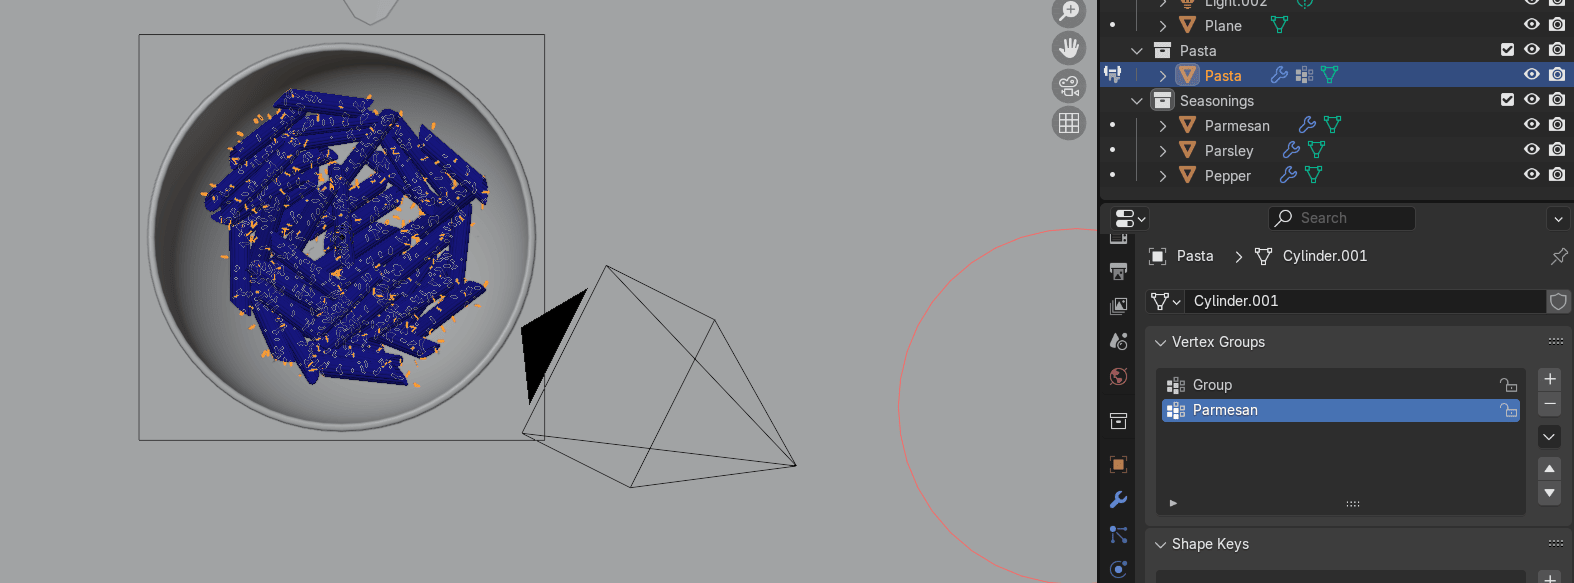
When you make a vertex a member of a vertex group, you cancontrol how much that vertexbelongs to the group by giving it a weight value.
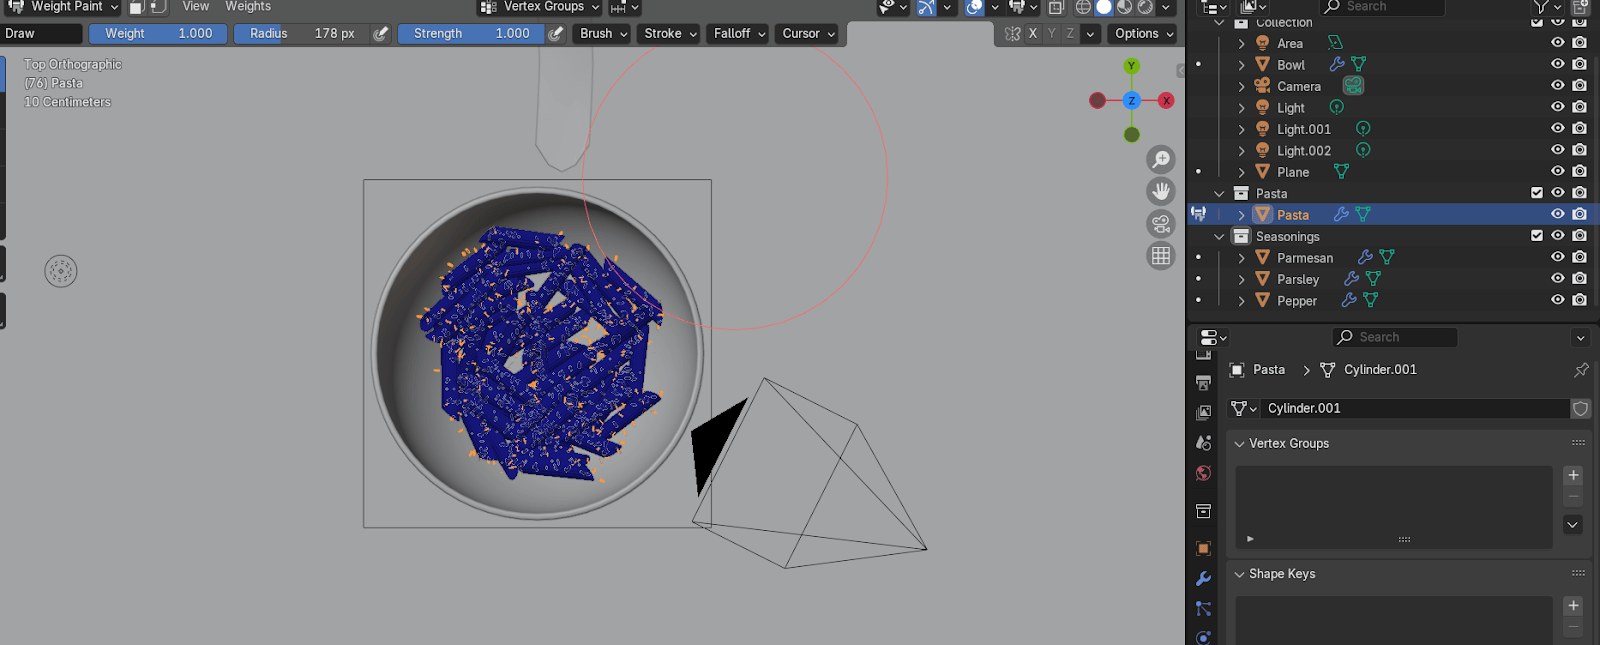
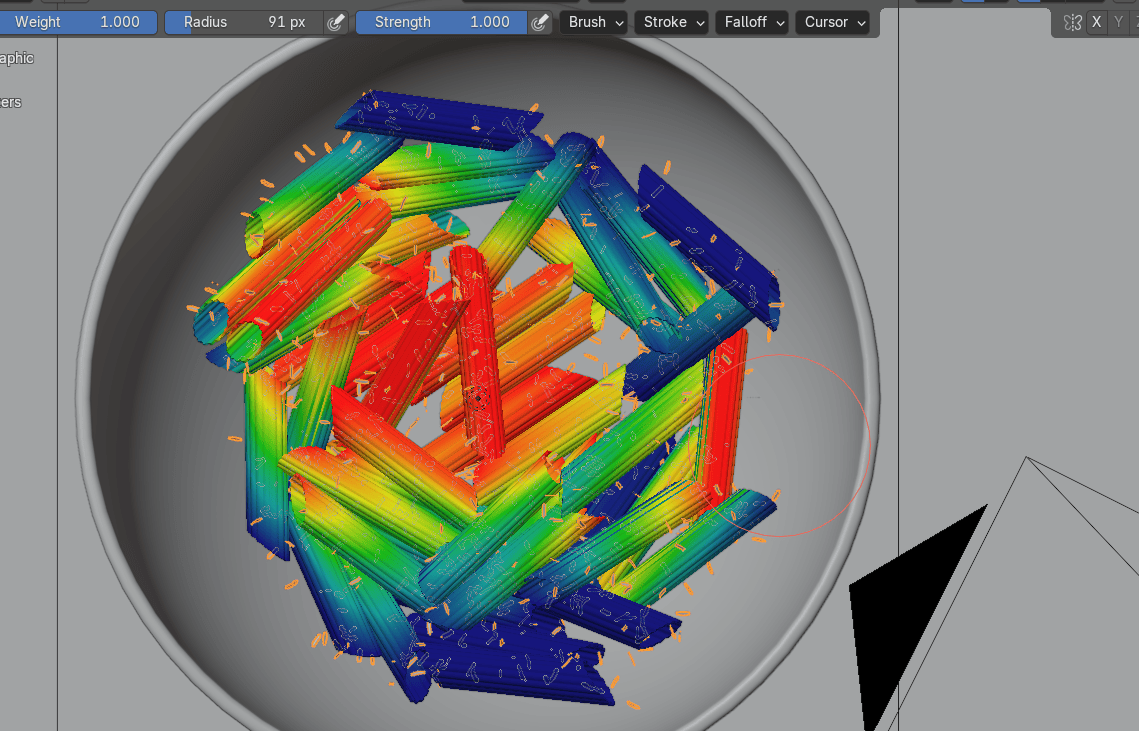
Rename the second vertex group to Parmesan.
Increase the radius and now color where you want to have parmesan (red means moreparmesan, blue means less).
Beginners guide to Blender
Switch to object mode.
Switch to rendered mode.
Go to particles - vertex groups and choose Parmesan for Density.
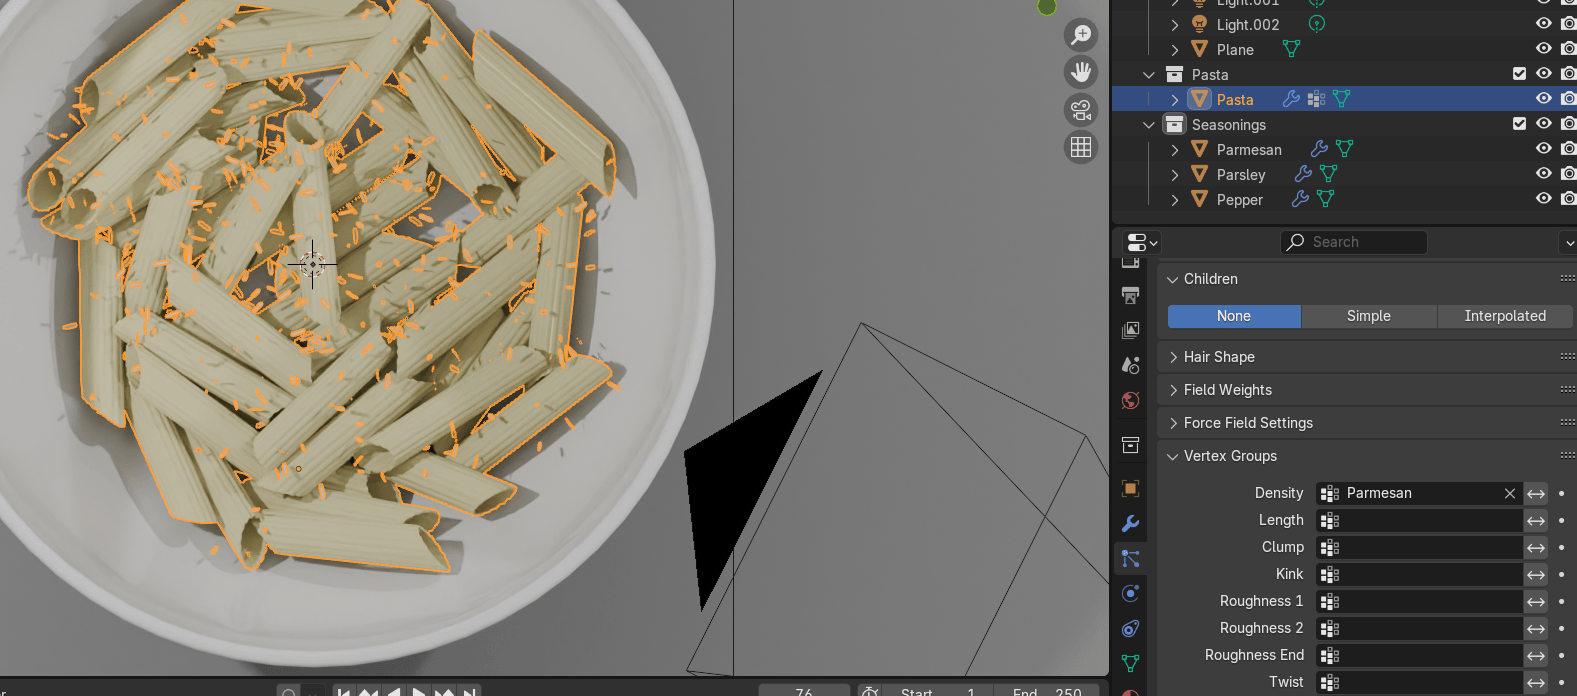
Adjust the number of particles if it’s needed.
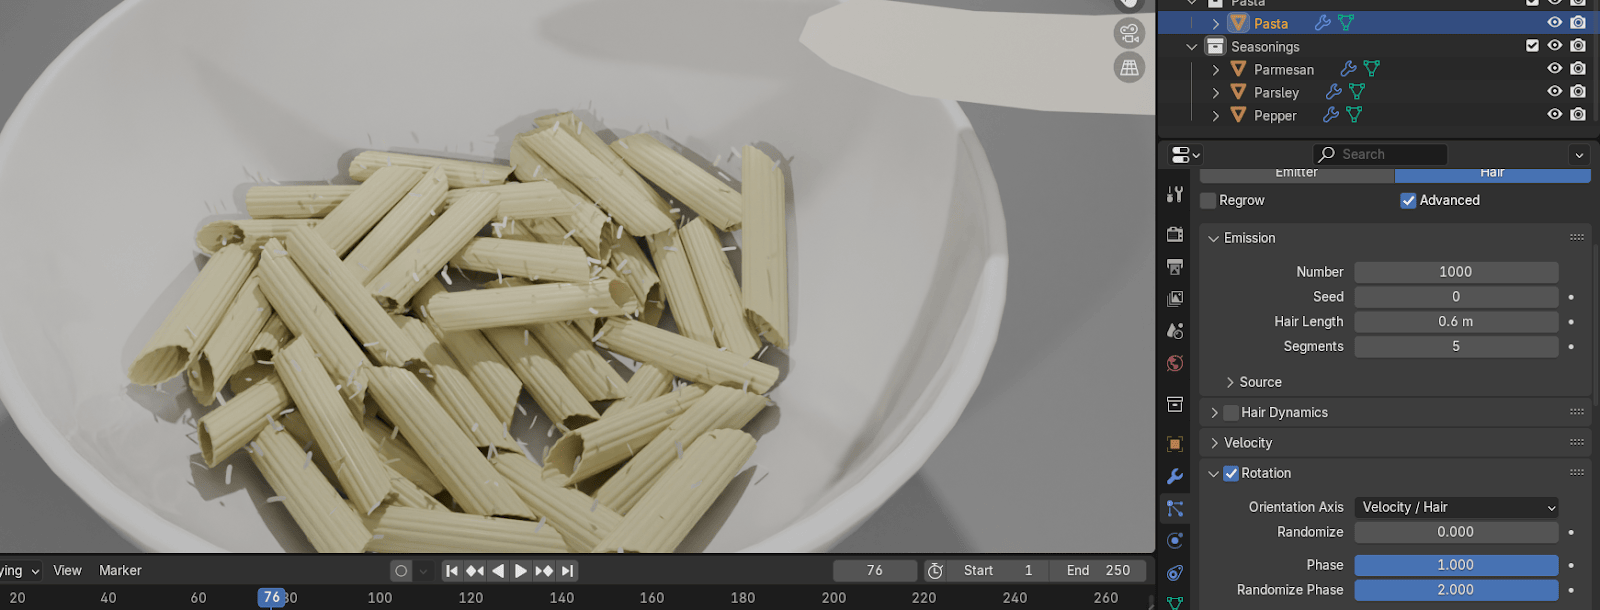
Beginners guide to Blender
Turn on all ParticleSystems so you can see how everything looks.
Change the orientation axis to normal.
Go to rotation and put randomize to 1.
If you think it’s necessary play around a bit with hair length.
Change max samples of render to 512 and if you are satisfied click Render image.
One more thing before the end. Maybe you realized that everything bow and pasta aren’tregular size but for example the bowl is over 2m.
It is because physics in Blender works that way. The bigger objects are the more accuratephysics is. In the end, before rendering when you are done with everything, you can scale itto the regular size.
Also, those big parsley, cheese and pepper that you are using only as an instance objectshould be hidden on render or just you can move it somewhere under the plane so they won’tbe in camera focus.
That is it! I hope you enjoyed learning with me. This was a long chapter and I gave my bestto explain all this in the easiest way.
If you want to support me and this Guide, feel free to follow me on social media, subscribe tomy YouTube channel, buy some models from my Blender Market page or just rate this guide.Whatever you do, it will mean a lot to me.
Also, thank you all for 1000 subscribers on YouTube. We are now near 1050 and I amgrateful to each one of you for commenting, liking, watching and subscribing.
Don’t forget to join to Discord channel and ask questions directly about Blender or just shareyour progress and promote yourself.