Chapter 21a: Texturing a book
Place the cursor on the upper side of the screen as shown, and when you see plus,
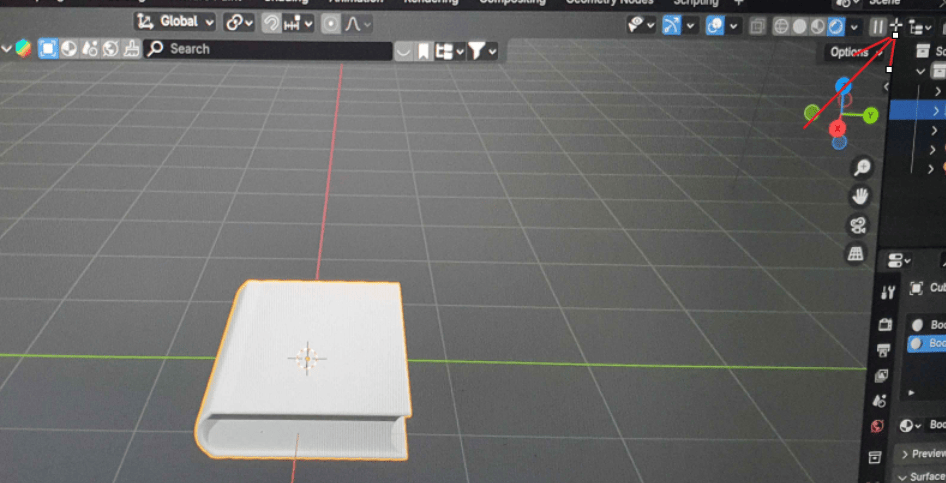
just pull it down to the left while holding the left mouse click.
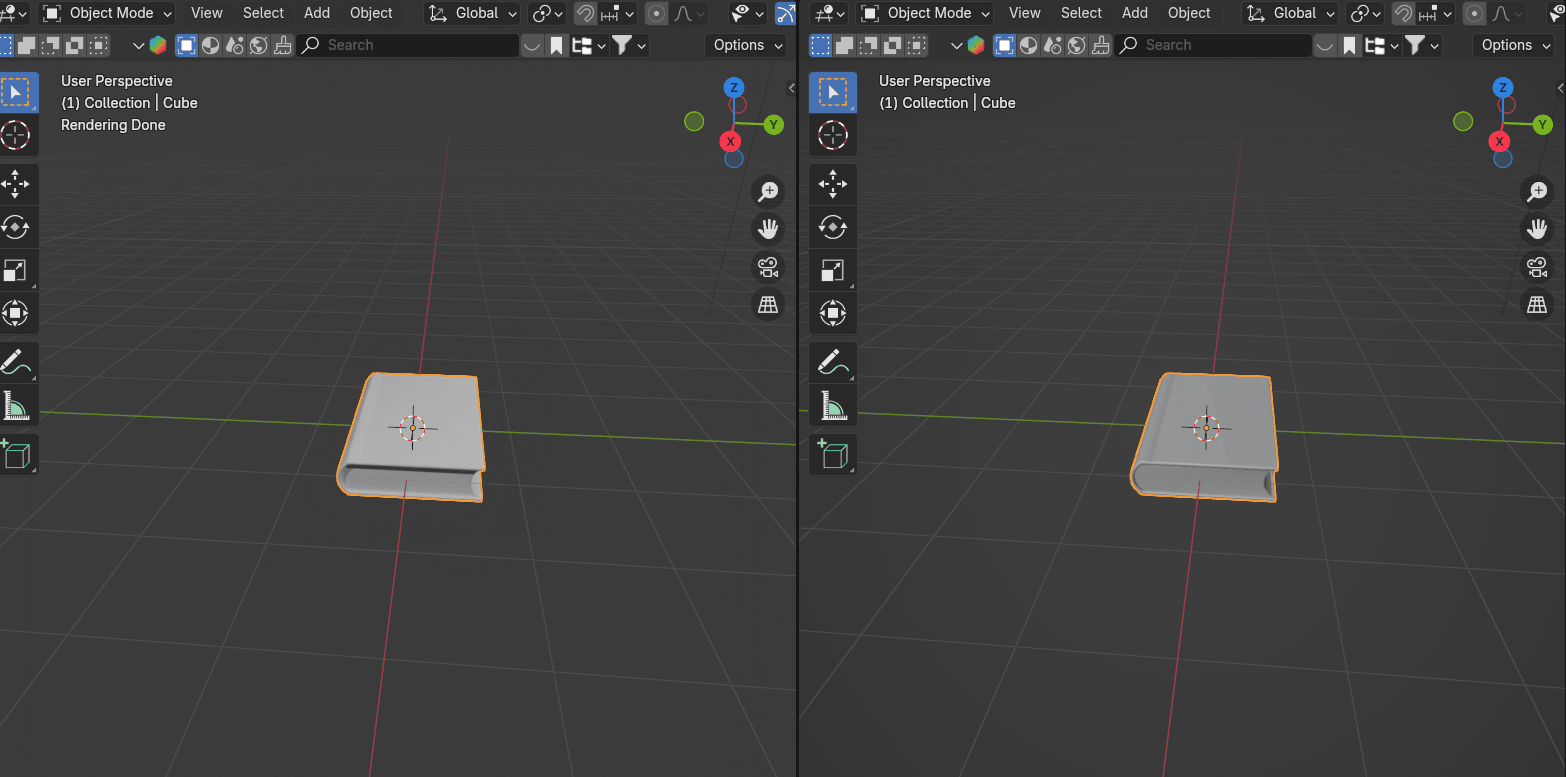
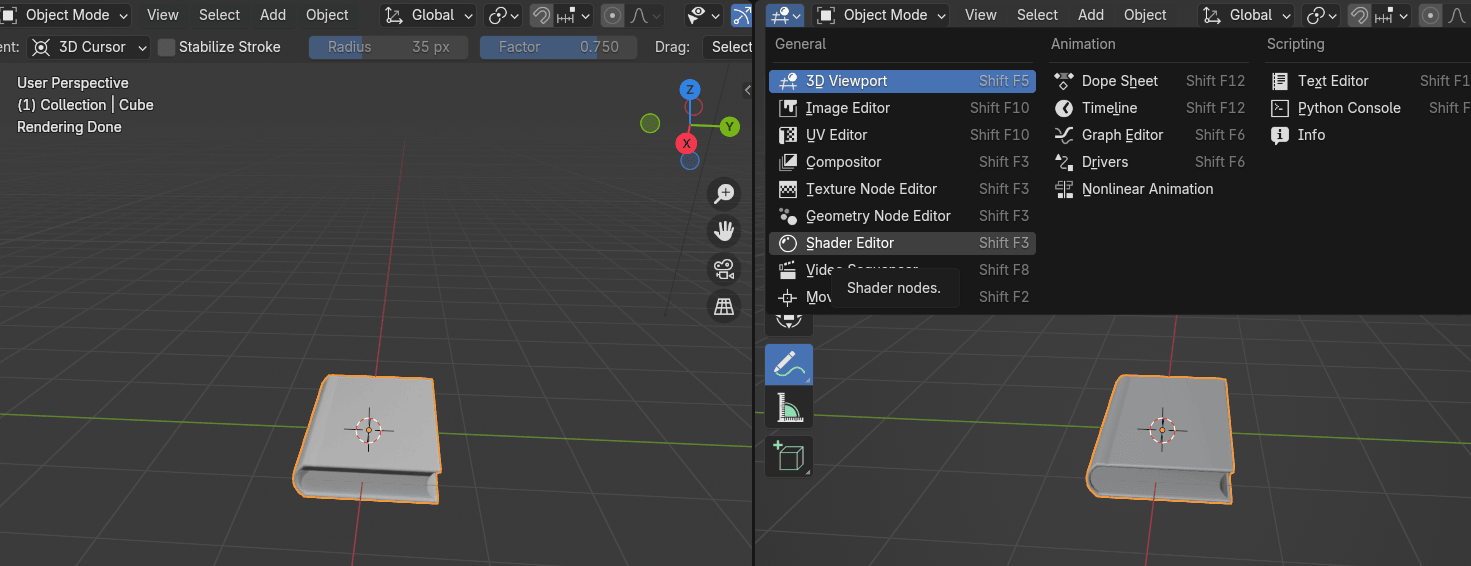
Open the shader editor in the window you just created.
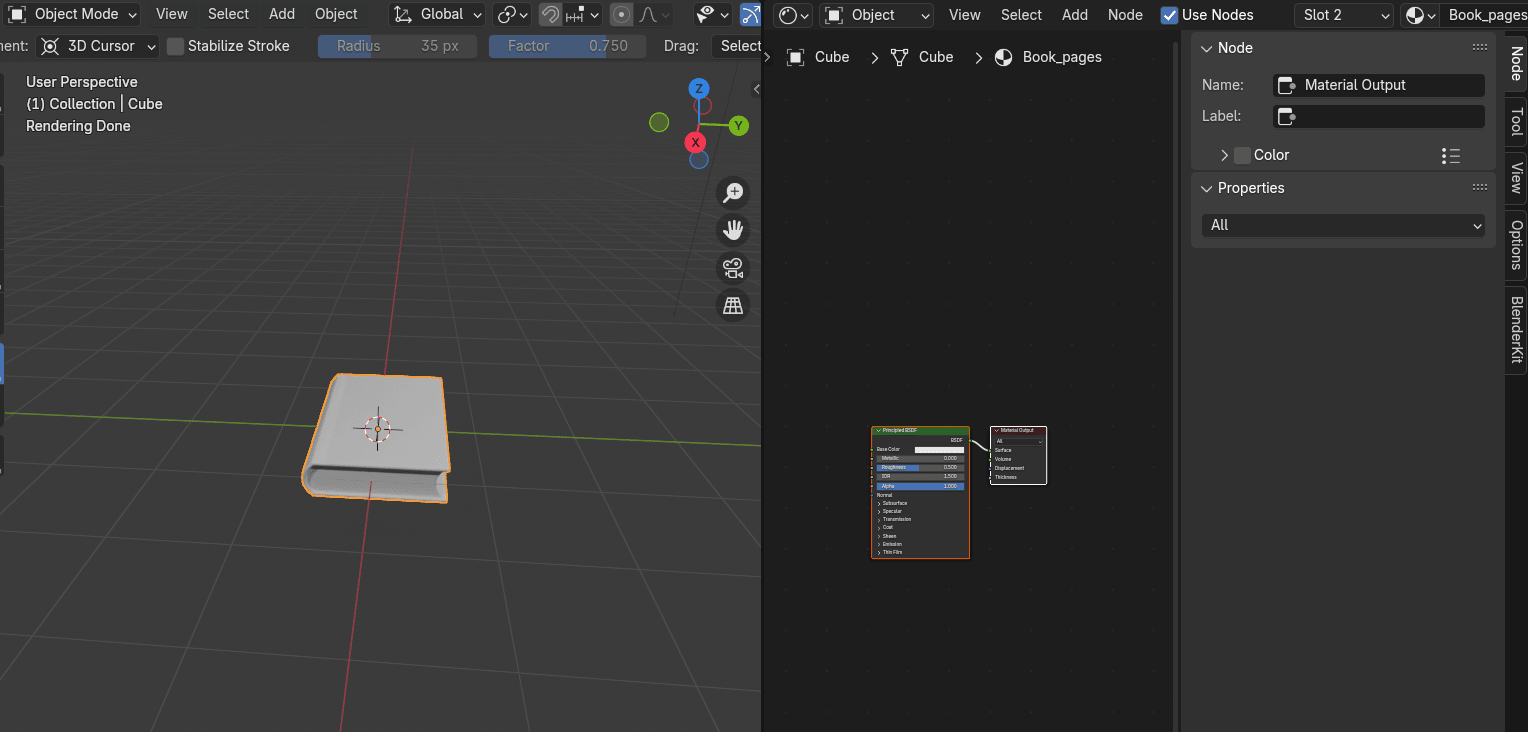
Click “N” to hide that sidebar on the right because you don’t need it.
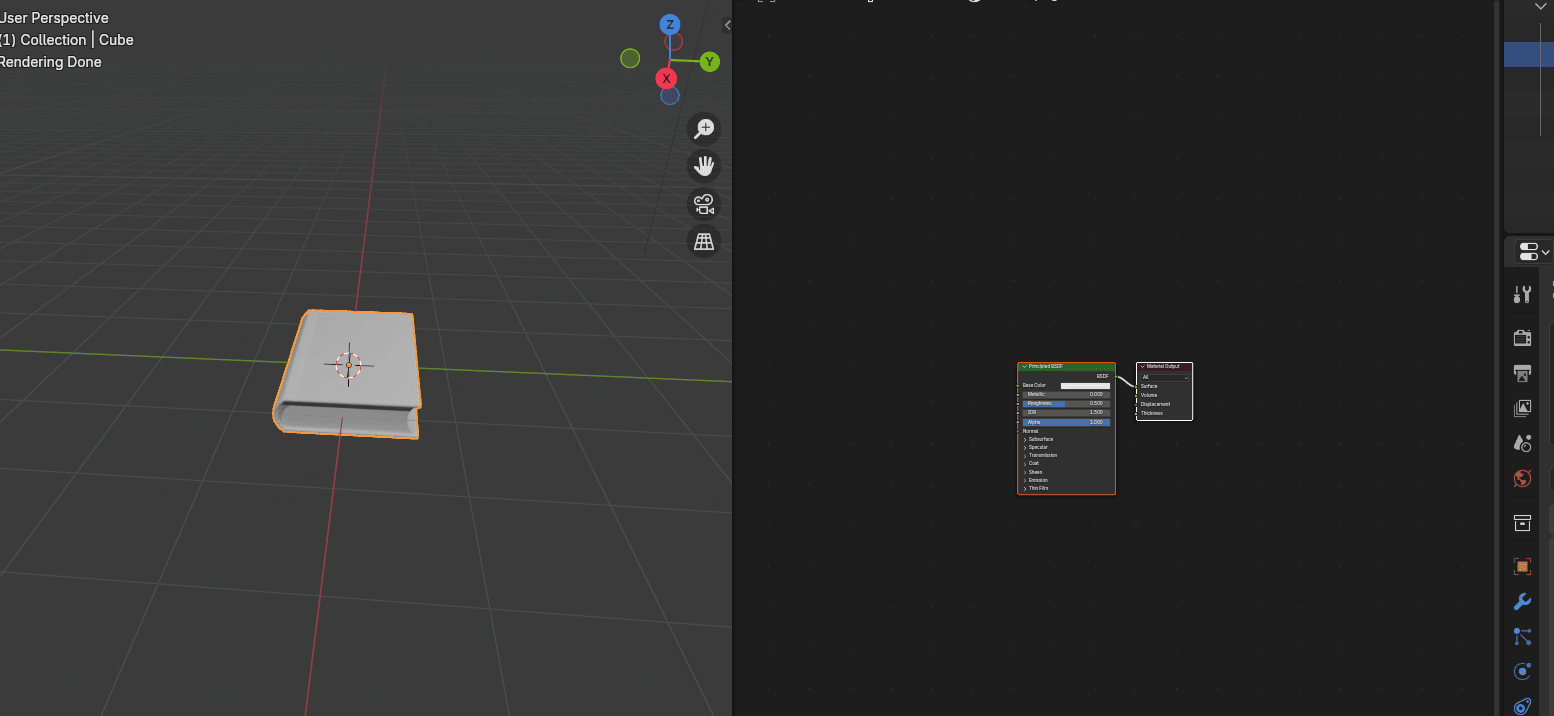
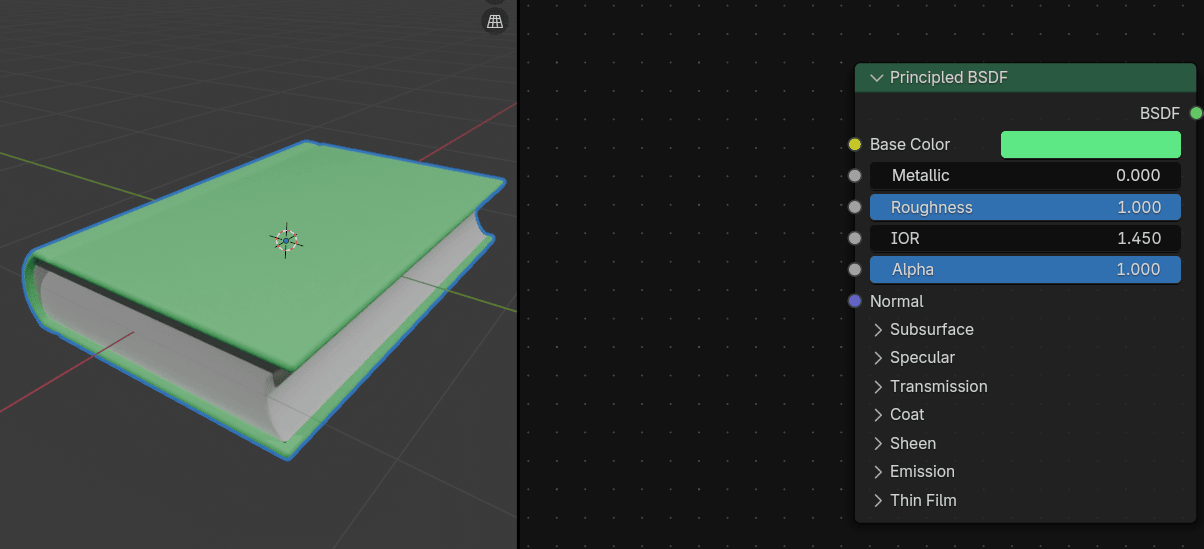
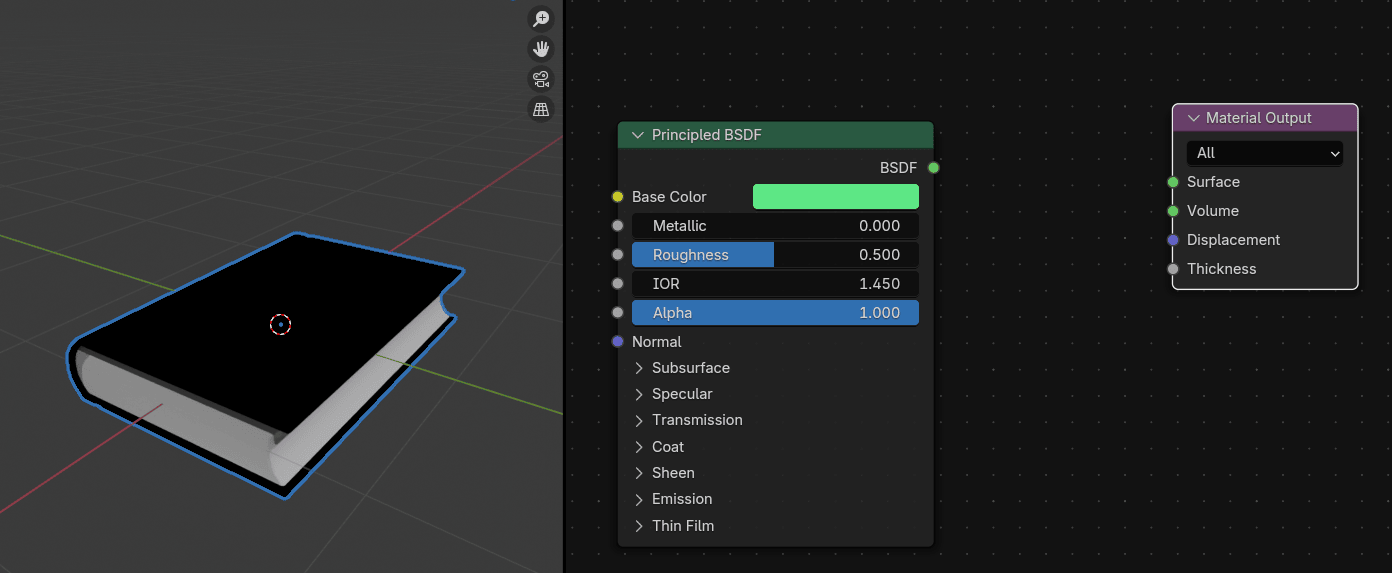
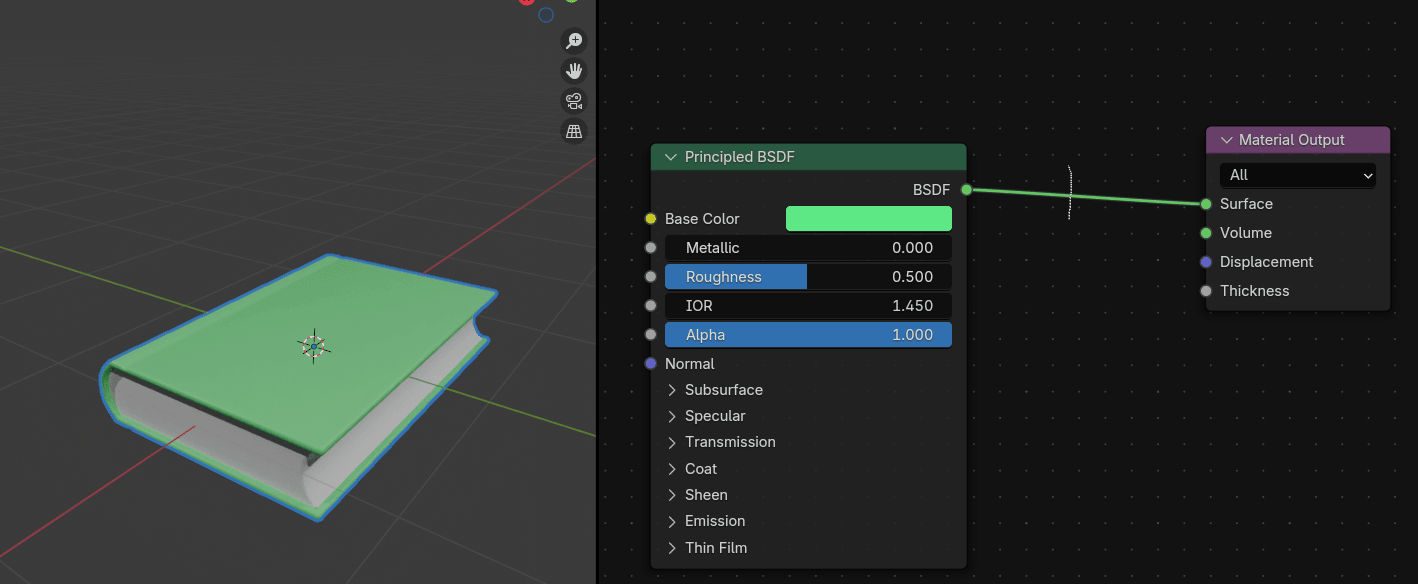
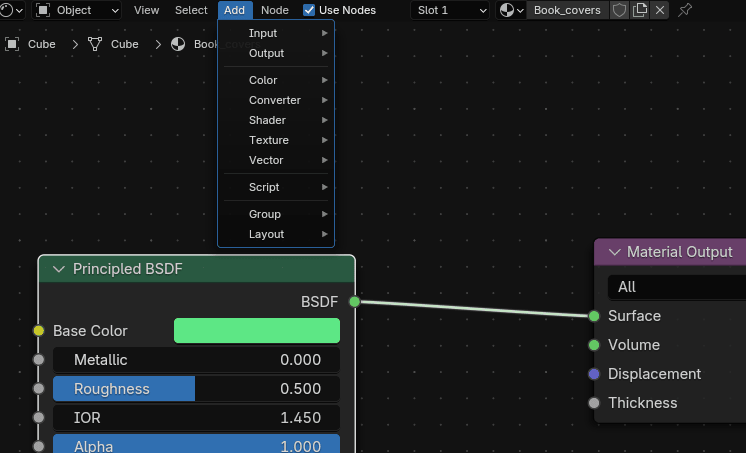
Select Book_covers material.
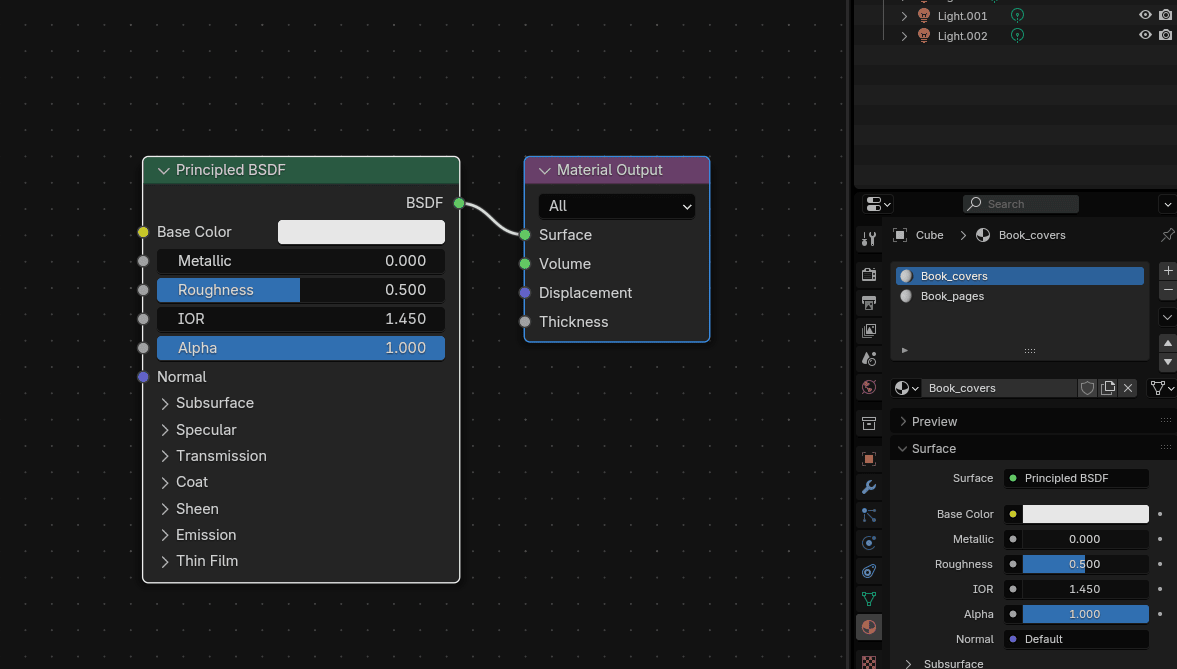
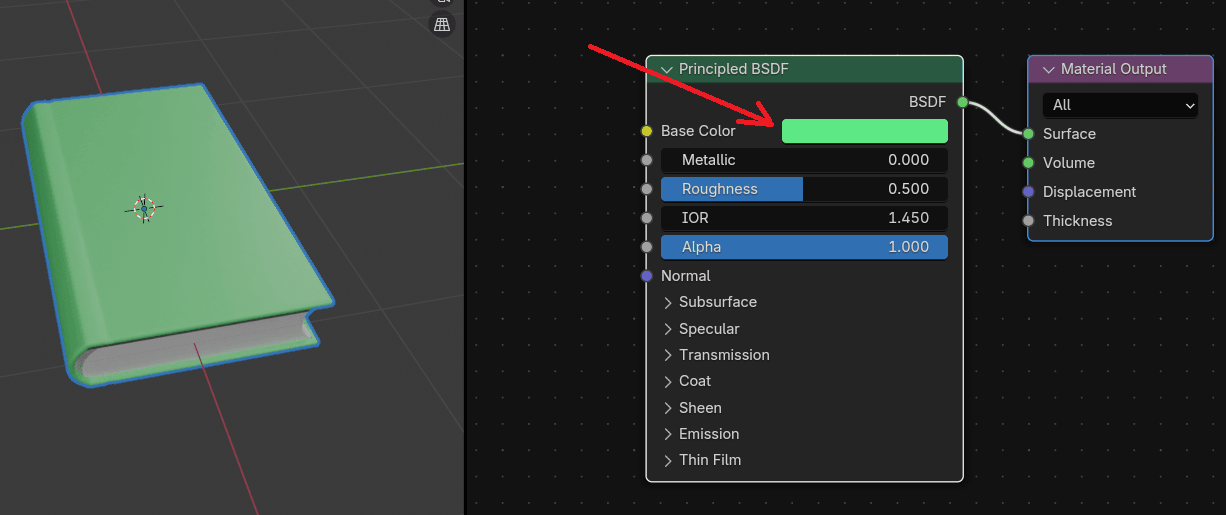
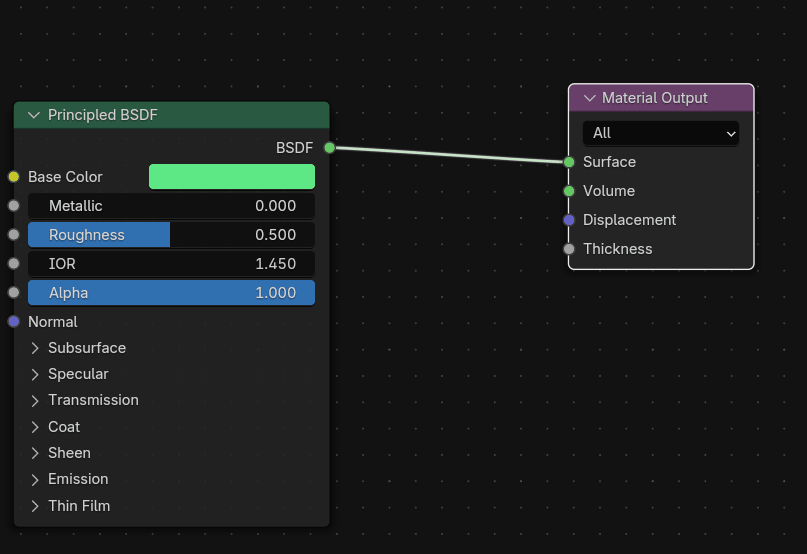
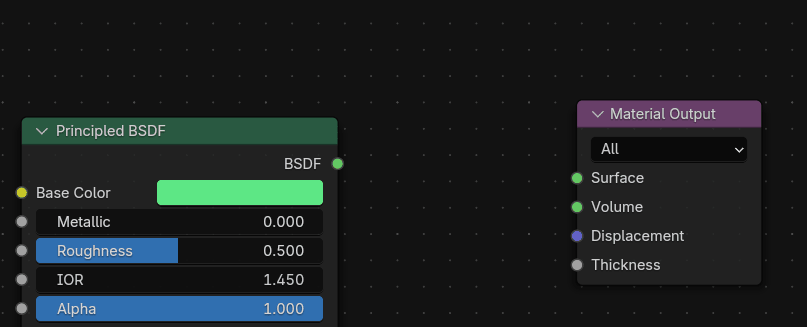
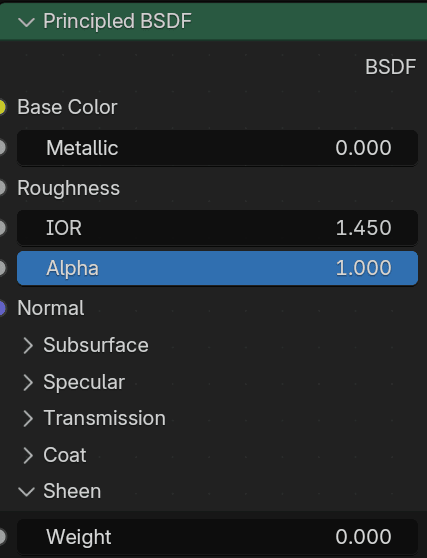
What you are currently seeing are two nodes: the Principled BSDF shader node and the Material Output node.
Before anything else, let me first explain what are parts of nodes are.
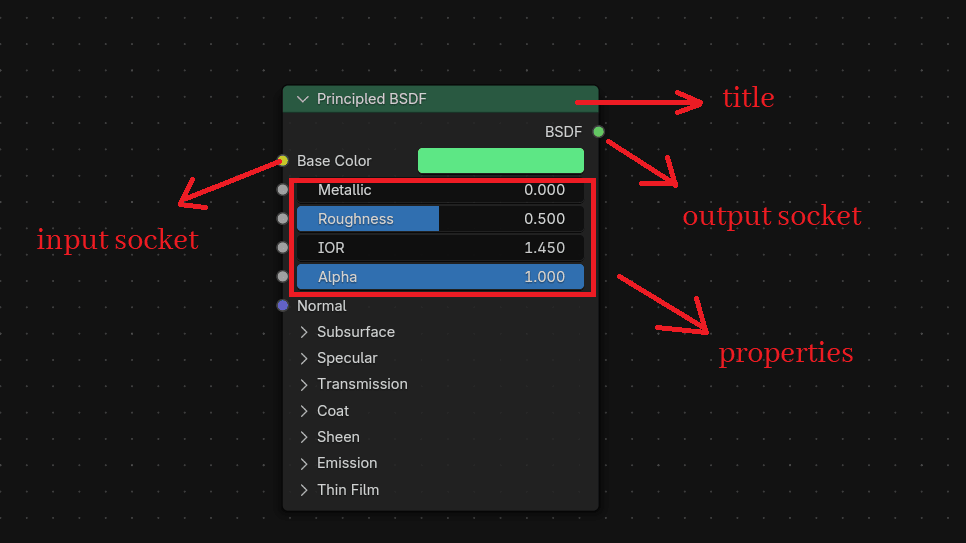
The title shows the name/type of the node.
Sockets are input and output values for the node. They appear as little colored circles on either side of the node.
Properties are settings that can affect the way they interact with inputs and outputs.
I will now explain in detail the Principled BSDF shader - Physically- based, easy-to-use shader for rendering surface materials, based on the OpenPBR model.
That is the official definition of it, but let’s try to understand it better with real examples.
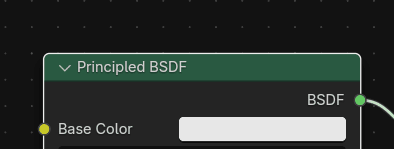
You can change the color of the material by changing the Base Color.
Or here, like you already did it previously.
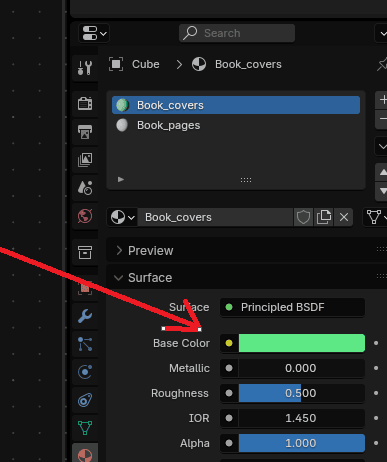
It is exactly the same thing, so when you change the base color in the shader, it will also be changed there. You can also change other options like Metallic, IOR, etc…
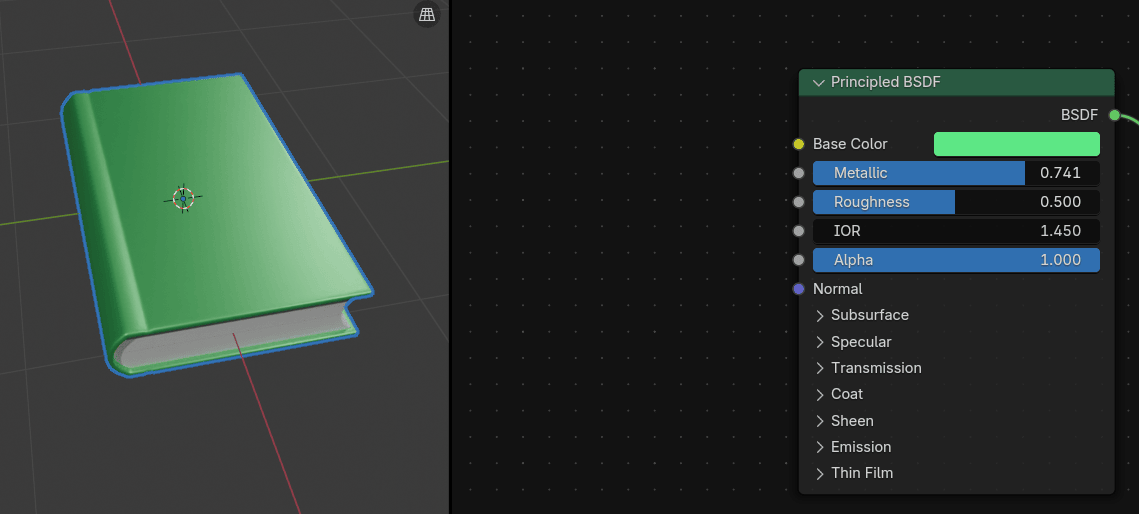
The second option that you see in the Principled BSDF shader is Metallic.
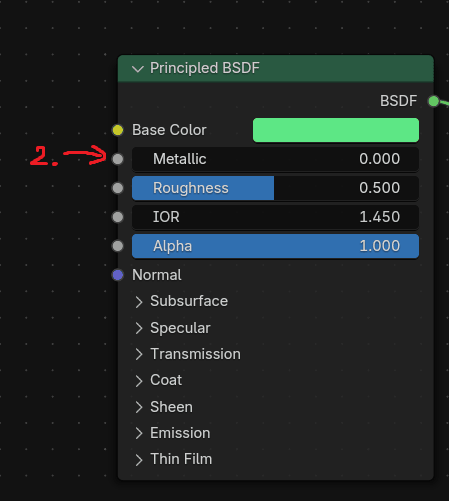
When metallic is on 0, that means that it is turned off. If you want something not to be metallic, you need to put it to zero.
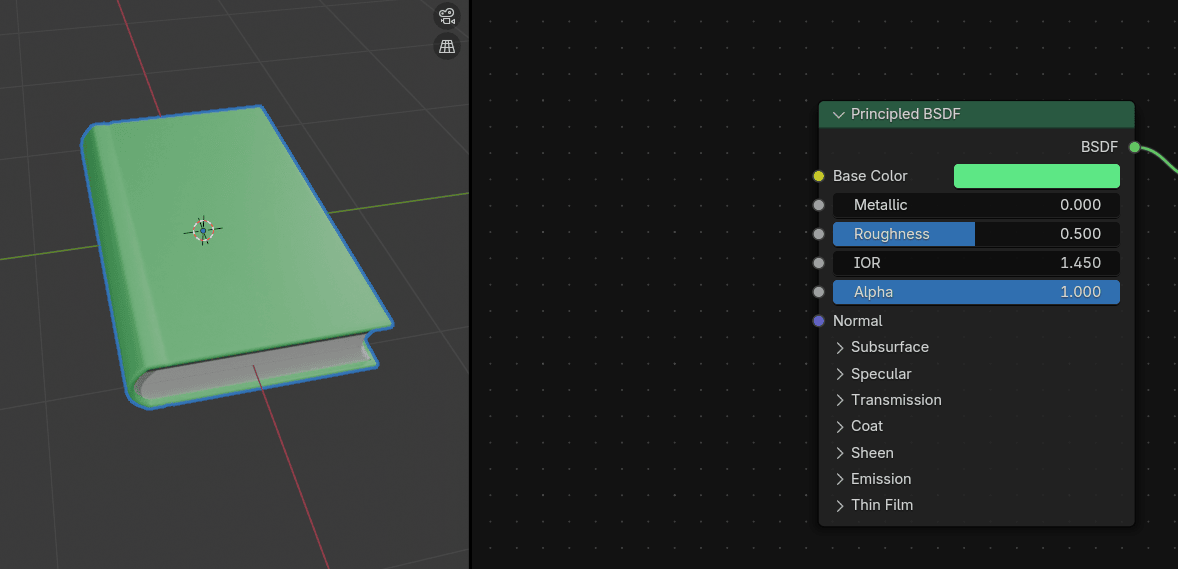
As you can see, this book isn’t metallic.
But if you change metallic to the 1, it suddenly becomes metallic.

Of course, you can also make variations between 0 and 1. So if you want your object to be slightly metallic, you will put it closer to 0,
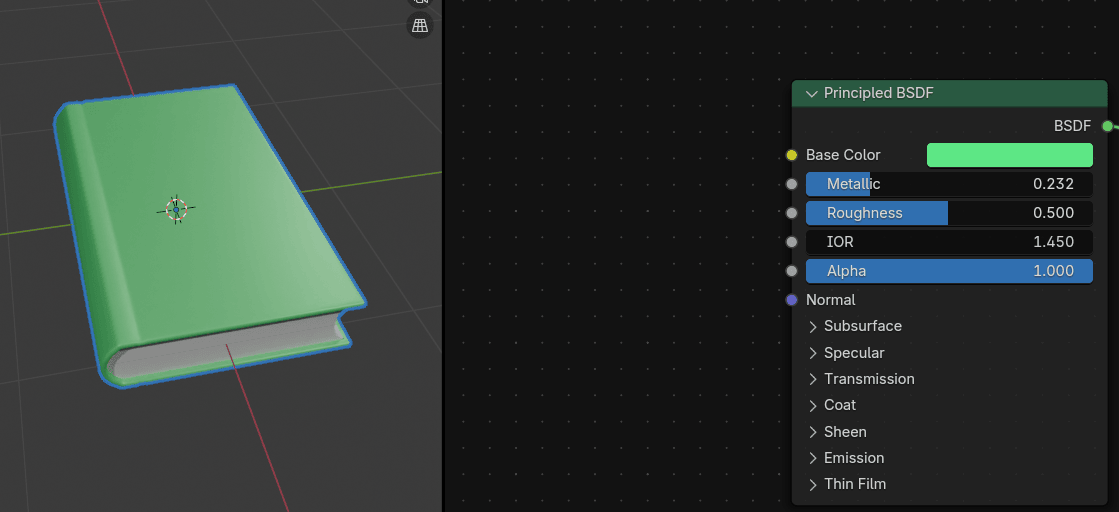
and if you want it to have a strong metallic color, you will put it closer to 1.
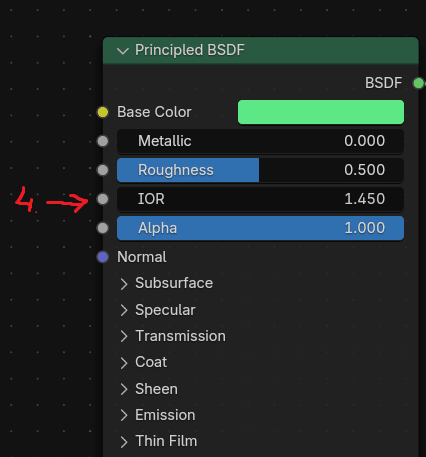
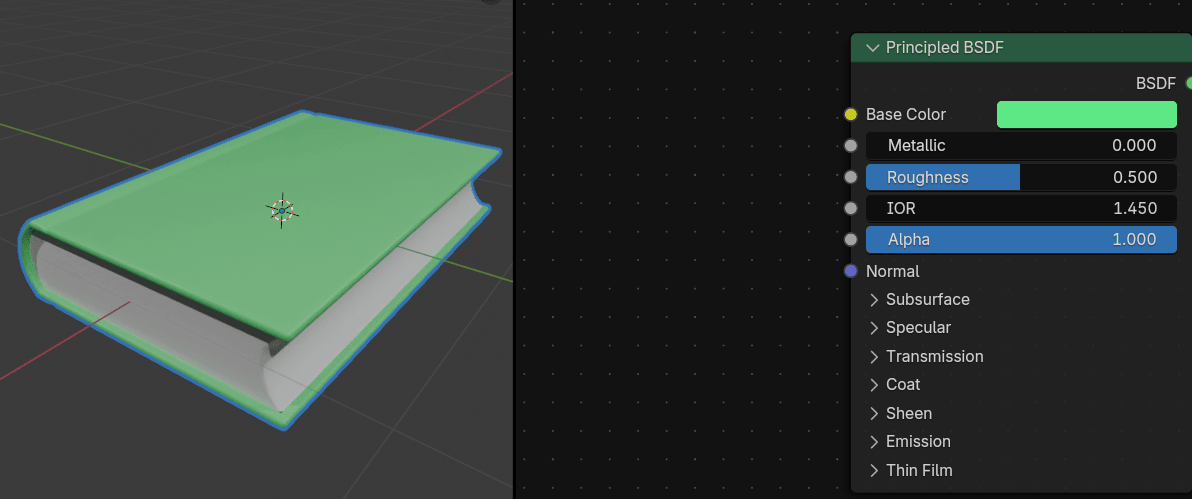
The third option that you see in the Principled BSDF shader is Roughness.
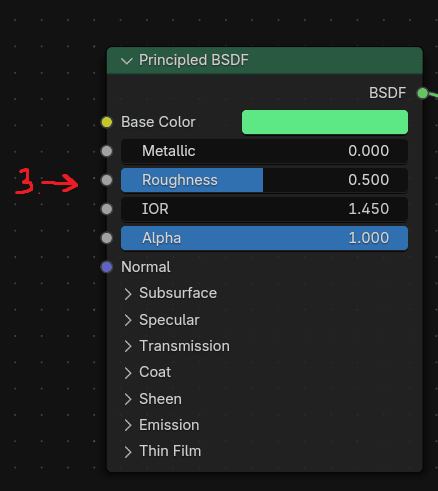
It is the same case as it was with a metallic. If roughness is 0, the object isn’t rough but it is a perfect mirror reflection.
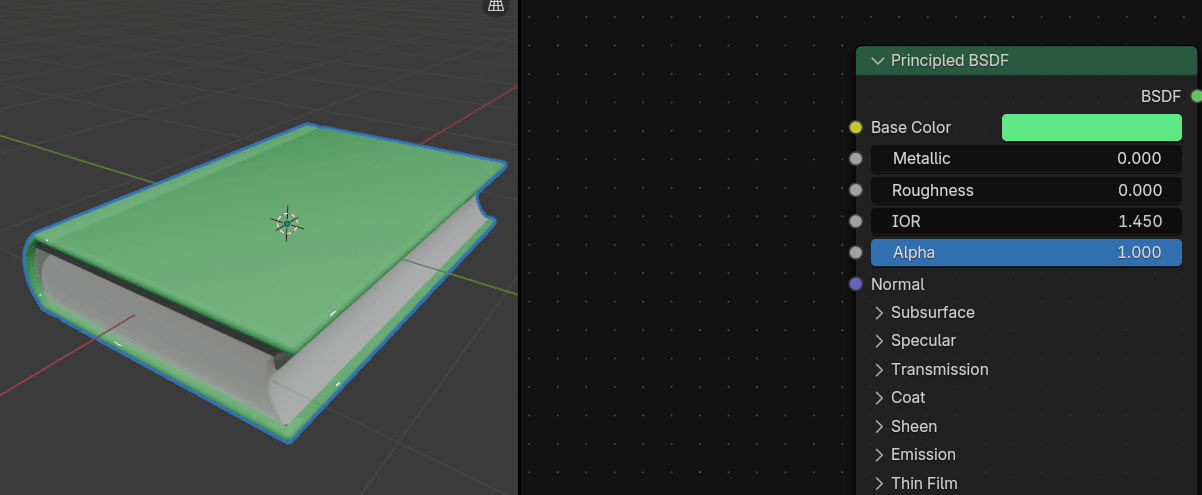
If the roughness is 1, then the object is completely rough.
The fourth option that you see in the Principled BSDF shader is IOR.
IOR or index of refraction for specular reflection and transmission.
For most materials, the IOR is between 1.0 (vacuum and air) and 4.0 (germanium).
The default value of 1.5 is a good approximation for glass.
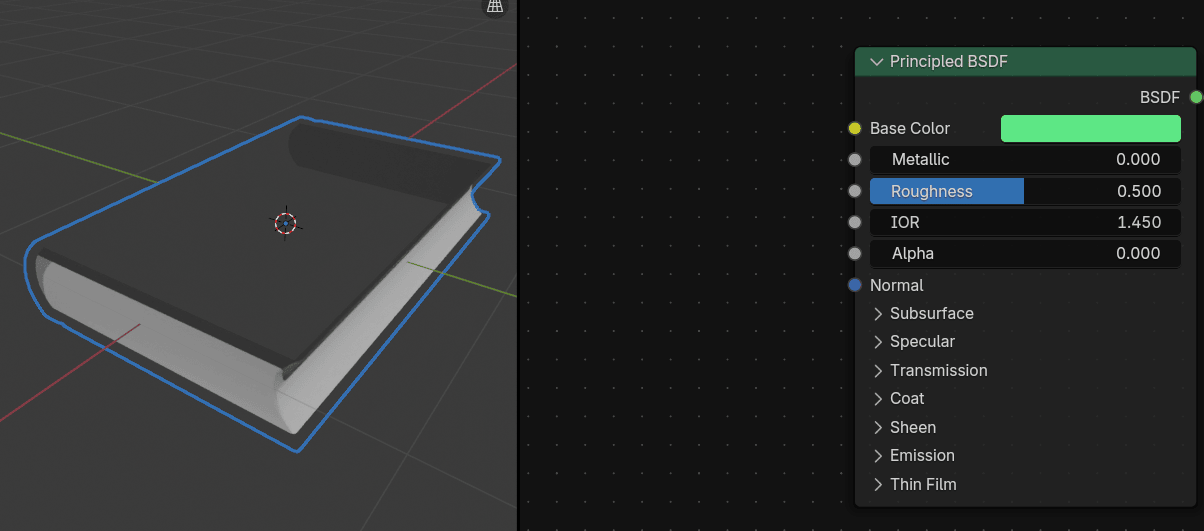
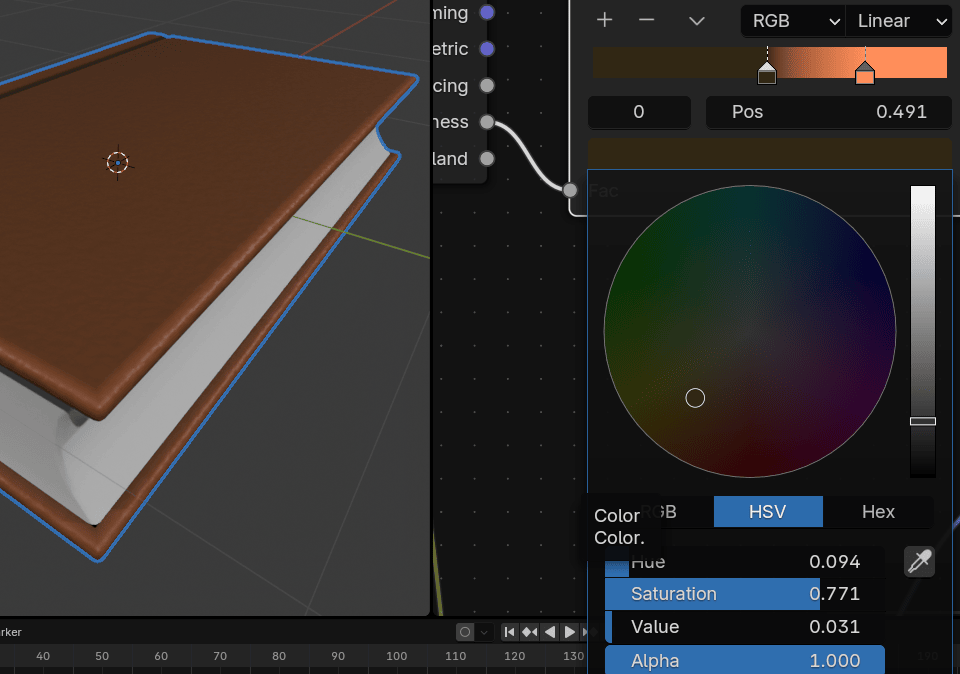
The fifth option that you see in the Principled BSDF shader is Alpha.
With Alpha, you control the transparency of the surface.

If alpha is 1.0, then it is fully opaque.
If alpha is 0.0, then it is fully transparent.
I wanted to explain just the basic stuff for the start, so I won’t explain any of those without a real example.
The second thing that is important is the material Output node.
The only thing that is currently important here is Surface.
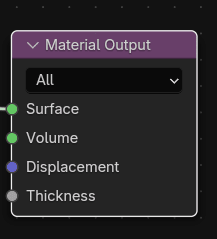
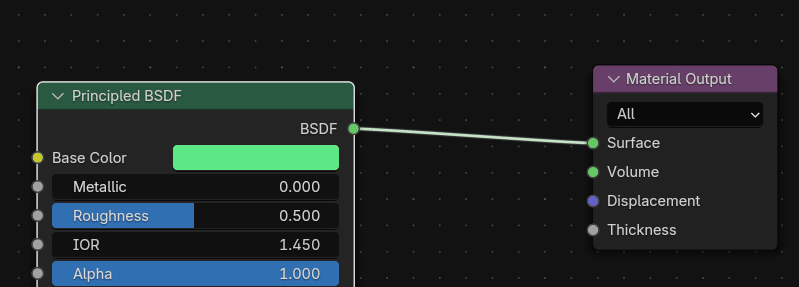
If you want to show your material, then you have to connect the Principled BSDF output socket - BSDF to the Material input socket - Surface.
They are automatically connected when you create material, but if you accidentally delete it, this will happen.
And how do you disconnect the sockets?
Hold CTRL and RMB, and a knife will appear. Then just disconnect the sockets by cutting the line with a knife.
and you will get this.
And what if you want to connect the sockets?
Put your mouse pointer on the output socket that you want to connect and this line will appear.
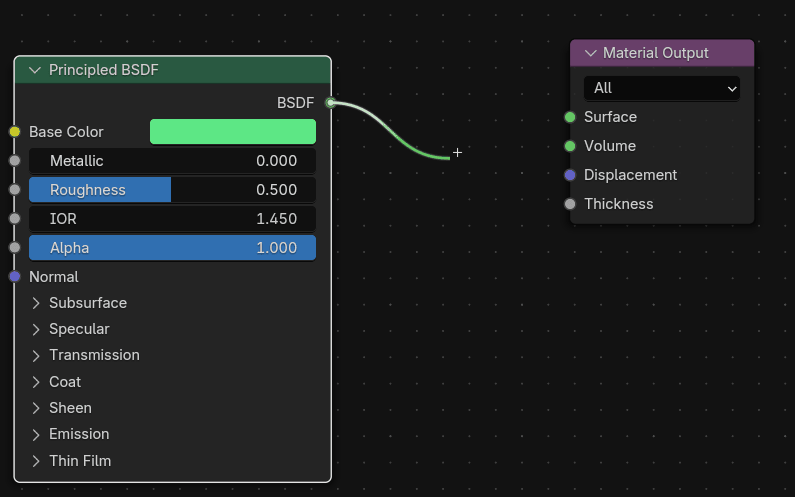
Now just drag it to the input socket that you want to connect with.
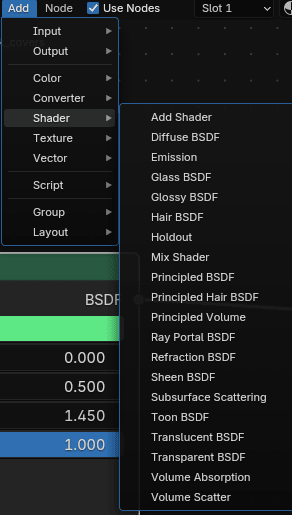
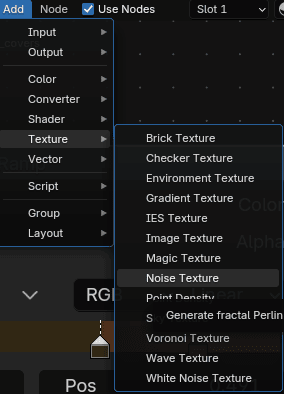
How to add a new node?
If you click here on this Add
You will see all nodes grouped (input, output, color converter…)
So, for example, if you want to add one more Principled BSDF shader node, you click: ADD → Shader → Principled BSDF.
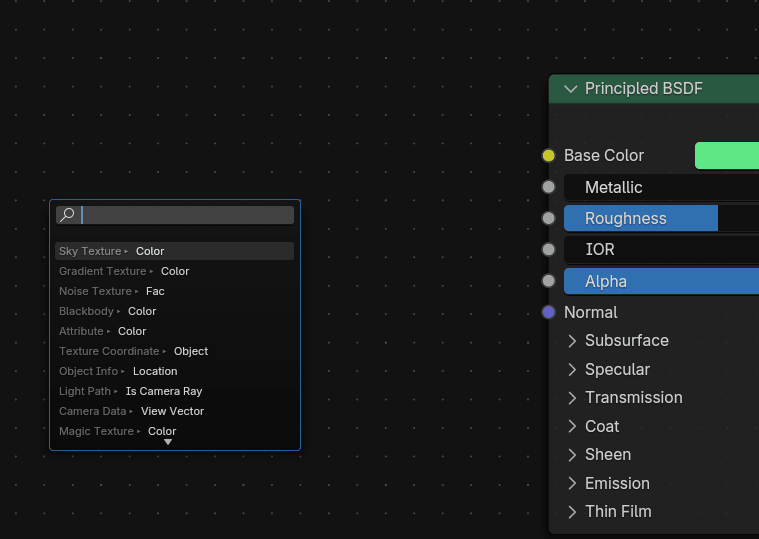
You can also add them by dragging from the socket with a mouse, and a new window appears where you can search for a node that you want to add. So just type the name, and confirm with LMB.
One more thing before you learn new nodes: to move around the node territory, just use the mouse wheel and hold it while moving the mouse, and if you want to zoom in or zoom out, scroll the mouse wheel up or down.
Now you can finally continue with texturing a book.
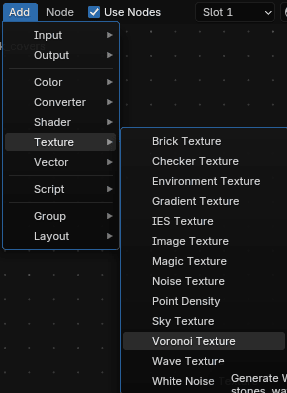
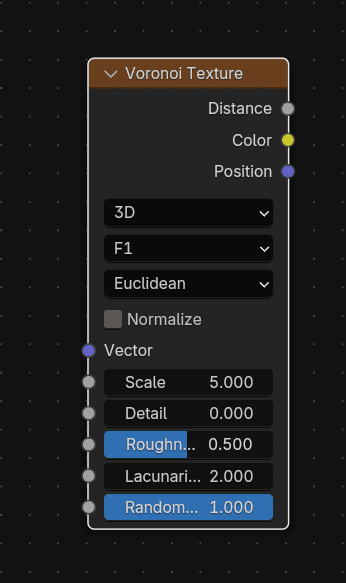
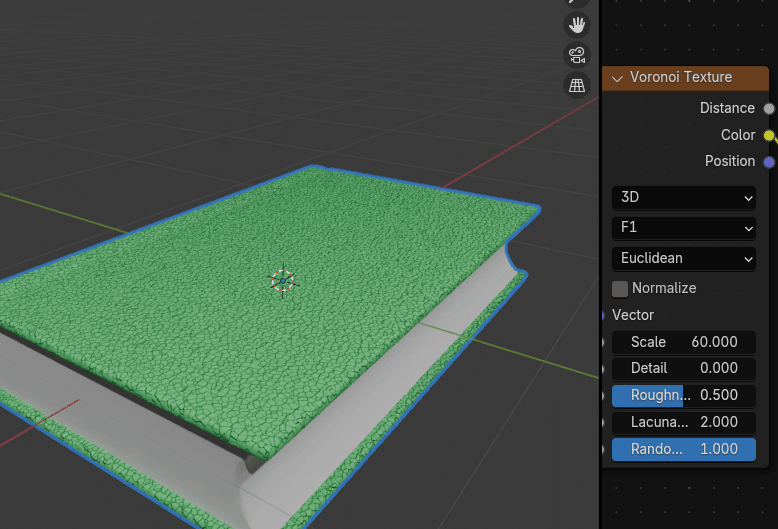
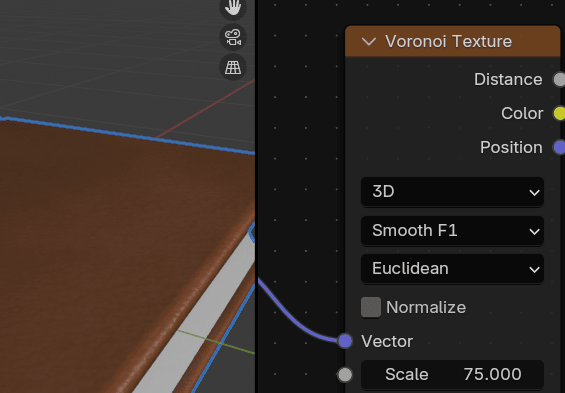
The first node that you will add after those two that you already had is a Voronoi texture.
Voronoi texture generates Worley noise based on the distance to random points.
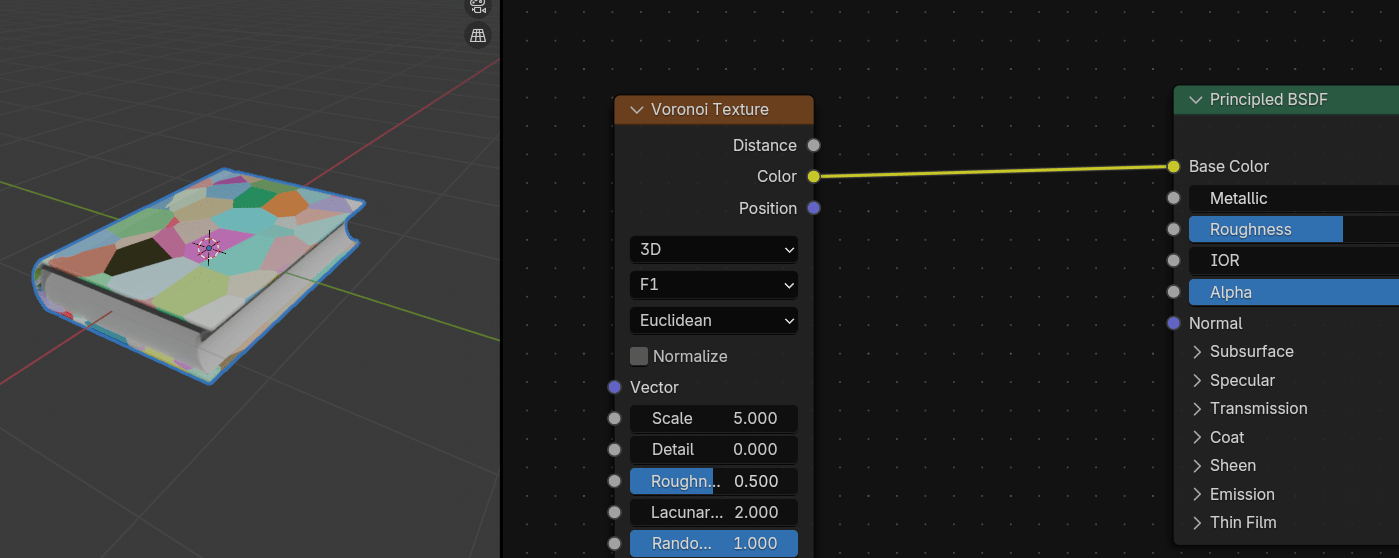
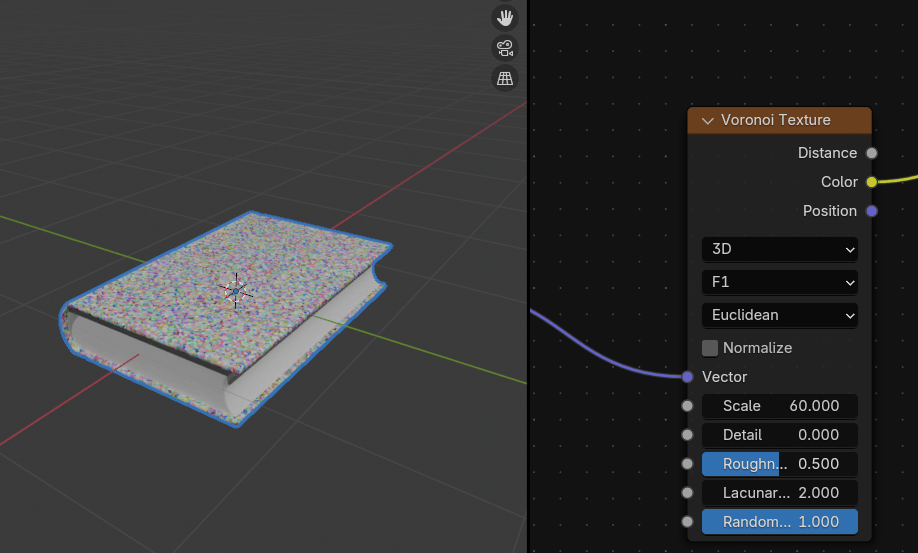
Connect Color from Voronoi texture with Base Color from Principled BSDF and you will get this.
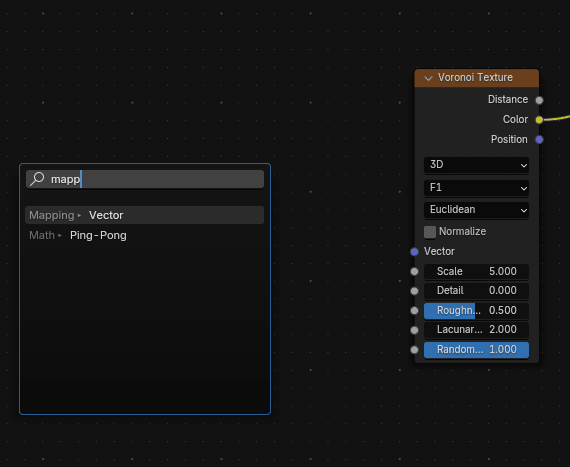
Click on Vector from Voronoi texture and connect with Vector from Mapping.
Mapping node transforms the input vector by applying translation, rotation, and scale.
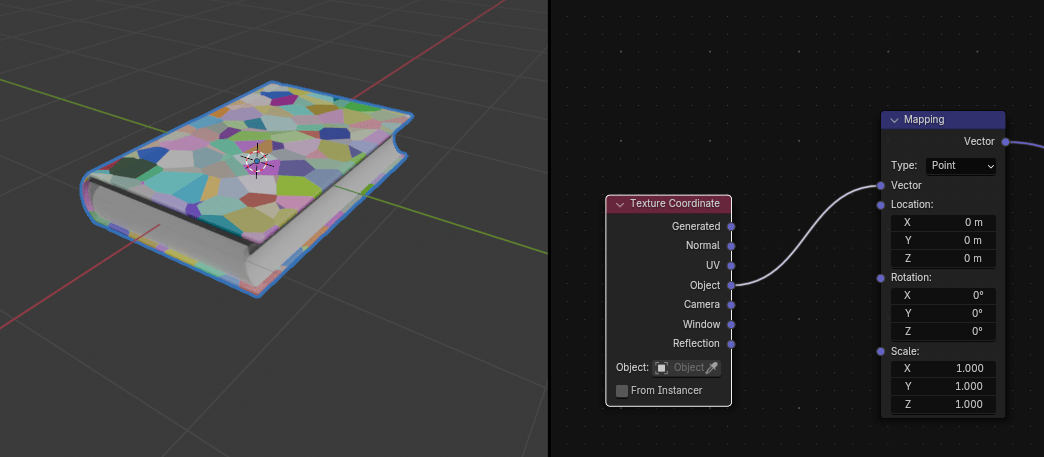
When you connect those two vectors, the Voronoi texture loses its function because you need to add one more node.

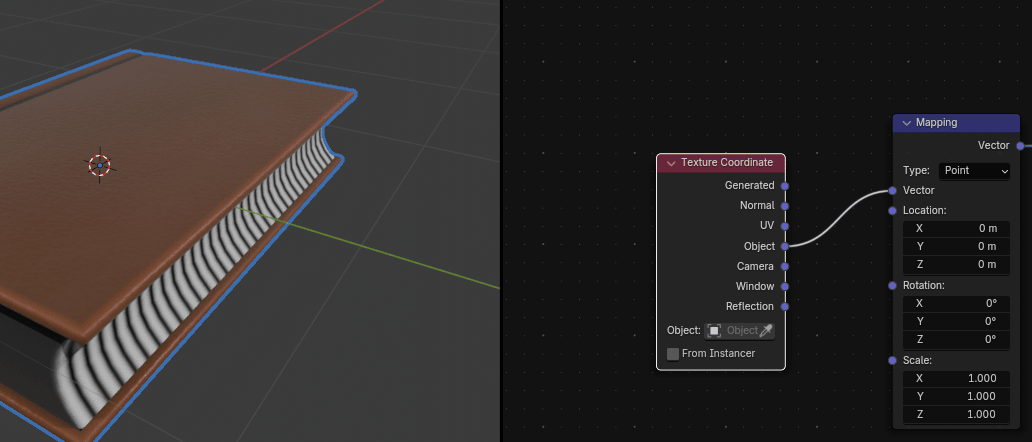
Connect Vector from Mapping to Object from Texture Coordinate.
The Texture Coordinate node retrieves multiple types of texture coordinates. Typically used as inputs for texture nodes. Because you don’t have a real image texture (PBR material) but a procedural material (made procedurally with nodes), you connect the vector with an object input socket.
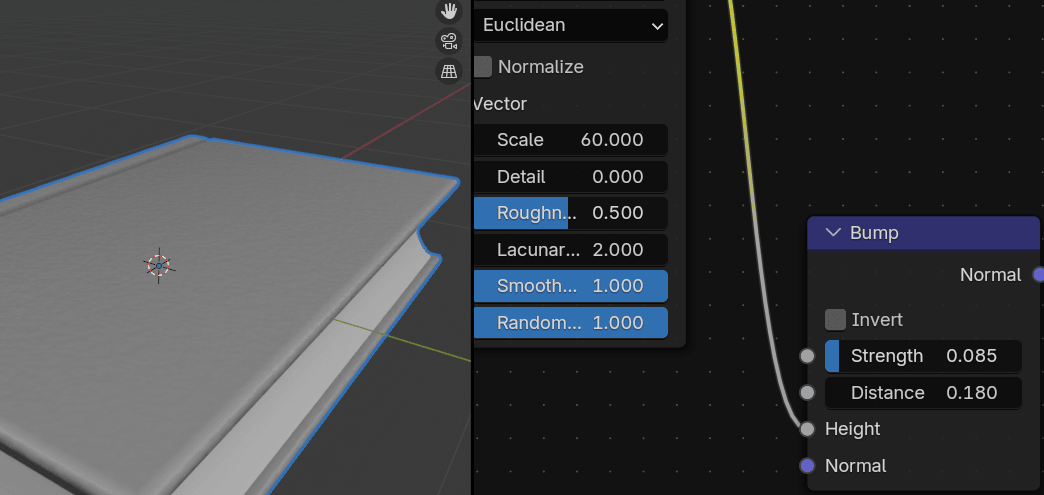
Change Scale in Voronoi texture from 5
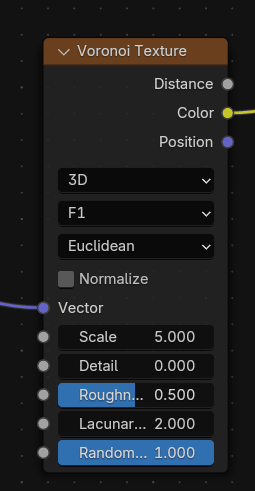
to somewhere around 60. As you can see by changing the scale to a smaller number, you get more little details on your book cover. If you change it to a larger number, those details would be bigger.
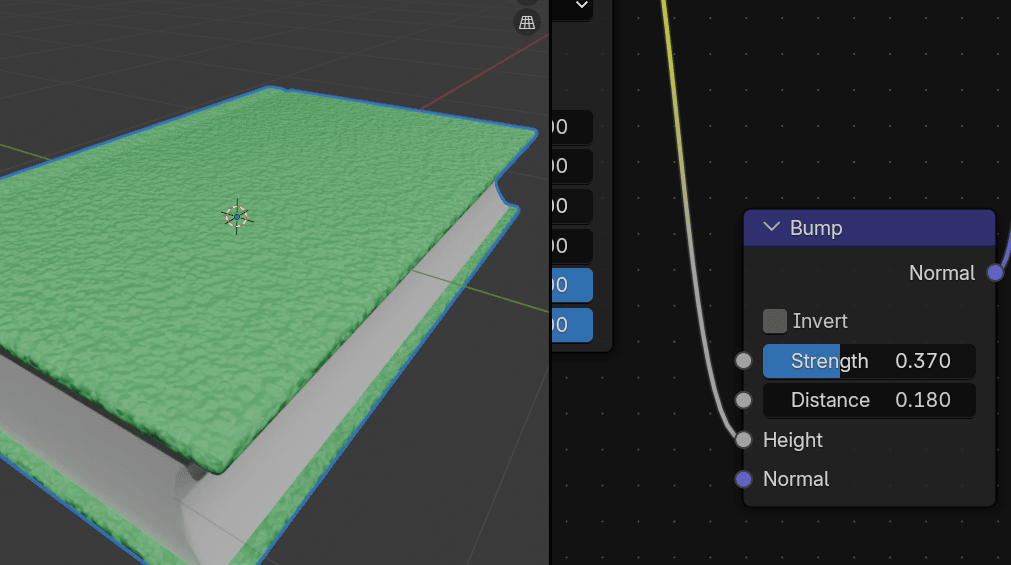
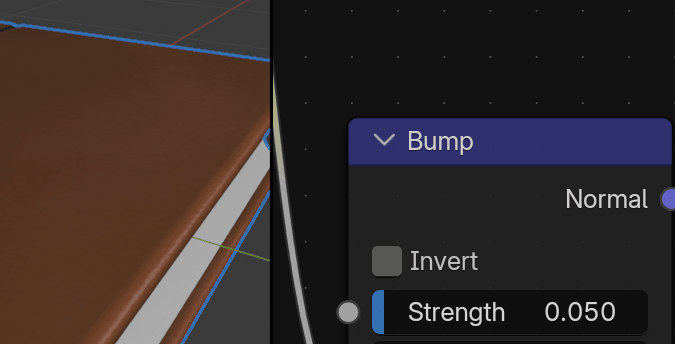
Connect Color from Voronoi texture with Height from Bump.
Bump node generates a perturbed normal from a height texture for bump mapping.
It is typically used for faking highly detailed surfaces, like for example book cover in this case.
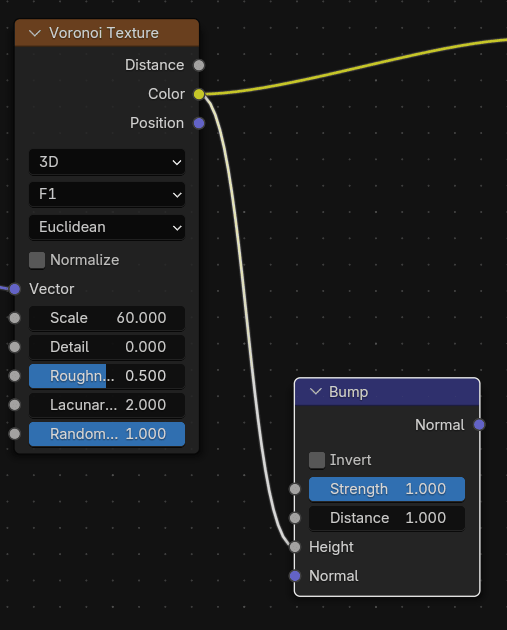
Connect Normal from Bump with Normal from Principled BSDF.
Click and hold “CTRL” and while holding RMB cut that yellow line that connects Color with Base color.

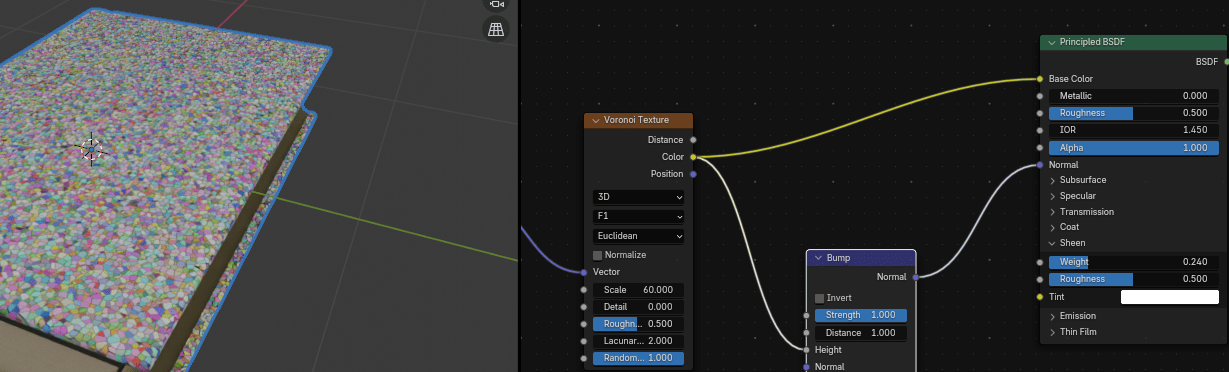
Change feature output in Voronoi texture from F1
to Smooth F1.
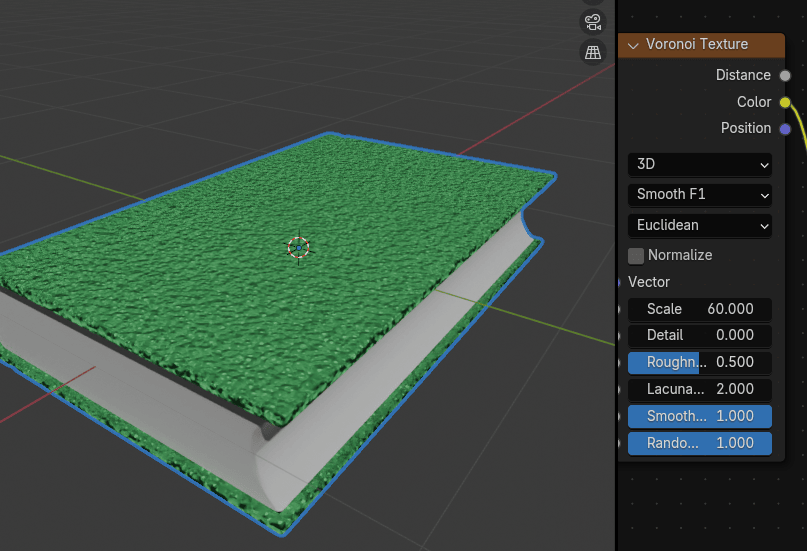
F1 computes the distance to the closest point as well as its position and color.
Smooth F1 is a smoothed version of F1.

Change the strength in Bump from 1

to somewhere around 0.370 to make the bump less noticeable.

and distance to somewhere around 0.180 to reduce the overall distance of the bump.
Connect Base Color from Principled BSDF with Pointiness from Geometry to create some edge highlights on the book.

Add Converter -Color Ramp and put it between Geometry and Principled BSDF.
It will automatically connect what needs to be connected.
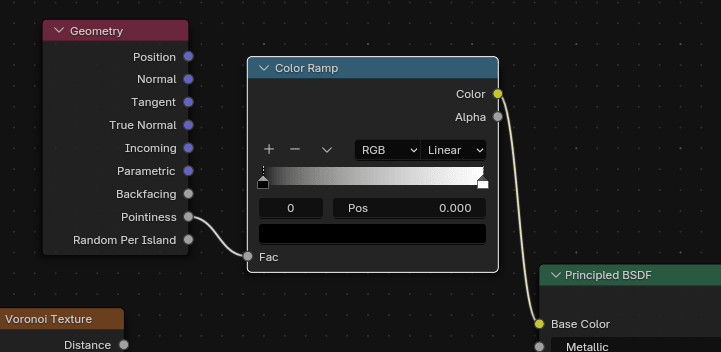
Click on the first color of the color ramp and move it to more to the right.
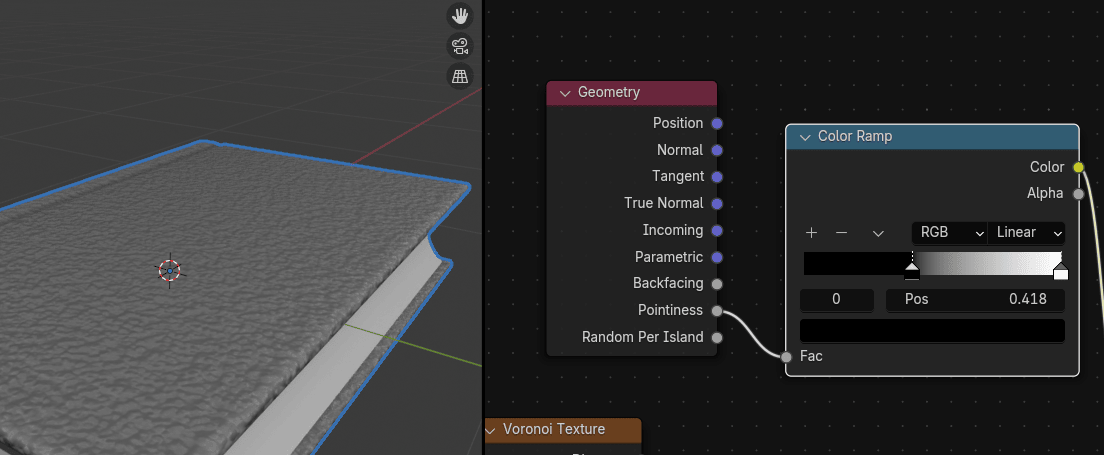
Click on the second color of the color ramp and move it more to the left.
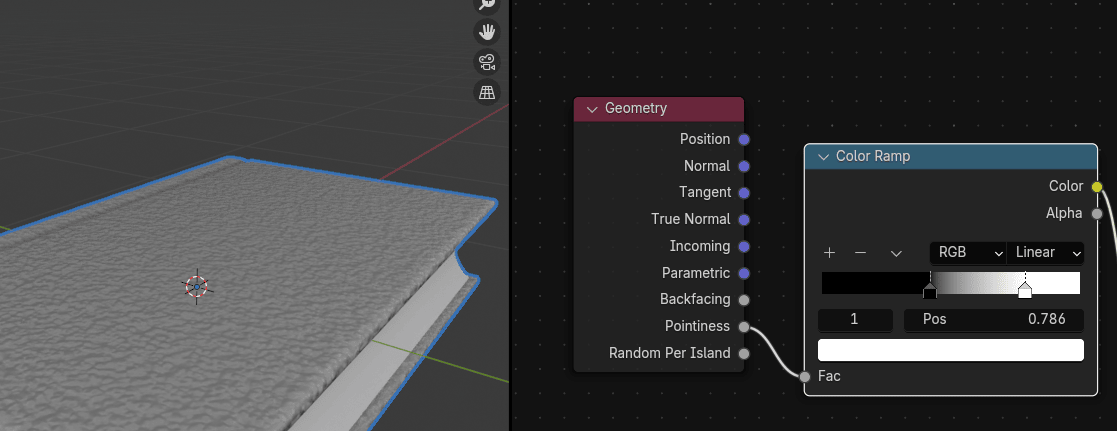
Change strength in Bump to somewhere around 0.085.
Click on the second color of the color ramp to set your edge color.
I chose a pale orange color.
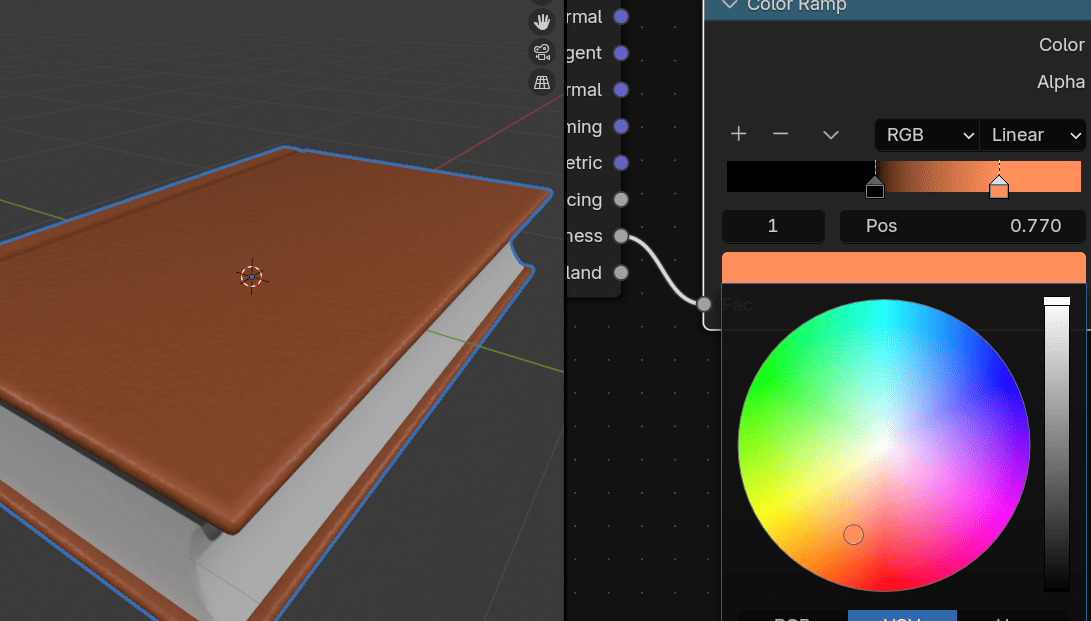
You can then change the first color of the color ramp to set the overall color of the book. For this, I chose darker brown.
You can play around with those colors and make your book look like whatever you want.
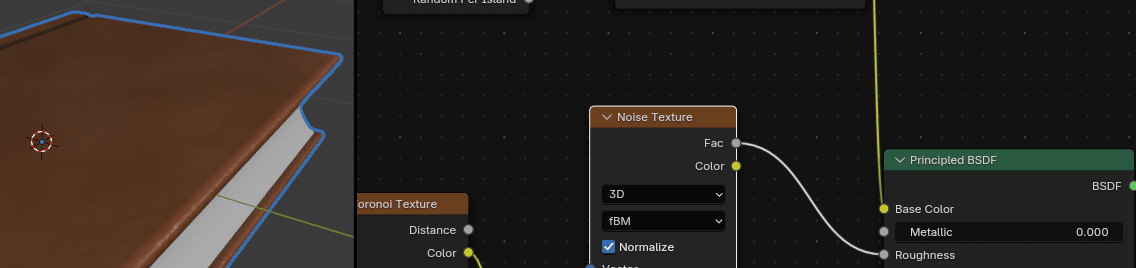
Add texture - noise texture.
Noise texture generates fractal Perlin noise.
Perlin noise is a type of gradient noise developed by Ken Perlin in 1983.
It has many uses, including but not limited to: procedurally generating terrain, applying pseudo-random changes to a variable, and assisting in the creation of image textures.
It is most commonly implemented in two, three, or four dimensions, but can be defined for any number of dimensions. (source: Wikipedia)
Connect Fac from Noise texture with Roughness from Principled BSDF.
Change detail of the noise from 2
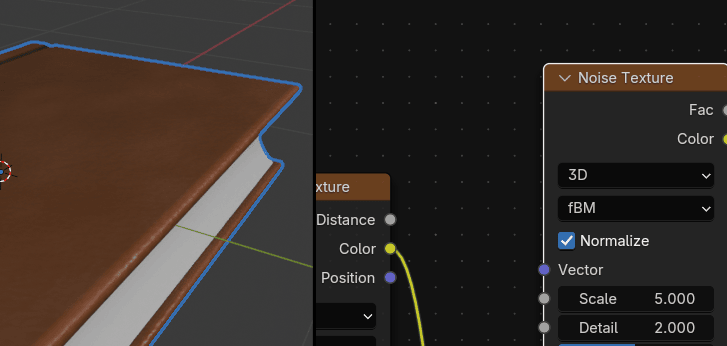
to 15 or similar
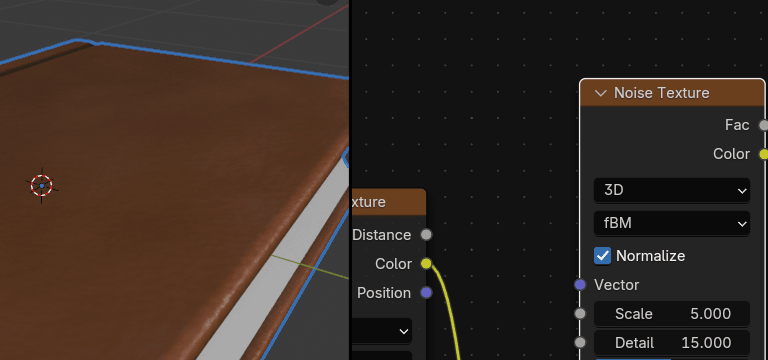
and scale to 3.
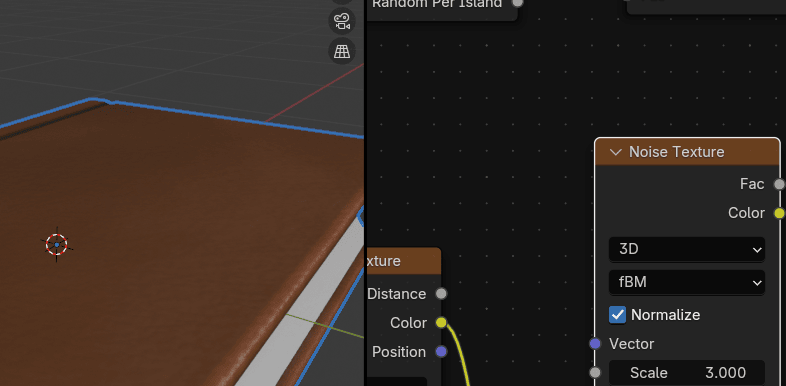
Change Scale in Voronoi texture from 65 to something similar to 75.
Change strength in Bump to somewhere around 0.050.
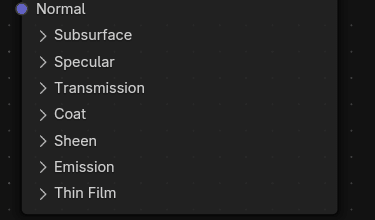
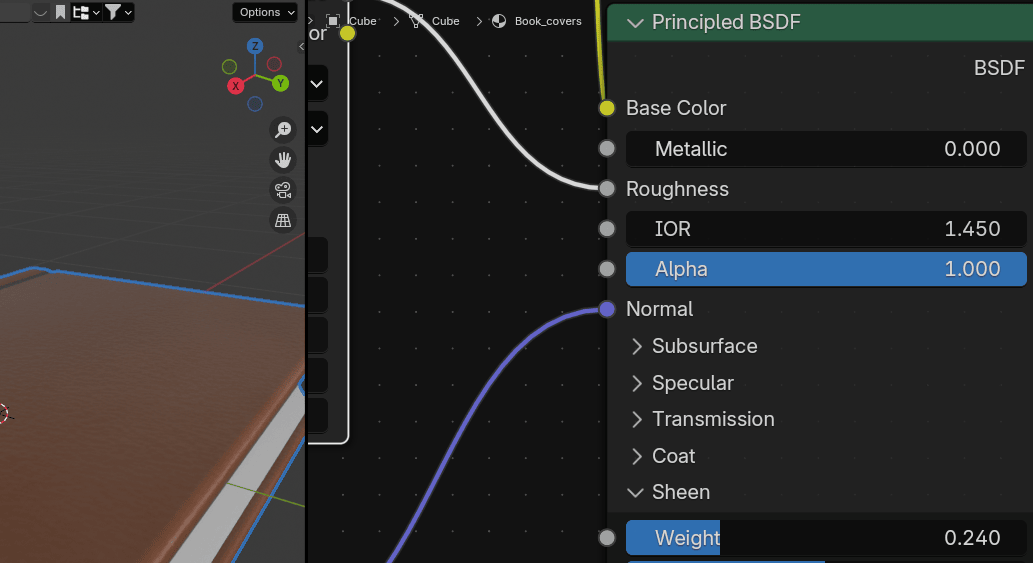
Click on Sheen in Principled BSDF and change weight from 0
to somewhere around 0.240. This will give the book a nice dusty look.
You can use sheen for all kinds of stuff, like adding dust, such as in this case, or giving a material, such as fabric or peach skin, an illusion of having a bunch of tiny hairs.
Select the second material BookPages.

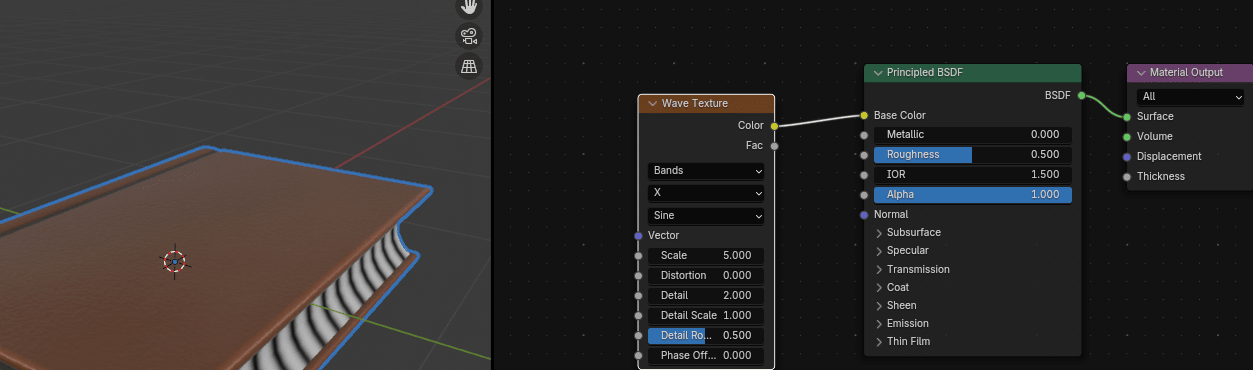
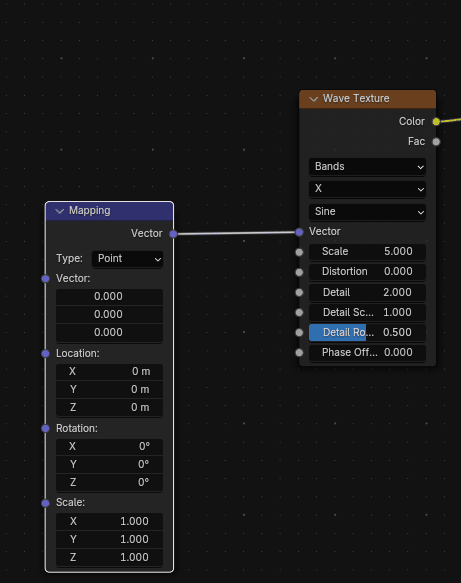
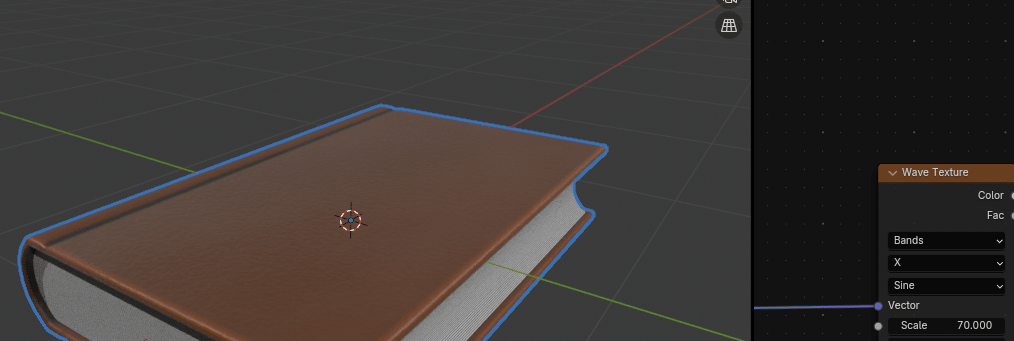
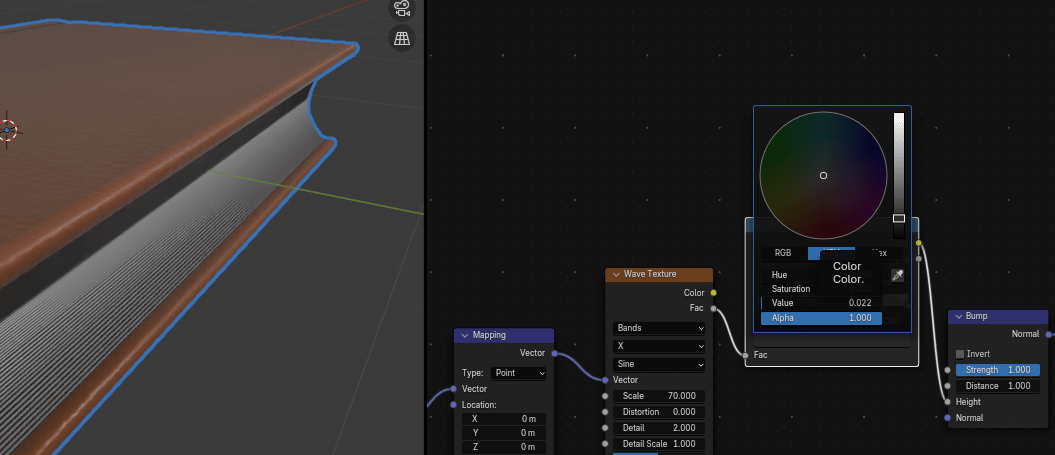
Add texture - Wave texture.
Wave texture generates procedural bands or rings with noise.
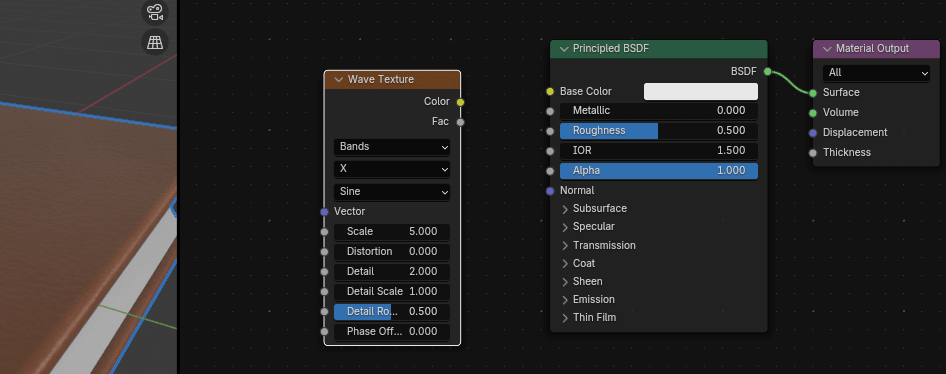
Connect Color from Wave texture with Base Color from Principled BSDF.
Click on Vector from Wave texture and connect with Vector from Mapping.
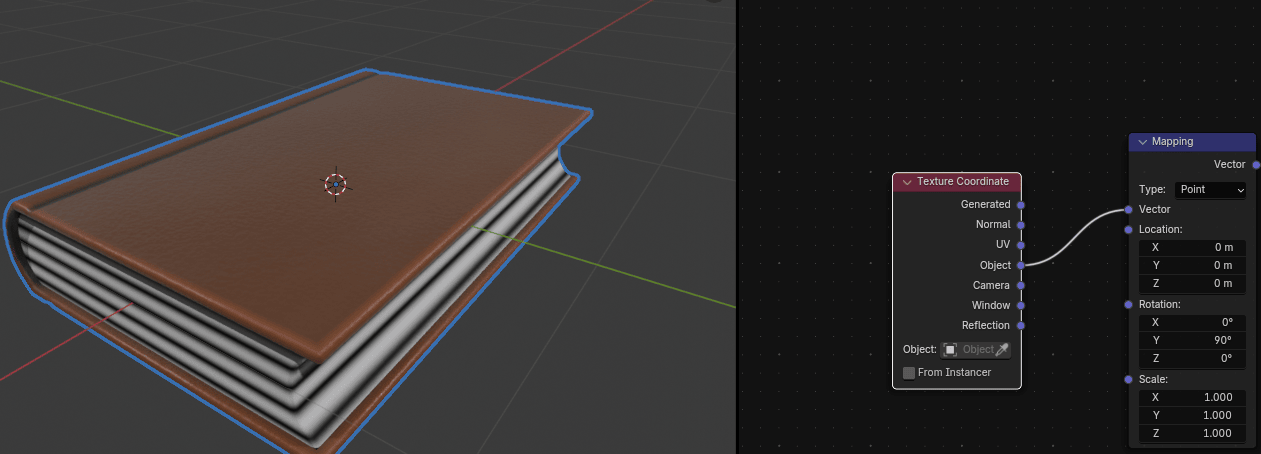
Connect Vector from Mapping to Object from Texture Coordinate.
Change Rotation of Y in Mapping to 90 degrees so your pages are correctly rotated.
Change scale in Wave texture from 5
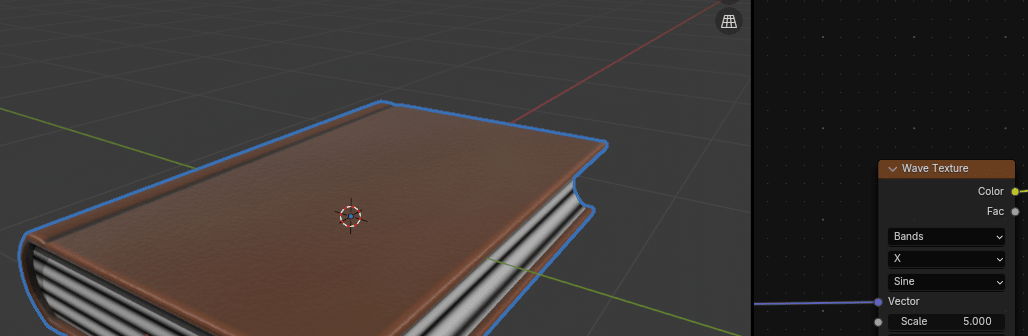
to somewhere around 70 so your pages look better.
Connect Fac from Wave texture with Height from Bump. Nothing has changed with how the book looks because you still didn’t connect the output socket Normal from node Bump.
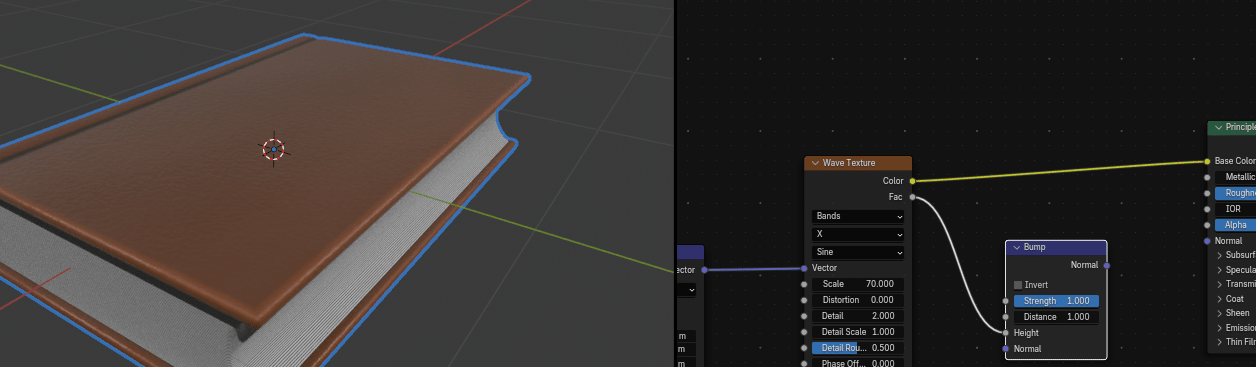
Connect Normal from Bump with Normal from Principled BSDF. You can already see a difference, but as you can see the color has become a bit darker. To change that you need to do the next step.
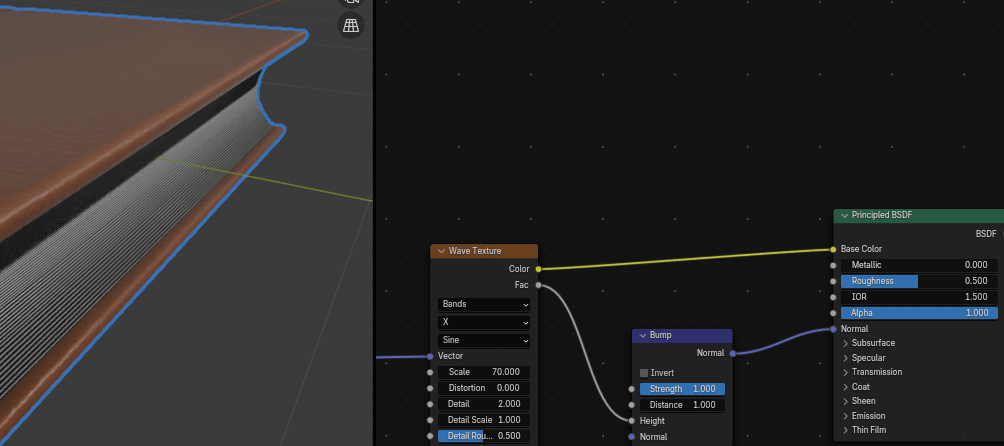
Click and hold “CTRL” and while holding RMB cut that yellow line that connects Color from Wave texture with Base color from Principled BSDF.
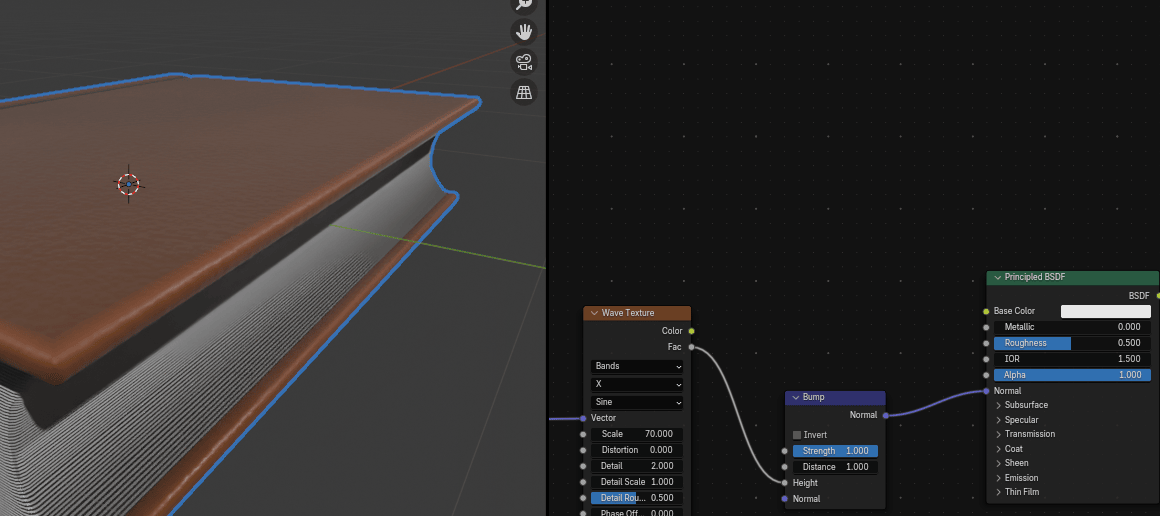
Add Converter -Color Ramp and put it between Wave texture and Bump.

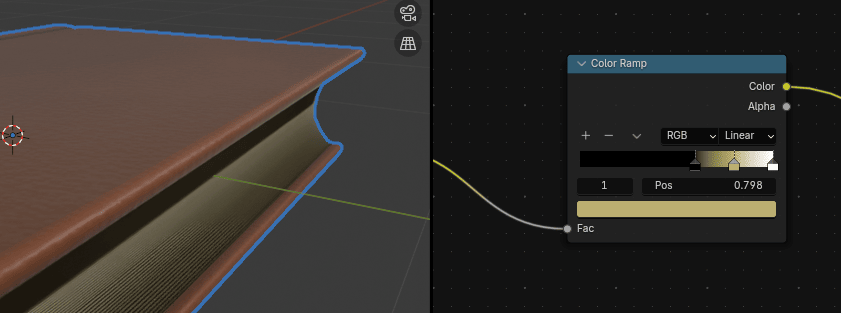
Click on the first color of the color ramp and change it to gray.
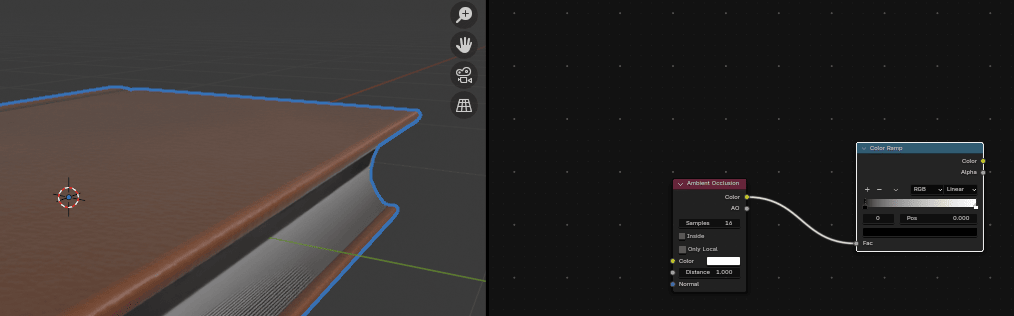
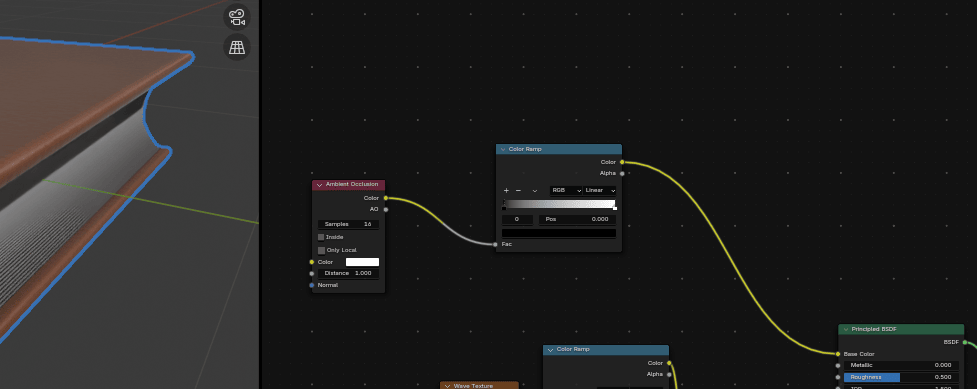
Add input-ambient occlusion. Ambient occlusion computes how much the hemisphere above the shading point is occluded. Be careful if you have a slower computer, and think about if you should add it because your render time might slow down significantly.

Connect Color from Ambient occlusion with Fac from new Color ramp node.
It still doesn’t work because output sockets from the color ramp aren’t connected to anything.
Connect Color from Color ramp with Base Color from Principled BSDF.
Click on the first color of the color ramp and move it to more to the right.
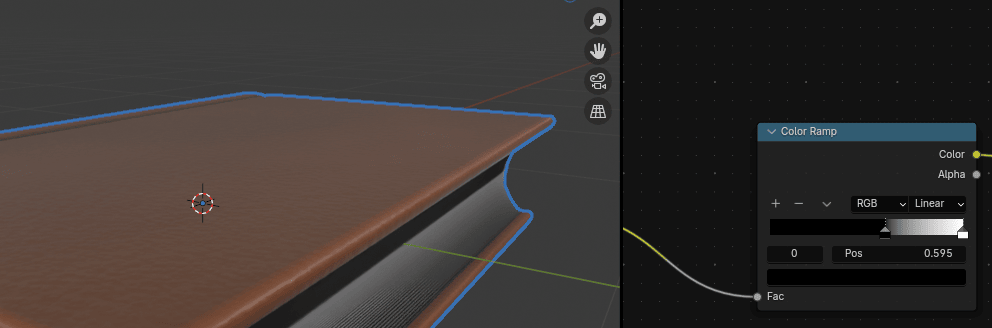
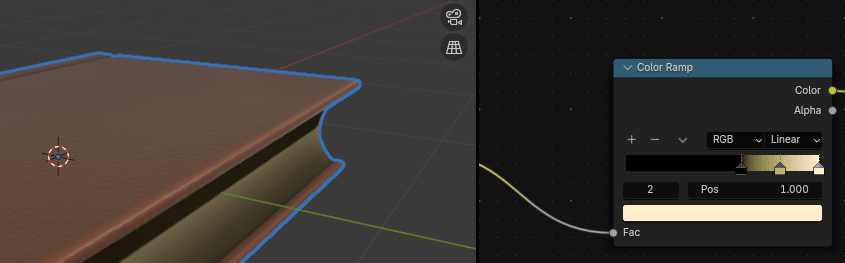
Click + on the Color ramp
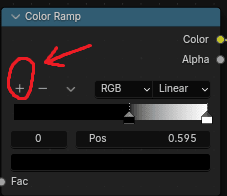
to add one more color. After you clicked the plus sign, the middle pointer appeared for a new color.
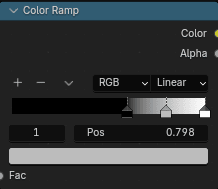
Choose something light yellowish.
Click on the third color picker of the color ramp and change to something light yellowish as well.
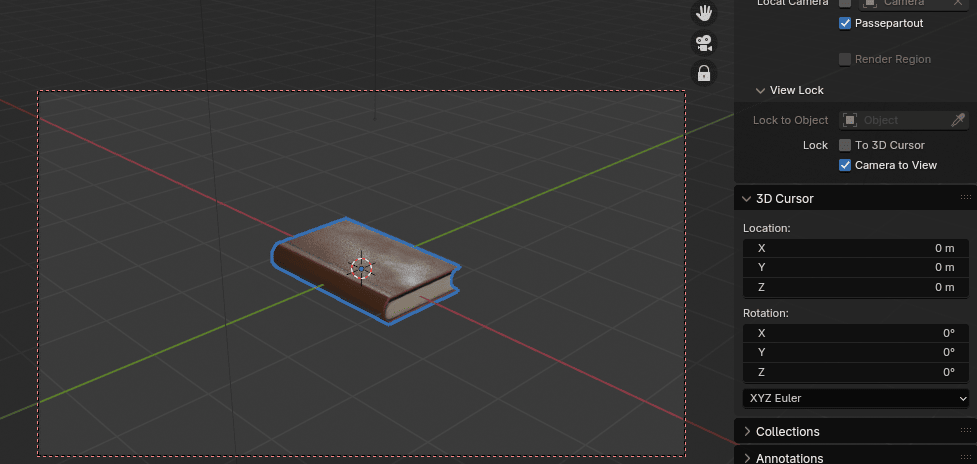
Click on the camera icon.
Go to view, and turn on the camera to view.
Now you can adjust the view far or near by scrolling up or down the mouse wheel, and rotating the view while pressing the mouse wheel and moving the mouse left or right.
If you want to move the whole camera, hold “SHIFT” and press the mouse wheel while moving the mouse up or down.
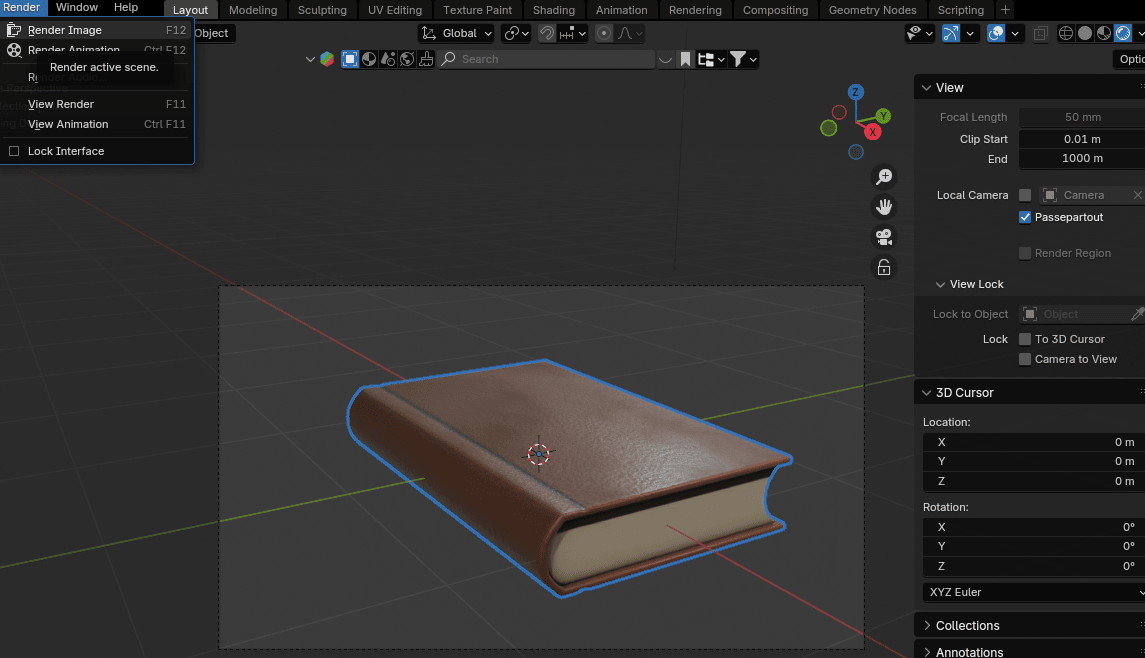
When you are satisfied with it, turn off the camera to view, click Render, and render the image.
That's it! Now you know how to model and texture a book in Blender.
I hope you enjoyed the new chapter! I tried to explain it the best I could, but feel free to ask if you don’t understand something.
Thank you once again for all the love and support for this guide and my YouTube channel.
We passed 900 subscribers, so we are closer and closer to our main goal of 1000!
You can follow this whole chapter on YouTube as well!
https://www.youtube.com/watch?v=onF5s2bXhZ0&t=2s
Happy Blending! Byee, see you next time 😀